| |
|
|
©By: John T. Blair (WA4OHZ)
 1133 Chatmoss Dr., Va. Beach, Va. 23464; (757) 495-8229
Originally written: circa 1989
Last update:  June 1, 2009 - added pictures of the various tools and changed some of the wording.
|
|
So, you need some tools and are wondering what to buy. The answer depends on what you
plan on doing with the tools. If you are just looking for some tools for small odd
jobs around the house, or some very occasional work on the car, you can get by with
a very small collection of tools. Most people who work around the house have some
sort of small tool collection (usually stored in a shoe box or a kitchen drawer)
consisting of a couple of screwdrivers, an adjustable wrench, a pair of pliers and a
hammer. Or do you to have some tools kicking around in the back of the car,
just incase.
In recent years many companies have come out with some very nice sets of tools in
plastic cases for between $40 and $100. These are great for occasional use. In fact,
I have a small set in my daily drivers (Voyager, and 95 Taurus).
|
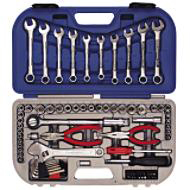 A typical tool kit
|
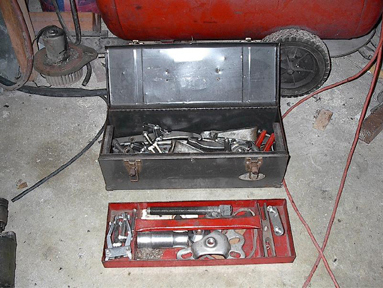 My 1st Tool box
|
If you plan on doing some maintenance on your car like working on the brakes, tune
ups, changing the oil, or restore a car takes a little more than one of the generic tool sets. But you'd be surprised what you can do with a good set of hand tools. You
don't need a lot of big ticket items. If you don't already have a good tool
collection - you'd better start building your collection of tools to fill a tool box
or go find a different hobby.
Don't be scared off by the last statement. You don't have to go out and drop several
thousands of dollars to get started. With this in mind, I thought I'd discuss getting
a tool collection together, for those people that are just coming into the automobile
hobby or are finally deciding to try to do some of the work on their cars themselves.
|
|
Over the years I've managed to accumulate a fairly well stocked tool box. Working on
old British, modern Japanese, and medium aged domestic cars has necessitated some of
this. Each of these vehicles uses different types of nuts and bolts. The older
British use Whitworth,
the Japanese and modern European use metric, and the domestic use standard and metric.
As a young buck of 18, I started with a small tool box (a Craftsman box with a lift
out tray) and as I grew older, my requirements for a tool box grew. Today I have 5
of them filled with various tools.
|
|
Instead of sending your car out to have it worked on, you can save a lot of money by
doing a lot of the work yourself and purchase the tools as the jobs require them.
You say you don't know how to repair a car. The amount of information required to
understand all the parts that make up a car is overwhelming for a new comer. To
help you learn, start by learning the systems, ie.
basic electricity,
the starting system,
the ignition system,
the charging system, the braking system,
replacing drum brake shoes, the
cooling system, etc. (Most of these articles are geared to older cars before '80 or pre computer). Once you learn the various systems, you can learn more about each of the parts that makes up that system. You will find that once broken down, it is fairly simple. The older cars (pre 1980) are easier to work on then the new ones due to all the electronics
and computers in the newer cars.
|
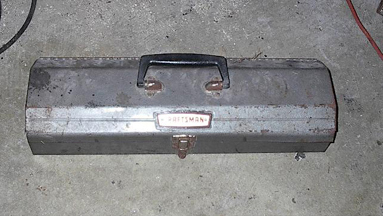 Tool Box from my 1/2" drive socket set - now houses my Body working tools tool
|
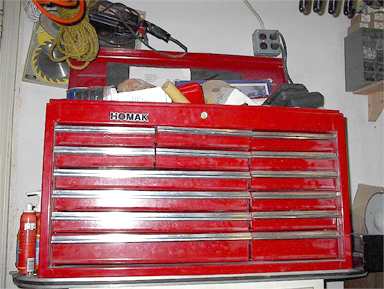 14 Drawer Tool Box
|
You can learn how the systems work, how to troubleshoot various problems, and how
to work on your car gradually by reading the technical articles published in club
newsletters, surfing the internet, by talking with people who do their own work,
and by getting friends to teach you what you need to know.
Just like acquiring the knowledge, you can build your tool collection gradually.
Tools make great presents! If you need the tool for a particular job, buy it, and
consider it part of the cost of the repair. The first time you do something it may
cost about the same as having a shop do the job because you had to buy some tools.
But from then on, you'll have the tool, and next time you use the tool, it will be
making you money!
|
|
There is an old adage "You get what you pay for". This is especially true with
tools. As a rule it doesn't pay to buy cheap tools, however, you don't have to spend
an arm and a leg for professional tools either (unless you happen to be a professional
mechanic). Most of my hand tools are Craftsman.
Craftsman tools are moderately expensive, but the quality is pretty good, Sears is convenient, the life time guarantee is great and I have a Sears charge card!. I broke 3 pairs of diagonal cutters restoring my 65 Morgan, and they replaced them free. One of the nicest parts about Sears is they don't require you to produce the receipt. (Of course I have the receipt for the 1/2" socket set I got when I was 21 - some 36+ years ago.) Many of the local auto parts stores will require a receipt if you try to bring back a tool that has a life time warrantee. Besides Craftsman, some other good manufacturers of tools are: Husky, Kobalt and Stanley.
|
|
To get started, the first thing you will NEED, is a tool box! This is the one thing I
hate to spend money on. They can get quite expensive and it seems to be such a waste
to spend all that money ($600 is not unusual) on just a box to put your tools in! If
you really plan on playing with and or restoring a car, you will eventually end up
with a something like a roll around tool box with a upper and lower box. The upper
tool box should have at least 4 drawers (preferably more) and a roll around lower c
cabinet with at least 2 drawers. Sears has a good selection and locally CostCo has
had a GREAT deal on a very large roll around tool box for about $700. You can start
smaller with smaller ones. My first tool box cost me $35 from Sears 40 years ago.
Here again, start with something small, or inexpensive, and work your way up.
I just purchased a roll around (bottom) cabnet from Harbor Freight. They run about
$600 while the Snap On's are about $4,000. There are a lot of differences in tool
boxes, both the top and roll around units. Things to look for are ball bearing slides
that the drawers slide out on. The ball bearing slides make it a lot easier to open the drawers when heavly loaded with tools. Another thing to look at is how the drawers lock closed. Some, like my 14 top box, will lock the drawers when the top is
closed. Others, like my roll around unit, won't lock the drawers until the key lock
is locked. Others will lock the drawers anytime they are pushed closed. Then you
have to grab a lock under the handles to unlock and open the drawers.
|
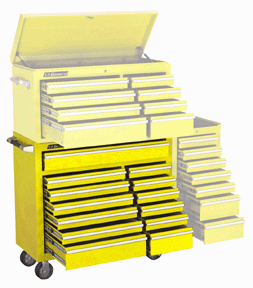 Roll around Cabinet
sold by Harbor Freight
|
|
Filling the drawers ends up being very easy. Tool boxes are like computer memory and
disk space, there is never enough room.
The first tool I bought, back in 1966, was a 3/8" drive socket set. I still have
it and all the pieces. It cost $20, which took me almost a month to save, as I was
working a part time job, 20 hr a week, and only making about $1.10 per hour. This is
probably the most used tool I own, followed closely by my wrenches. It's a toss up as
to which to buy first - a socket set or a set of wrenches. For those newcomers who
don't know what the 3/8" drive means, it the size of the square shaft that will
fit into the socket.) Socket sets come in various "sizes" 1/4", 3/8", 1/2",
3/4" and 1" drive. The bigger the drive, the larger/longer the handles of the ratchets and flex handles, consequently the more torque you can apply. The reason I prefer the 3/8" drive socket set, is I don't get enough torque to break bolts when trying to tighten or loosen them. If I can't unscrew a nut and bolt with the 3/8" drive, then I get the 1/2" drive tools or the air impact tools.
Socket Sets
A socket set consists of a collection of sockets - the sizes and number vary depending
on the size and cost of the socket set. For your fist set of sockets for any size (1/4", 3/8" or 1/2" drive), you'll want to get a set that includes the sockets and many (if not all) of the following accessories:
|
|
1. A ratchet - a handle that attaches to the sockets and allows you to turn
the socket some, then back up and turn some more. These are very useful in tight
spaces where you cannot turn the handle a complete turn (360 degrees). The new
ratchets have a button on the top of the ratchet head that releases the hold on
the socket. This is fantastic when you hands are oily or greasy. With my old 3/8"
drive ratchet (purchased back in about 1968), I have to use a screwdriver to pry a
socket of the ratchet when my hands are slippery.
|
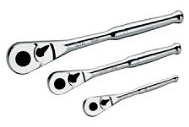 1/2, 3/8, 1/4" Ratchets
|
 3in. 3/8 drive extensions
|
2. A couple of extensions - these are just bars that fit between the sockets
and the ratchet and come in many different lengths and drive sizes. These allow you
to get move the ratchet further away from the nut or bolt so you have room to work.
|
3. There may be a universal joint - this attaches between the socket and
extension bar and gives the extension some flexibility. This allows you to get at
the nut or bolt at an angle and not just straight on. They come for all drive sizes.
|
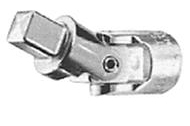 1/2 drive universal joint
|
 1/2" drive flex handle or Breaker/Tommy Bar
|
4. A flex handle, breaker bar or tommy bar - a handle longer than the ratchet gives
more leverage, but it will not allow you to back up unless you remove and rotate the
socket. These are used when you need more torque to undo a nut or bolt. (The
principle here is - the longer a lever is the less effort you have to exert to move
something.)
|
|
I suggest the first socket set you purchase be the 3/8" drive (either standard,
metric or both depending on the cars you play with). I find myself using this set
more than the others for 2 reasons: first the 3/8" drive tools fit in many places the
1/2" drive socket will not fit; because the walls of the sockets are thinner, and the
sockets, ratchets, and tommy bars are not as big as the 1/2" drive. Secondly, the
ratchet and tommy bars are shorter than those for a 1/2" drive set, consequently
you develop less torque and are less likely to break or strip a nut or bolt.
|
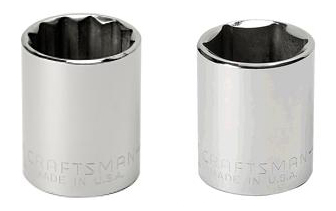 6 point vs 12 point Sockets
|
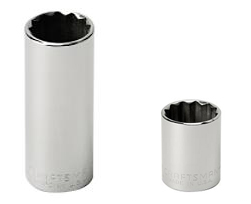 Deep vs Regular Sockets
|
In addition to the drive size, sockets come in "regular" - 12 point and
6 point. The impact sockets are 6 point so they have a better grip of the bolt or
nut, and consequently you can apply more torque to the nut or bolt without rounding
off the corners.
Sockets also come in different lengths, "shallow" and "deep".
Again I would suggest that your start with a 3/8" drive socket set first, then a
1/4" drive, and finally a 1/2" drive set. Sears (and other vendors) sell a "big" set (in the folding case) that includes 1/4", 3/8", and 1/2" sockets and accessories.
|
|
Once you purchase a "socket set" you can then purchase additional sockets
(deep dish, impact, Metric, etc) as needed.
This is why I know have about 10 sets of sockets, 1/4" regular length SAE, regular
length Metric, deep dish, a 3/8" regular length SAE and Metric, a 1/2" regular and
Metric, 1/2" regular SAE and Metric impact, and 1/2" deep dish SAE and Metric. Boy
sure is a lot of sockets! (See Note 1 at the end of the article.)
|
Wrenches
As with the socket sets, you will need several sets of wrenches, and they come in
SAE and Metric. (See Note 1 at the end of the article.) There are 3 basic types of wrenches:
open end wrenches - both ends of the wrench are open, like a U. Once the nut/bolt
has been broken loose, you use an open end wrench as it is easier to get on and off
the nut as you need to reposition the wrench in tight places.
|

open end wrench
|

Box end wrench

Combination wrench
|
For undoing old, rusted nuts and bolts, you want to grip the entire head of the nut
and bolt to prevent rounding the corners off of either the nut or bolt. Therefore,
you should use either a box end, the box end of a combo wrench, or a socket.
box end wrenches - both ends of the wrench are closed.
combination wrenches - one end of the wrench is open and the other
end is a box end.
|
|
You will need several sets of wrenches, at least one of each - open end, box end, and
combination. Then duplicate that in Metric. Why so many different sets of wrenches?
For starters, many times you'll need 2 wrenches, one to hold the bolt and one for the
nut. Most ordinary people (but not us "car" people) use an adjustable wrench for
undoing just about everything.
|
|
Screwdrivers
The next most used item will be your screwdrivers. A set will consist of
different size screwdrivers and different types.
A good set of screwdrivers can usually be had for between $20 and $40. There are 4
basic types. The flat blade screwdriver for the usual slotted screws. A
Phillips head and Reed & Prince head for screws with the X slots in
them. And the Torx tip. This is like a star, a round hole with five finger
point out.
When you get a new flat blade screwdriver, look at the blade. You will notice that
the end of the blade is nice and flat, a uniform width, and the corners are sharp. As
you use the screwdriver, the blade will suffer, the corners will be come rounded, the
end of the blade will get thinner or even chipped. These changes cause the screwdriver not to hold in a screw's slot. You can fix this by lightly grinding the
blade, to flatten the end, and square up the corners.
|
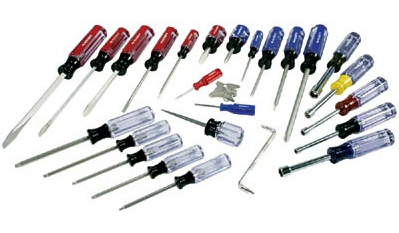
Screw Driver Set
|
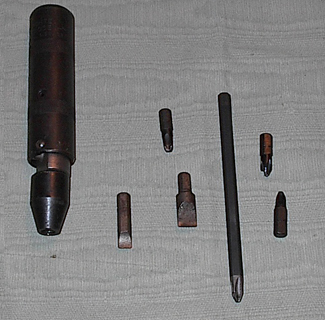
Hand impact tool set
|
Also look at the Phillips and Reed & Prince tips. You will notice that the flutes,
4 sides are nice and straight. As the screwdriver slips in screws, it will gouge out
a section of the sides and you will notice an imaginary ring around the point. When
this happens the screwdriver is done for. It will continue to slip out of screws. You can try to gently grind the 4 sides flat, and you will probably have to take a little off the very tip. But you need to be thinking about getting a new screwdriver.
I prefer the screwdrivers that have the square shafts. When trying to free a
really tight screw, a wrench can be attached to the square shaft to give you more
leverage.
|
There is also a manual impact screwdriver. This is used to loosen
very tight screws, nuts or bolts by hitting the top of the impact handle with a hammer.
The shock from the hammer blow and the twisting motion help undo the screw, nut or
bolt.
If anyone is still a hold out and hasn't bought a cordless screwdriver
you ought to be committed. These are the greatest thing since sliced bread (I bet
you thought I was going to say sex)! I've gone through 3 of them. I had one of the
inexpensive inline ones (about $20) by Skill. (Inline means that it is one straight
line, like a screwdriver and not like a drill.) I used it to disassemble my 65 Morgan
when I restored it. While it worked all right, I really didn't like it that much.
By the time the car was torn down, the screwdriver had had it. While the batteries
are rechargeable, they are NOT replaceable. The next one I purchased was the large
inline Craftsman (about $40) with a clutch. This one really got a work out when I
was reassembling the Morgan. Again the batteries were rechargeable but not replaceable.
|
General tools
Now for those tool that no real mechanic should ever use,
but always does,
the adjustable crescent wrenches. Notice the plural wrenches, there are at
least 4 generally used sizes: 4", 6", 8" and a 12". The size here means the length
of the wrench. As the length increases so does the width of the jaws - meaning they
will fit a larger nut or bolt and you can apply more torque, which means the wrench
is more likely to slip off the nut or bolt and round the edges. Making it harder to
remove. That is why you shouldn't use these. But every one does. And face it, we're
all lazy. It's just easier to grab a one-size-fits-all instead of a handful of
wrenches looking for the correct size.
|

Adjustable Wrench
|
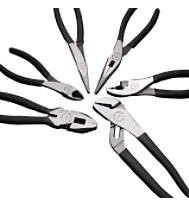
Pliers - (L/R) Linemans, dikes, needle nose, slip joing, channel locks
|
In the general category of pliers, there are several different types:
slip joint pliers, Tongue and Groove (commonly referred to as channel lock) pliers,
long or needle nose and diagonal cutters (usually called dikes - for short). These
can be purchased individually or in sets. The sets will include several different
types and/or sizes. It should be obvious that the smaller the pliers, the smaller
the job they were meant to work on.
The slip joint and tongue and grove pliers are usually used for clamping, or holding
a nut, bolt, or shaft/pipe. I usually use them to compress the spring clip type
hose clamps or holding a piece of metal while trying to drill a hole into it. While
not the most used tool, they come in very handy.
The dikes are for cutting wire. A must for working on cars. The larger the dikes,
the larger wire it can cut. Don't try to cut a large diameter wire with a small set
of dikes. The smaller dikes are for 18 gauge and higher - more electronics than electrical work.
|
|
Long or needle nose pliers are used when you need to hold something but can't get to
it with anything else, or for trying to get into the little crevice to get the nut or
bolt you just dropped.
The lineman's pliers are for doing electrical work, more house hold wiring than
automotive.
|
|
The last type of pliers is in a class all by itself, the locking pliers
or Vise Grips are a must. They have a hundred uses from holding something in place,
undoing a nut or bolt after the head has been rounded, to helping keep a flare wrench
from opening and slipping on a bolt. These also come in various sizes and styles
(flat jawed, curved jaw, etc.) including long nose and many specialty uses for body
work, and welding.
|

Locking Pliers or Vise Grips
|
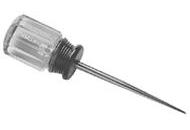
Scratch Awl
|
We have not been through the basic tools, and we'll move on to a few more general
tools to help fill that tool box. An awl - a sharp metal rod with a handle.
These are used to scratch metal to mark where something was positioned or to lay out
a pattern on a piece of metal for cutting. They also work well for trying to poke a
hole in something like a gasket, or carpet, and are very useful when trying to align
several pieces to put a bolt into. (Note: for aligning holes you can also use a
Phillips head screwdriver or a punch.)
|
|
A center punch - is a short, sharp metal rod used to make a dimple in a piece
of metal to hold a drill bit in place when starting to drill a hole in a piece of metal or wood. Center punches come in manual - you hit the with a hammer, or automatic - you simply push on them, they have an internal hammer.)
|
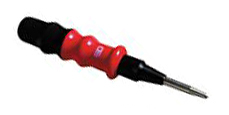
Automatic Center Punch
|
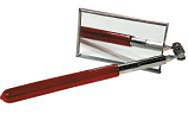
Inspection Mirror
|
There are many tools that don't really fit into a specific type of tool catagory,
like wrenches, etc. but are definitely worth having. An Inspection mirror is a mirror on a stick. They are used for seeing in tight places or behind things. They
come in different shapes (square or round) and different sizes.
|
|
An Allen wrench set (SAE and Metric) is a must have. So many fasteners
have Allen heads that you can't escape have a set or two of these. An Allen head
screw is one that has a hexagon pattern inside the bolt instead of on the outside.
|
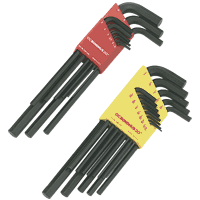
Allen Wrenchs
|
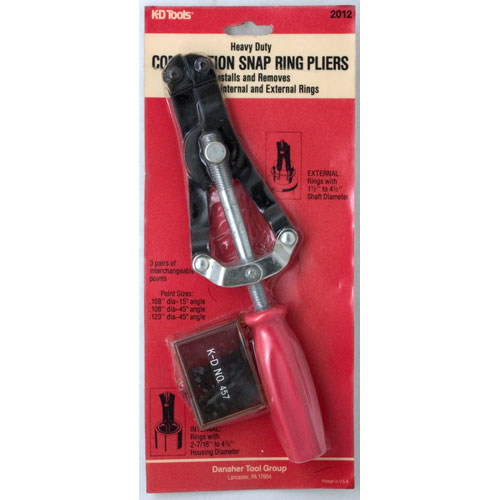
Snap Ring (C clip) pliers
|
Then there is the Snap Ring or C clip pliers. These are used for releasing
the round clips that resemble a "C" and have little holes at the two open ends of
the "C".
|
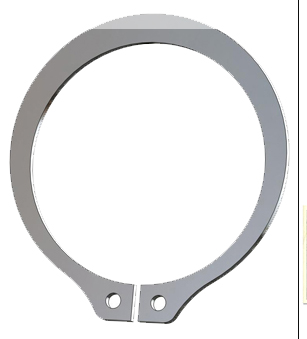
Typical Snap Ring
|
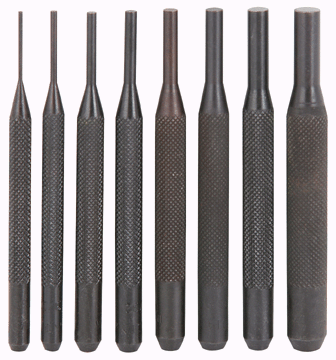
Punch Set
|
A drift or Punch set will find lots of uses. The drifts are used to
push out pins usually holding a pulley to a shaft. Also when you're trying to
align bolt holes in a fixed piece and moveable piece. You can slide a drift into
the holes and wiggle drift to help get the holes aligned.
|
|
If you plan on changing your own oil, you'll need an Oil Filter wrench. There are several different types. From a strap type thing that goes around the filter to
something that looks like channel locks. I tried several different types and prefer
the one that looks sort of like a pair of channel locks.
|
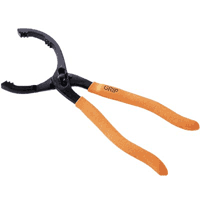
Oil Filter Wrench
|
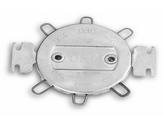
Plug Gapper Gauge
|
For setting the gap on a spark plug you'll need a plug gapping gauge. Some
of the newer type plugs come pre-gapped. But the older style plugs require that
you bend the "L" piece at the bottom end to adjust the cap (between the inner electrode and the "L"). Again these come in different types. The best type has wire loops that slides into the gap. You pick the correct size and try to insert it. If the gap is too tight, you open the gap by bending the "L". If it's too loose, you close the gap just a little.
|
|
For the inevitable times you drop a nut, bolt or tool down into some place you can't
fit you hand or your arm's aren't long enough there is a magnetic pick tool. It is
nothing more that a magnet on a stick. But they are worth their weight in gold!
|
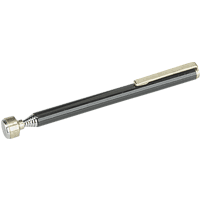
Magnetic Pick Tool
|
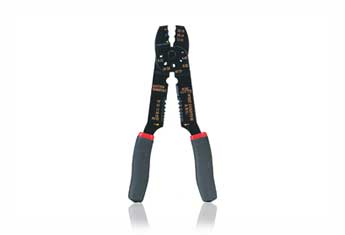
Wire Stripper/Crimper
|
If you plan on doing any work on electrical systems, you will need a volt/ohm meter
(discussed in the 2nd part of this article). This can be used to test for continuity
between two point in the wiring, testing fuses and light bulbs, and voltages. If
you have to add a new piece of wire or repair an existing piece, you will need dikes
(mentioned previously), wire strippers and a good solder pencil. If you have to
put a connector onto a piece of wire, you can use the crimp end pieces. But I
strongly suggest that you also solder the connector to the wire after it is crimped.
Be sure to use Rosin core solder. Do not use acid or sold core solder.
|
|
One last off the wall tool. A 4" to 6" C clamp or a caliper retractor tool. This is used when you replace the disk pads on disk brakes. You have to retract or push the caliper piston back into the caliper.
|
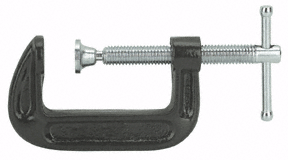
C clamp
|
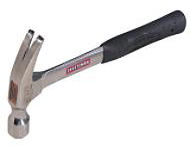
Claw Hammer
|
Hammers come in all shapes and sizes for different work. Most people are
familiar with the Claw hammer. It has a round head on one side, for hitting
nails, and two claws on the other end, for pulling nails. This is basically used
in carpentry. However, for automotive work you'll want a ball peen hammer - it
has a round head on one side for hitting things, and 1/2 a ball on the other. This
is used to peen (bend) over threads on a bolt to keep their nuts from coming off. |
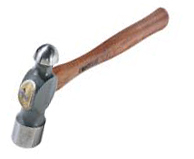
Ball Peen Hammer
|
|
They are also used to make gaskets. Placing the gasket material on the part, you can gently hit the gasket material at edge of the item to cut the gasket material. You can also press the ball end into the gasket material at a hole to cut the hole out. I use a ball peen hammer for anything I need a hammer for working on the car. The claw hammer is for wood work.
|

Tap and Die Set
|
Something that everyone should have is a tap and die set. A
tap is a rod or shaft used for cutting new or cleaning threads in a nut.
A die is a disk with a hole in it and is used for cutting new or
cleaning threads on a bolt. Anytime a nut and/or bolt is removed from a
car (or anything for that matter), it should be oiled and have the threads
chased (cleaned). When they get put back, they will work very easy
and the next time they must be removed it will be a lot easier, which makes
it a pleasure to work on something. No more busted knuckles.
|
|
A good set of taps and dies are quite expensive and a cheap set can be more expensive
if the tap breaks off in an engine block. I suggest purchasing quality
taps and dies one at a time, when you need it. Every time I need a new tap or
die, I go purchase both the tap and the die. While their cost varies with
their size an average of $5.00 to $8.00 each is to be expected. This may cost more
if I were to buy a complete set, but I only have the ones I use. Taps and Dies
come in SAE and Metric, so you will need an assortment of both.
|
|
To find out the diameter of a nut or bolt, or to find how thick a piece of metal is,
you will need a micrometer and or a vernier caliper and a thread pitch
gauge to determine the thread size of a bolt. The micrometer looks like
a small "C" clamp, but the shaft is measured in 1/1000" of an inch and is used to
measure the diameter of the bolt.
|
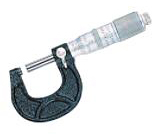
Micrometer
|
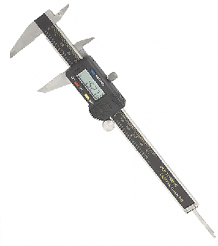
Digital Caliper
|
The caliper can be used to measure outside or inside diameters and depth of a hole.
I'm fortunate in that Harbor Freight has a local store. They have a plastic caliper (not digital) that sells for about $2. I have several of these and
grab for them most of the time I want a rough measurement like a bolt diameter.
|
|
A thread pitch gauge looks like a collection of tiny saws. Each metal blade
has a different number of teeth per inch. Simply lay each blade on the nut or bolt
until the teeth match.
|

Thread pitch gauge
|
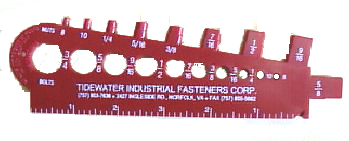
SAE bolt gauge
|
(Note: a local fastener store -
Tidewater Industrial Fasteners
Corporation; has a great pair of gauges they sell for about $2 ea.
You can probably order these gauges from Tidewater Industrial Fasteners, or
check your area and see if any of the local fastener shops have something
like these.
|
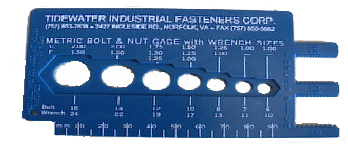
Metric bolt & thread pitch gauge
|
|
They have a ruler for measuring the length of a bolt, holes to
measure the bolts diameter, and stalks to measure the diameter of nuts. They
also have a Metric gauge that includes a pitch gauge. These are great! I
have a couple of each so I can always get my hands on one.)
Now that we can undo a nut and bolt (with the sockets and wrenches), clean then with
a tap and die, and check it's sizes with a micrometer and a thread pitch gauge, there
is two thing left to worry about. One is a bolt that has been broken off, the other
is a bolt that has been rounded off.
|
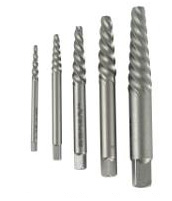
EZ out
|
To get a broken bolt out will require using a electric
drill, some bits, and a set of EZ outs or screw extractors. These items
are used to help remove a screw after the head has been broken off. The extractor
has a very course reversed thread. To use them, you drill a hole in what is left of
the bolt or screw, and push the extractor into the hole. Then put a wrench on the
end and try to unscrew the bolt. (This doesn't always work) Be very careful using
an extractor, if it breaks off in the screw, it is much harder to drill out. There
is also a set of reverse twist drill bits that you can buy. These are a good
thing to have. If you are going to use an EZ out, drill the pilot hole with the
reverse twist drill. Sometimes, this is enough to remove the broken shaft of the bolt.
|
|
Removing a nut or bolt that has become rounded off (so a wrench or socket won't
work) has also been the job of EZ outs. However, recently there is a new tool on
the market, the Bolt outs. They are like sockets except that the have reverse flutes
inside of the points. So as you try to remove the nut or bolt, the flutes dig in and
allows the nut/bolt to be removed.
|
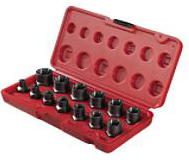
Bolt out
|
|
A few more items should also be in the tool box, a pair of scissors, a razor blade knife or (packing box knife), a pen knife, a hack saw and blades for cutting off bolts, a set of Allen wrenches, several putty knives, a wire brush, and a wire brush disk for
an electric drill, a couple of chisels (1/4" and 1/2") and a pair of dividers will all come in handy.
|
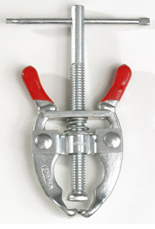
Battery Post Puller
|
When it comes to your car's battery there are 3 tools that you should have.
on a car's battery. The Battery Post Puller for pulling the electrical connector off the battery post. This is use link any other puller to jack a stuck
battery terminal off of the battery post.
|
|
Once the connector is off the terminal, a Battery Post Cleaner is used to
clean both the inside of the connector, and the outside of the battery terminal. It
consists of two wire brushes: one to clean the battery post and one to clean the
inside of the battery terminal.
|
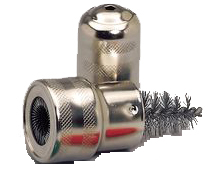
Battery Post Cleaner
|
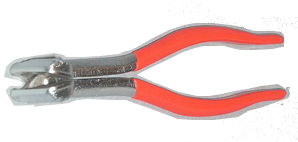
Battery Terminal Spreader
|
In some cases, the battery terminal is too tight to fit over the battery terminal so there is a Battery Terminal Spreader to open the connector so it will fit over the battery terminal.
|
|
This is a very good start on the general hand tools for working on a car.
Now for 2 life savers (literally). While they don't exactly fit in the tool box, they
sure make life in the garage a lot easier and safer.
|
|
A good 1-1/2 to 2 ton floor jack is a necessity and they run between $80 and $100. I know a lot of people that have purchased the cheap (under $40) jacks with the handles that you have to move between 2 spots to jack or release the jack. They are all right for occasional use and to throw in the back of a truck, but they just don't make it around the garage. They don't have the height and they are a pain to use.
|
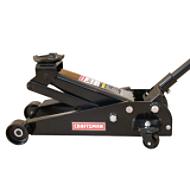
Floor Jack
|
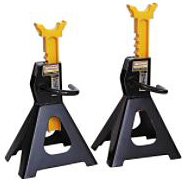
Jack stands
|
The other item is a
couple of pairs of heavy duty jack stands. These two items making getting a
car off the ground a breeze and safe. I know of several people who have been killed working under a car that was supported by cinder blocks. The cinder blocks collapsed and the people were crushed. So please, if you are going under a car, think safety! The heavier the vehicle the stronger the set of jack stands must be. I might be getting paranoid but when I put a car on jack stands, I try to keep the floor jack under the car also.
One other safety trick I've been told, is to place the wheels, that you've removed
from the car, under the car. So if it falls, it will land on the tires, and
hopefully give you a little safety margin.
|
|
Speaking of safety, when I was younger I never thought about much about safety. But
as I get older I got smarter. So a few additional safety items that should be in the
shop are:
|
|
When using air tools like either an inline or Dual Action (DA) sander, grinding or
such, you should wear some Hearing Protectors or Mickey mouse ears.
Don't ever touch a high speed grinder with out leather work gloves. I have
used a grinder or wire wheel without gloves and I have the scars to prove it. So
be sure to use heavy gloves when working with sheet metal or tools like grinders.
|
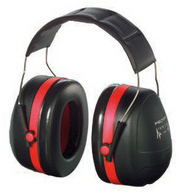
Hearing Protector or
Micky Mouse Ears
|
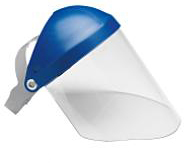
Face Shield
|
I've worn glasses all my life and have taken eye protection for granted. You
slide under a car and get all kinds of junk dropped on your face. My glasses protected my eyes from this stuff. But one day I was grinding on some metal and the wind changed direction and blew the metal filings around behind my glasses. I spent several hours at the doctors having him pick the pieces out of my eyes. So please wear some eye protection.
|
|
So thinking safety, we've taken care of you hand, eyes and hearing. But what about
your lungs? If you sand blast, grind metal, sand bondo or fiberglass, paint, or wire
brush rust off of parts, you should wear a respirator.
|
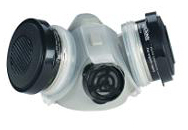
Respirator
|
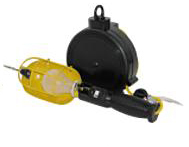
Trouble Light
|
Here are a couple more items that don't really fit in the tool box but are great to
have on hand in your garage. A trouble or drop light - preferably with
the reel retractor for the cord. I haven't used one of the fluorescent ones, but
they are worth looking at. The standard incandescent ones give off a lot of heat.
The one thing you don't really need on a hot summer day. Now that the Compact
Florescent light bulbs (CFLs) are available, I've been using them in my trouble light.
I've been using flashlights more and more to cut down on he heat.
|
|
An extension cord, and a shop vacuum are almost necessities.
Electric drills: You will probably want at least 2 electric drills. One should
be a cordless, the other corded. There are some jobs that the cordless just will not
really cut it at. For instance trying to use a wire wheel to clean parts. Yes you can chuck up a wire wheel in the cordless drill, but how long will the battery last? This is where a corded drill pays off.
I've been through several cordless screwdrivers and cordless drills. First let me
caution you about the cordless tools, that have self contained batteries. While they
are rechargeable, when the battery dies, you may as well through the tool away. Not to
mention that when the battery dies, you will have to wait for it to recharge, instead
of putting in a backup battery and continuing with you job. After several of the
non-replaceable battery drills and screwdrivers, I finally broke down and bought a 9V
Makita 3/8" variable speed with a 2 speed transmission, keyless chuck, and reversible.
It came with a recharger and only 1 battery for about $60 and an extra battery was
about $35. I've had it for about 10 years now and have purchased a total of 2
additional batteries. I like it as it has enough power for most of the tasks I give
it and it's not that heavy. Since I purchased it, manufacturers have been upping the
battery voltage which usually means the drill has more power. The down side is they
weigh more and the batteries are more expensive. Look around for a set that offer 2
batteries. You'll find that when it comes time to replace the batteries, you can
probably buy another complete set cheaper than you can buy 2 new batteries.
Hold the drill for a while to see if it gets too heavy. I find that the 9V Makita
is just about perfect. When I buy my next one, I don't think I'll go up to a 14V one
as they are just a little too heavy for me.
Also a corded 3/8" Variable Speed Reversible (VSR) electric drill is essential ($40
up), especially when the batteries for the cordless drill are dead. I have several
corded drills, a couple of inexpensive ones and a moderately priced DeWalt. Besides
being used to drill holes or drive screws, the drills can be used with a wire wheel
to help clean grease, dirt, and rust off of parts.
|
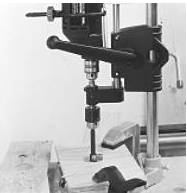
Drill Press Stand
|
While this doesn't fit into the "tool box" a drill press is nice to have,
but they are relatively expensive ($125 up). An interim solution is to purchase drill
press stand for your 3/8 drill for under $50. While it is not as good as a drill
press, it does help fill the void. This is all I had for years!
My dad recently purchased a floor mounted drill press and gave me his old
Craftsman table top drill press which he purchased this back in the early 60.
I've alway liked it, its well built and heavy.
|
|
Well there you have it, a good look at the basic tools you'll need to really play
with your car. Here is a list of what you'll end up with for a basic set of tools and my suggestions as to the order of purchase.
(Note:
1. If you are working on late model car (made after about 1985) you'll probably want
to start with the Metric tools. But if you're playing with older cars (pre 1976)
then you'll probably want to start with SAE tools.)
Enjoy
Continue on to Part 2 - Diagnostic and specialty tools
Return to the Index of Tech. articles
To email me with comments or
questions.
|
 1133 Chatmoss Dr., Va. Beach, Va. 23464; (757) 495-8229
 June 1, 2009 - added pictures of the various tools and changed some of the wording.


