RESTORING A MORGAN - page
two
by Lorne Goldman
STAGE TWO
The full extent of a restoration project cannot be fully
determined until the car is disassembled. If there is any signs of metal
rot..add paint and coating stripping to this disassembly to get to the
same point of decision as there is no way of ascertaining the extent of
damage with still painted or coated metal.
N.B. On the other hand, if the metal skin and wings
are solid, there is no advantage to stripping paint. It will not prejudice
the quality of a respray unless there is some inherent problem with the
original paint and prep. If you have a Superform winged car ..special care
should be taken and the wings examined by an expert. There is an incidence
of a chemical reaction between the paint and the adhesive at the wing molding
which can produce a bubbling.)
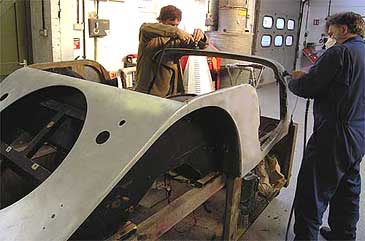
DISASSEMBLING THE CAR
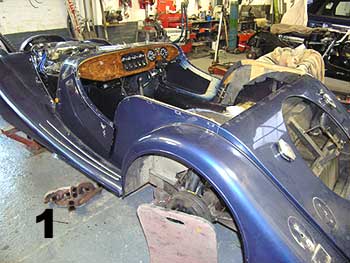
1. We began by removing the seats, the carpets, the wheels,
the quarter panels, the door panels and the exterior fittings.
2. The parts are sorted and, if necessary, labeled as
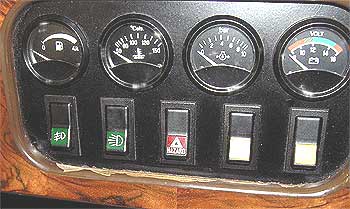
they are removed. Each is subject to an examination and a decision. For
example, the instruments are analyzed for damage and/or corrosion and choices
made to refurbish them inhouse, re-bezel them, re-face them, or even replace
them.
In this case, the faces are fine and all the gauges function
well and suit the chosen color scheme. However, there is corrosion
on some of their rims. The instruments (VDOs) will be cleaned and re-bezeled
in chrome by Belmog through John Worrall (Heart
of England Morgans).
 The
dash is beyond anything but visible patching. There are cracks throughout
and the surfacing around the switch cluster has cracked off. Rarther than
seeking out another stock dash, I had called on the services of the
Morgan community's master dash maker, Matthias
Kaufelt, before the project began in hope of getting a sublime MK masterpiece
in the intervening weeks until it is needed. A black crackle boss
will be polished back to alloy, the plastic column surround will be changed
polished stainless.
The
dash is beyond anything but visible patching. There are cracks throughout
and the surfacing around the switch cluster has cracked off. Rarther than
seeking out another stock dash, I had called on the services of the
Morgan community's master dash maker, Matthias
Kaufelt, before the project began in hope of getting a sublime MK masterpiece
in the intervening weeks until it is needed. A black crackle boss
will be polished back to alloy, the plastic column surround will be changed
polished stainless.
New rubber bobbins are needed for rad and exhaust, new
Lucas reflectors, new wing treads, new threshold plates, new light plinths
in polished stainless, new turn buckles, press studs, sidescreen knobs,
wing beading, mirror bases, filler hoses, rad hoses, gaskets...and then
more gaskets. The logistics must come together before the car does. The
owner can and should be key in helping with the logistics.
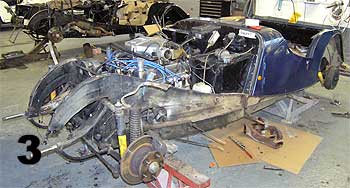
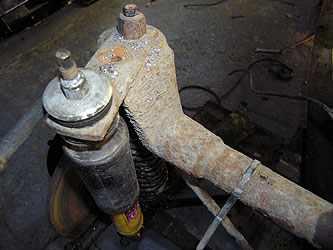
3. More parts are removed and scrutinized. As each comes
off, new vistas appear (wry smile), some indicating more work to be done
than first imagined and some indicating less.
The inner wings show minimal surface corrosion but dirt
cakes everything. It will be removed..and all parts brought back to "shiny
metal" (which is actually a trade term).
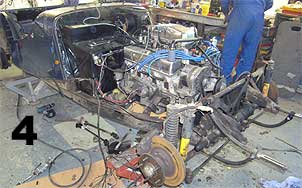
4. The wings have been sent off for stripping so we can
fully ascertain their condition (normally a 2 week job). They are Morgan
alloys from the pre-Superform days and are a big question mark. A better
look and a more informed decision can be taken on their return.The dismantling
process continues. The bulkhead is off next and the car is getting considerably
more difficult to recognize as such.
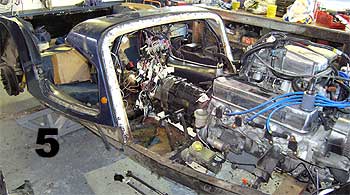
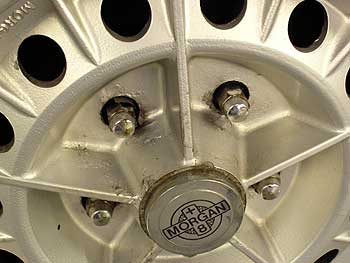
5. The bumpers and bright work are off for polishing.
The wheels, Morgan Plus 8 alloys, are pitted and show corrosion is some
spots. They are sent off for sand blasting and re-coating. I have chosen
a special color and we have plans to bring it out by polishing the metal
and brightening the glow on the alloy wheels. (more of this later!).
N.B. I had immediately tossed the stock tyres
that came with the car. I have switched to a remarkable new Michelin offering
called Primacy Sports in a "W" speed rating. Quite a remarkable increase
in fun and safety!
6. As the car becomes denuded..more is revealed and 15
years of neglect sees light. The bracketry is grouped, inspected and most
heads to the shot blaster tomorrow. Other items will be be dealt with inhouse.
STAGE 3
COMPONENT PREPARATION
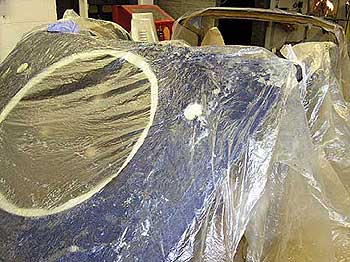
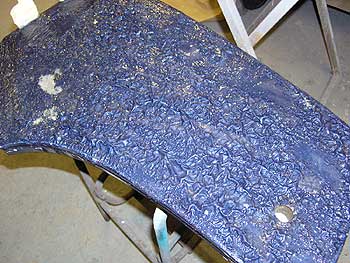
1. The tub's skin will also have to be stripped but this
area must be done by hand in shop. It is done partly with the application
of a chemical paint remover and partly by sanding. A plastic envelope enhances
the effect of the chemicals.
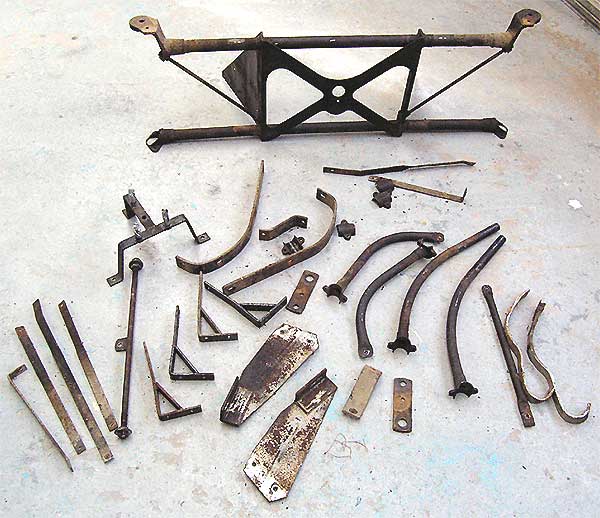
2. Progress is made with other items. The list of bracketry
and components has been finished, decisions on whether to replace or refinish
each item have been made and the parts sorted accordingly to the work required
on them. Those for refinishing are sent to a shot blaster for cleaning
down to the metal.
Here are some laid out before before the leave the shop.
(See if you can recognize them!)
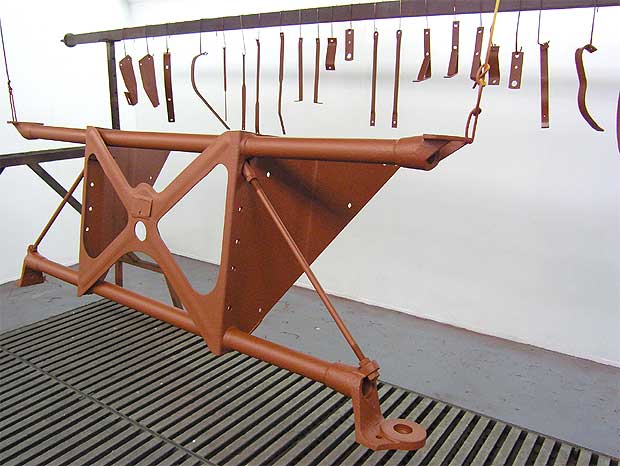
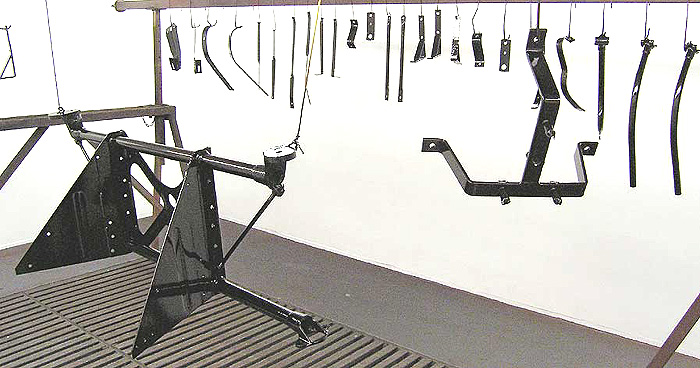
3. They return three days later stripped clean. They are
now strung for preparation and paint. Here they are with the rust primer.
4. The pieces are now sprayed with high gloss black paint
mixed with special hardeners. This
gives a very deep high gloss surface that is extremely
reflective (almost mirror-like) and resistant, leaving the items looking
and protected far better than they did when new (over 15 years ago).
PAGE 3