|
|
|
©By: John T. Blair (WA4OHZ)
 1133 Chatmoss Dr., Va. Beach, Va. 23464; (757) 495-8229
Originally written: January 2008
Last update:  November 22, 2009.
|
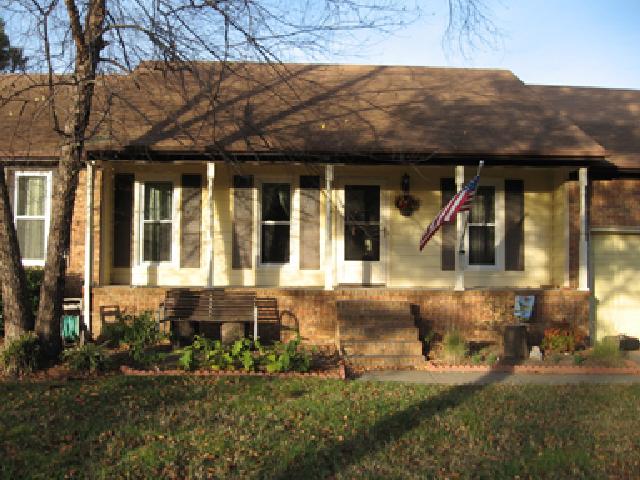 The front porch before installing railings
|
If you read what was the first part of this article, Installing a Vinyl Stair Railing you'll remember that when I bought my house, it didn't have any porch or stair
rails. Now some 20+ years later, I'm finally getting around to installing them.
You'll remember that we put off working on the columns because we quickly ran
into a little snag. We had to get the trim and siding off of the porch to expose
the tops of the columns. We also were going to have to move the column on the
left of the stairs to the right about 2 inches. That’s were we originally started,
|
|
Well luckily, I’d just had replacement windows installed, and I spent quite a bit of time talking to the young man, John Price, doing the job. He also did siding on the side. So while we were working on the stair railing on the right side of the steps, I called John and asked if he could come over and show me how to take the siding and trim off. He said sure, and one Saturday morning he came over to have a look.
The inside of the porch had siding on it, and the faux beam that is supported by the columns had been wrapped with aluminum trim.
|
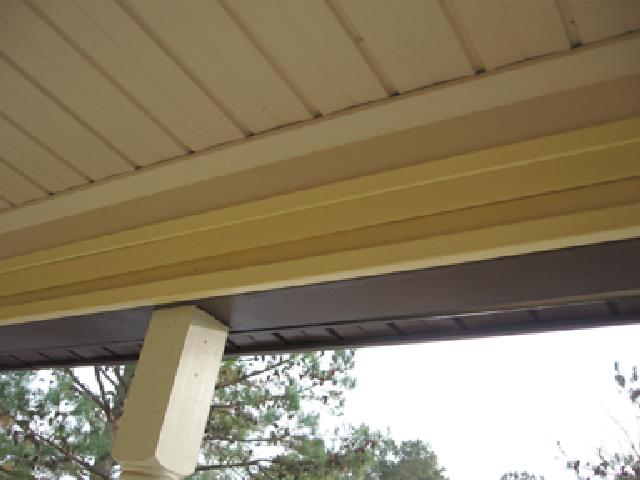 Siding Surrounding Porch Columns
|
|
We had to get the trim off to be able to cut the faux beam to all the new columns and their mount plates to fit.
The aluminum trim went up the front of the beam under the gutters and on the inside of the porch, it wrapped up under the siding. Having never done siding I had no idea how to take it off.
|
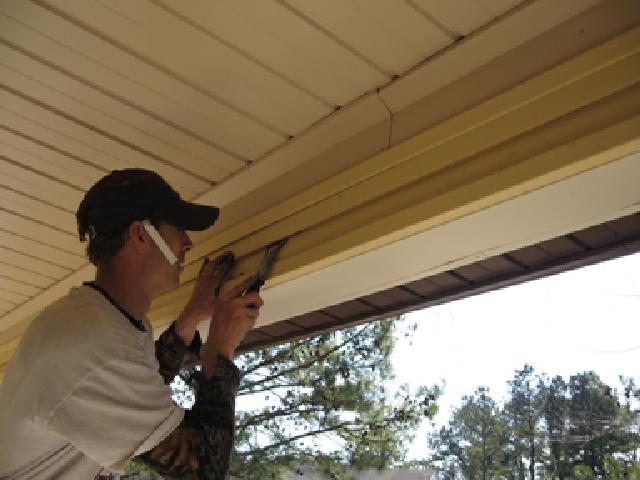 John Starting To Remove The Siding
|
When John arrived, he took a quick look at it, and said, “that’s easy”, and started to unclip the top row of siding from the lower one. Once the top piece was off, he pulled the nails, and the bottom of the two pieces of siding came right off. Lastly, he popped the bottom “J” rail off and he was done. In less than 15 minutes he was done. He said, “now all you have to do, is pull the nails out of the Aluminum trim and pry it back.
|
|
We thanked John for his time, and now Dennis and I had to get busy and start pulling the nails and removing the aluminum trim. This took us about an hour or so. We removed the nails and the aluminum “L” from the inside of the porch. Then we started pulling the nails from the aluminum “L” on the front. Then we were able to pry back the front “L“ and get to the nails holding the bottom piece of aluminum trim in place.
|
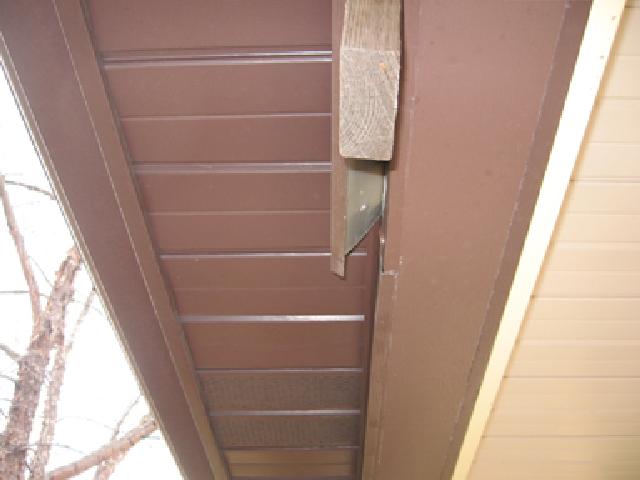 Peeling back the Aluminum trim
|
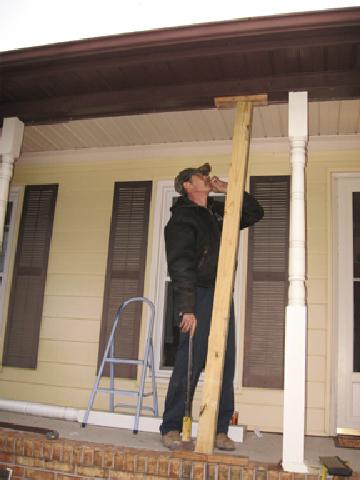 Dennis Knocking The Jack Post Into Place
|
We were just about ready to cut the first column out. We wanted to put a 4x4, “jack post” near were we were going to remove the column to support the roof when we cut the column out. This was easy. We measured the length from the bottom of the faux beam to the porch floor and the subtracted the thickness of two 2x4s. We screwed one 2x4 into the faux beam with a couple of dry wall screws, laid the second 2x4 on the floor. Then we wedged the 4x4, jack post, into position and tapped it in with a sledge hammer. Finally, we get to the fun part, destruction.
|
|
We didn’t know what to expect as to how hard the column would be to cut out, how much weight it was supporting, etc. So we used a reciprocating saw, and were going to cut a wedge, like we felling a tree, in the column. As Dennis made the bottom horizontal cut, the saw went right through the column. Turns out, it was hollow. We couldn’t get either piece out. There wasn’t enough clearence. So we cut the wedge out to give us some working room. I must say, that wasn’t easy, as the saw was really biting into the wood and shaking the column all around.
|
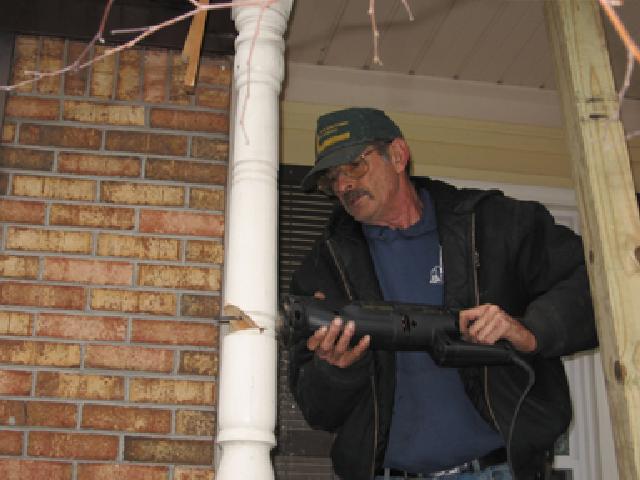 Dennis Cutting Column Out
|
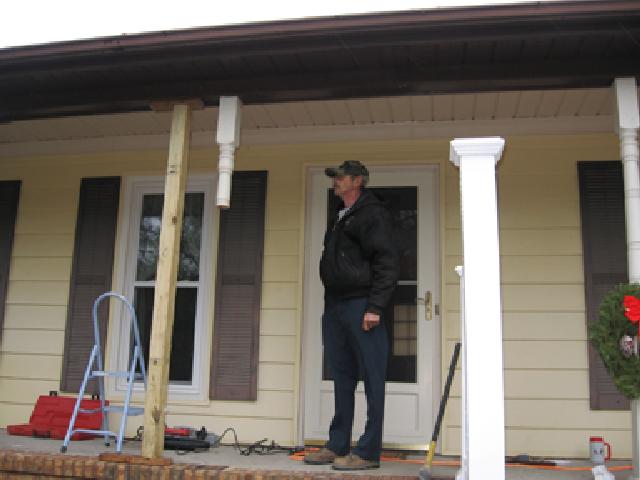 1st Column Bottom Cut Out
|
We did prevail! Now we have to figure out how the end of the column is attached. Dennis jokingly kicked at the bottom part of the column and it goes flying off the porch. It wasn’t fastened at all. Leaving the top of the column hanging in the breeze. We grabbed it and rocked it back and forth a few times, and it came off. It turns out that the top had 4 nails holding it to the faux beam.
With the old column out, we had to cut a notch in the trim edges of the faux beam to allow the top mounting plate to slide in.
|
|
This turned out to be a bit of a problem. One side of the trim was masonite, the other was wood. We tried using the “saw-z-all” but I guess we were using too course a blade and had a lot of trouble controlling it. We tried to cut slits and then chiseling the pieces out, but on the masonite it would tear instead of really cutting, on the wood the chisel worked fine.
However, we ended up using a saber saw to give us a little more control, and the chisel for final clean up of the notch.
|
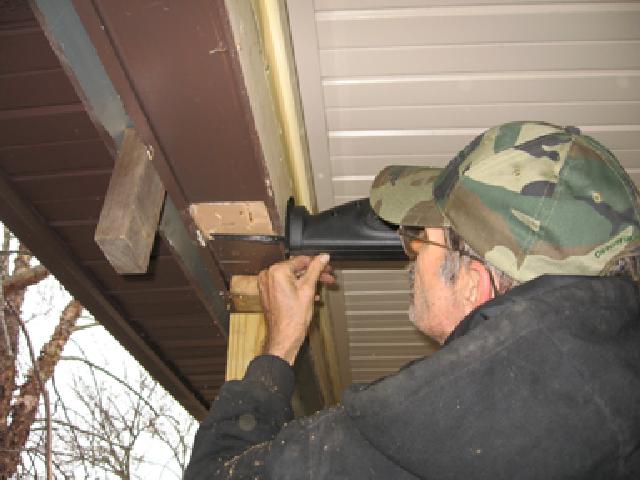 Cutting trim to allow for mounting plate
|
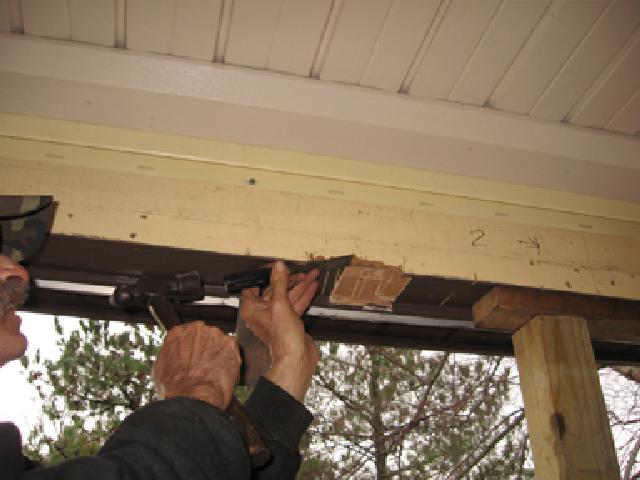 Finishing the cut with a chisel
|
Now it was time to install the new column. We measured the total distance from the floor of the porch to the faux beam as we’d need to know the over all length. But we also had to be careful how we cut the column. We had to cut the bottom of the column so that it would be tall enough to mount the railings. We found that if we drew a line on the column where it starts to arch to go from square to round, and the measured down 42” the railings would fit nicely. (Remember that you have to subtract the thickness of a mounting plate from each end of the column.)
|
|
The ends of the railing should screw into the square part of the column.
After the bottom was cut to length, we measured the total length, then subtracted the thickness of the mounting plate, and cut the top of the column.
I should mention the column construction and how we cut them. The columns have an aluminum square tube that goes the entire length of the column. Around this aluminum square is wood to give the shape and hold the Vinyl coating in place. We used a portaband (portable band saw) to cut the column.
|
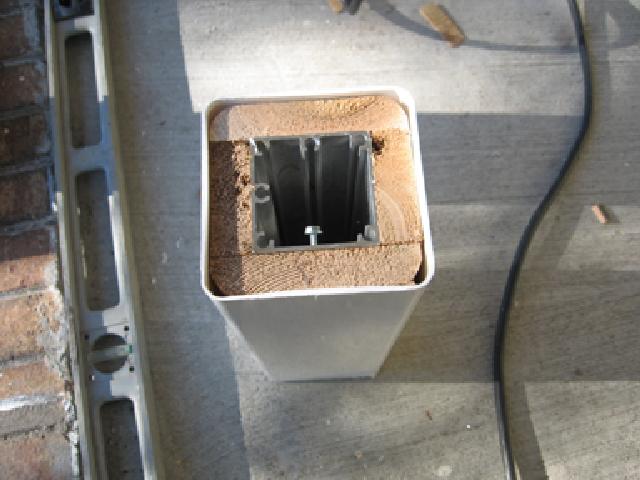 Cross section of column showing construction
|
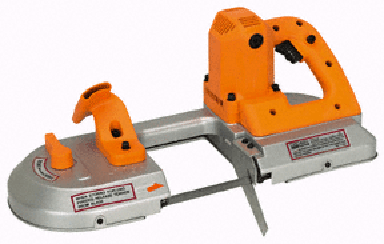 Portable Band Saw
|
Luckily Dennis could borrow one from where he worked. It took some experimenting to get a good smooth clean cut. We even tried making some ears out of an old bed frame, which we clamped to the column to try and act as a guide for the blade. But in the end, we found that if we took our time, and really watched what we were doing, held one end of the portaband still and then rocked the far end down, then rolled the column and did the same on all 4 sides, we could get a decent cut. When we cut the top of the column, we got a little surprise. The wood inside did not go all the way down the square section of the column. I don’t know if we really needed to do it, but we drove the wood out of the scrap piece of column and then inserted it into the end of the column.
|
|
Once the column was cut to length the decorative trim pieces were slid on, and the top and bottom end plates were screwed to the column.
It was time to try and insert the column. We lifted it up onto the porch and slid it in place. It was a tight fit (good) and we had to do a little persuasion. We tapped the mounting plates by using the sledge hammer and the extra mounting plate that comes with the mounting kits. We also had to rotate the column a little.
|
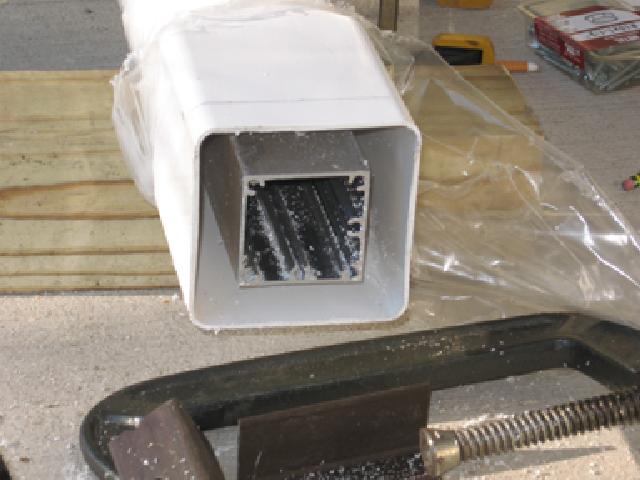 When cut to length, we were below the wood
|
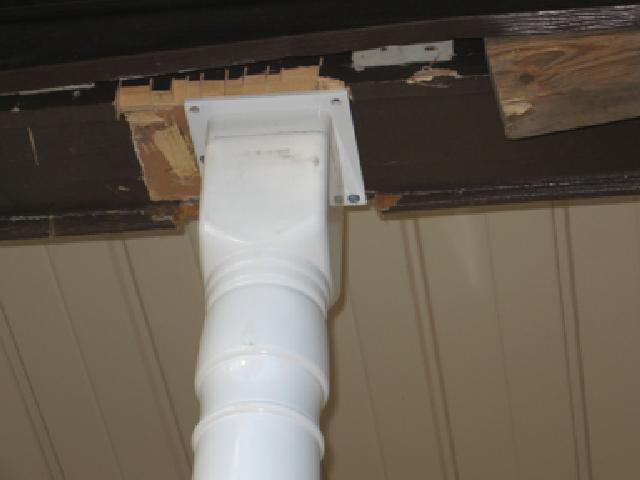 Column top mounting plate screwed in place
|
We place a 2x4 on both sides of the square section of the column, held them in place with a 8” C clamp, and carefully pulled on the 2x4 to rotate the colum.
The last thing we had to do was to screw the top and bottom plates in place. To mount the bottom plate, we had to use a masonry bit and the hammer drill that we’d used for mounting the newel post for the right side stair railing (this is in a separate article on installing the vinyl stair railings). Then we screwed Tapcon screws into the base. To mount the top plate to the wood, we used #10 x 1 ½” hex head sheet metal screws.
|
|
We repeated this process for all 5 columns. We finally got to where we were able to replace 1 column in about 1 hour. We did run into one column that we ended up having to cut a couple of times. I don’t know how we managed to measure wrong, but we’d cut it too long by about ¾”. So we cut a little off, tried to fit it, and had to cut it again.
Finally all 5 columns were in place. This did take something like 2 weekends to do. Now we were ready to start installing the porch railings.
|
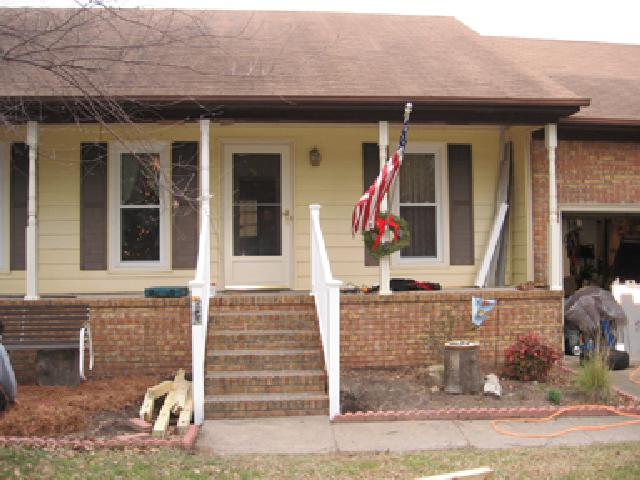 First Column In Place
|
|
This proved to be a pretty simple job. We put a piece of scrap 2x4 on the inside of 2 columns to set the railing on as we didn’t want to scratch the railings on the concrete. Now measure the distance between the Column and the nearest baluster at each end. Slide the railing to the left or right, so that this distance from a baluster to the column is the same on both sides, and hold the railing in place. Now you need to set the end caps against the column and mark the railing at the end of the caps. We then removed the railing so we could cut it. We had to move all the lines for the cut mark back 1” to account for the depth that the railing sits into the caps. I suggest that you now measure the distance between the two cut marks and then measure the opening between the two columns where the railing is going. The opening should be about 1/4” larger than the length of the railing. Somehow, I managed to cut the first railing too short. Luckily, this was the largest section, so I was able to still use this railing between the next two columns.
|
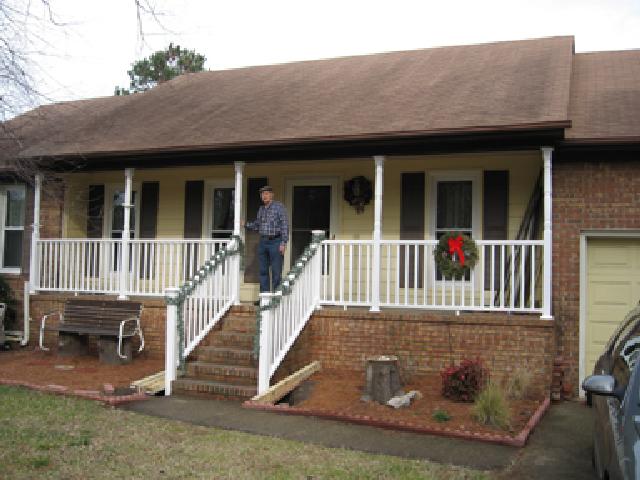 My Dad Standing On The Almost Finished Porch.
|
Now we were ready to cut the railings. I used a trick here that I discovered when I was installing the first stair railing. That was to push the aluminum “I” beam out one end of the railing. (Just make sure you pay attention to how the “I” beam was in the railing. The main bar of the “I” is not in the middle so when you look at the end of the railing, you’ll see it as an “H” with a long and short side.) We cut the vinyl railing using a hack saw with a metal cutting blade, which allowed a lot of control of the cut. After the all ends of the railng were cut, we slide the “I” beam back through the railings and set it flush at one end.
|
|
I need to clean up, put some quick creat in the holes for the front posts of the stair rails, and glue the post caps and column trim pieces in place.
We marked where it was sticking out the other end, removed it and cut the “I” beam.
This saves you one cut, and gives you the most control of your cuts. Especially if you are using hand tools.
Now the end caps, are installed on the ends of the railing, and the railing is set in place. Screw the caps to the column and it’s done!
After a rocky start, we are very happy with the way the project turned out. I hope this helps and gives you some idea of what you might be getting into.
Part 1 - Installing a Vinyl Stair Railing
Return to the Main page
To email me with comments or
questions.
|
 1133 Chatmoss Dr., Va. Beach, Va. 23464; (757) 495-8229
 November 22, 2009.


