
When I bought my Morgan, my dad used to joke about needing a cabinet maker because of all the wood. When I describe the car to friends, they always kid about having it covered by a termite contract. I think the best joke about the car came from a co-worker, "buy a real car and save a tree!". This leads me to the topic I'd like to talk about in this article: restoring the wooden body sub frame.
After the body is off the car, it was placed on saw horses to allow easy access for disassembly. The first undertaking was to remove everything from the firewall.
The firewall was removed from the wood sub frame by removing the numerous wood screws around the perimeter of the firewall and the 2 hex head bolts that hold a steel stiffening bar to the firewall and wooden frame. Now comes the hard part, removing the sheet metal skin from the wood. The skin is held to the wood by a few screws and a LOT of nails. Removing the nails turned out to be a real chore. I spent hours trying to remove them with diagonal cutters (broke 2 pairs of them) and end cutters. Next I tried modifying a screwdriver by grinding the blade to a sharp edge. I was hoping that I could drive the screwdriver under the sheet metal and pop the nails up enough to grab them with the dikes. This worked better than just the dikes, but not as well as I had hoped. The next approach was to use a dremal tool to grind off the heads of the nails. This didn't work at all. I kept cutting into the sheet metal. Regardless of the method I used, I couldn't work at this for more than 15 to 20 minutes before I got so frustrated I wanted to take an ax to the whole thing.
The Secret
I found the secret by accident. I had taken my youngest son to the hardware store a few days earlier. He decided that he wanted to get a tool. He picked out a small claw hammer with a removable head and several other tools in the handle. In desperation, I decided to try using his little "toy" hammer. It worked like magic. I was able to drive the claw of the hammer under the sheet metal on either side of a nail and pry up the nail with a minimum of damage to the sheet metal. I had spent 2 hours using the dikes and screwdriver to remove 2/3 of the nails holding only 1 quarter panel to the rear fender well. After I started using the claw hammer, I removed the remaining 1/3 of the nails on the one and all the nails on the other quarter panel in less than 15 minutes.
After all the sheet metal is removed, it is time to start removing the screws which hold the wood sub frame together. Removing some of these screws can be a real problem.
Here are a few hints to help a screwdriver get a better bite:
1. the slots in the heads of the screws should be cleaned with a knife.
2. ensure the blade of the screwdriver is flat and that the edges are not rounded - if so, regrind the blade.
3. hitting the top of a screwdriver with a hammer while trying to turn the screwdriver helped on the stubborn ones.
4. on screws that just won't move, I found a brace and a screwdriver bit usually did the job.
The wood sub frame can be separated into two parts. There are 2 screws holding each of the rear arches to the door sill plates, and 2 screws holding the rear quarter panel frame to the sill plate. The figure shows the basic wood sub frame and the size of the screws holding it together.
To separate the two fender arches, start by removing the wooden U formed by the rear chassis mounts which are attached to the rear inner fender panels and the rear cross brace. Be careful as this U is relatively fragile. The fender arches are attached to the chassis mounts by three screws (6b). It may be necessary to use a rubber tap hammer to remove the fender panels from the groves in the chassis mounts. This U can now be disassembled by removing the 2 screws that hold the cross brace to the chassis mounts. The trunk rack and the spare tire rack can be removed by unscrewing the nuts on the carriage bolts and removing them.
When rehabilitating the original wood pieces I removed the paint with paint remover, and sanded each piece. The small nail and screw holes were filled using toothpicks or matches dipped in the epoxy. Screw holes that had rotted or otherwise been disfigured were repaired by drilling them oversize, and inserting a piece of dowel rod which had been dipped in epoxy. After filling these holes, the remaining epoxy was used to start sealing the wood. When the epoxy dried, I sanded each part with 60 to 100 grit sandpaper and a second coat of epoxy was applied and sanded. Now the wood was ready to be reassembled and painted. Instead of coating each individual part, you could coat the entire wood frame with the epoxy; however, I chose not to do so. I wanted the option to disassemble the wood, if necessary, without having to cut it apart.
I had to make several new wood parts: trunk back, trunk deck, the door sill plates, right rear fender well panel, door panels, and the gas tank bed, floor boards. Most of the replacement parts were initially cut by using either a band saw or saber saw. Final shaping was accomplished by clamping a template (either the original part or a poster board pattern) to the part and sanding the new part with a 1" belt/disc sander until it matched the template.
To make the new front floor boards, I purchased some poster board to make patterns. I measured the chassis and sketched it on the poster board and cut them out. Once the patterns fit, they were traced onto a piece of 1/2 inch of CDX plywood and cut out using a saber saw. I made one minor change from the original floor boards. The factory cut them so they laid next to the little fore/aft stringers that the transmission bracket mounts to. Instead, I increased the width of the floor boards so they laid on the stringers. Since the stringers are not flush with the bottom angle of the chassis, the floor boards were notched to accommodate the height of the stringers. (The notch was made by making several cuts on a table saw with the blade set to the height of the stringer.) Since the new floor boards go completely across the angle iron stringers, the floor boards must be notched to fit around the transmission mount bracket and the emergency brake hardware.
The seat pan part of the floor boards was also modified. Originally it consisted of 2 pieces with a cutout in them, apparently to allow access to the grease fittings on the rear U joint. Since the new U joints I purchased did not have grease fittings, I decided to make the seat pan one piece.
Wood and its Properties
by Allan Alderwick
The wonderful but hard to find book "How to Restore Wooden Body Framing " by Alan Alderwick has a nice commentary on various woods. Here is a very abbreviated summary (my apologies to the author for quoting some of his phrases):
ASH - best possible to use, common belief that it is the only wood with a 'memory', naturally very springy, ideally suited to laminating in bends, English ash is best followed by Belgium ash and then American ash, kiln dried is less desireable than air-seasoned since the kiln can take out the 'backbone', avoid boards that feel light (they can be carroty - snap like a carrot)
Beware of weathered lumber (bleached gray appearance)
Beware of lumber that has fine cracks throughout - but
small cracks at the ends only is acceptable
Beware of 'Black Heart' in Ash. It occurs in the
heartwood and is a black patchy stain.
Most Ash when felled is attacked by the ash bark beetle
but it is generally isolated to 'just under the bark' and not throughout.
ELM - very similar to Ash, bends better when steamed, tends to be more knotty.
BEECH - very strong, tight grained, tends to split away when panel pins (screws or nails) are close to the edge.
HICKORY - appears that it would be suitable but Mr. Alderwick hasn't tried it for bodywork.
OAK (English, American, and Japanese) - popular for pre-war coachbuilding, very acidic and not Mr Alderwicks recommendation for that reason, Japanese oak tends to be 'carroty'
SPRUCE - very lightweight (used for racing bodies), quite successful but expensive, only use light-aircraft quality
ASH
(European versus American)
offered by Andrew Abbot at the eMOG Pub
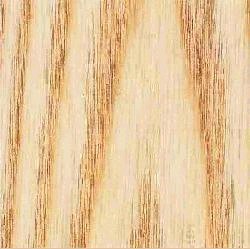 Ash,
American Wood type Hardwood
Ash,
American Wood type Hardwood
Introduction
The natural order Oleaceae includes a number of species of the genus Fraxinus or ash, whose timber is characterised by good strength elasticity, toughness, stiffness and hardness, allied to relatively light weight. The following are the principal species found in North America:
Black ash Fraxinus nigra
Green ash Fraxinus pennsylvanica
White ash Fraxinus americana
Distribution
BLACK ASH
An eastern species; it occurs mainly from the Gulf of
the St Lawrence to Manitoba. A slender, medium sized tree reaching a height
of 18m to 21 m growing in swamps and by rivers. The timber is greyish-brown
to brown in colour, darker than that of white ash, (F. americana} and inferior
to that timber in general strength properties and lighter in weight, about
560 kg/m³ when dried. A certain amount of this species is used for
interior trim and fittings It takes a good finish.
GREEN ASH
Found in fairly limited quantities from south-eastern
Quebec throughout southern Ontario to eastern Saskatchewan and also in
the southern states of America to the Mississippi River. A small
tree, some 12m to 15m in height. Produces timber similar to American
white ash in appearance, but inferior to that timber in hardness, strength
and toughness. It weighs about the same as white ash, about 670 kg/m³
when dried and is used for similar purposes as white ash, except for striking
tool handles.
WHITE ASH
Occurs in Canada from Nova Scotia to south-western Ontario,
and in America from New England, the Middle Atlantic and Central States.
The tree reaches a height of 15m to 18m or a little more, and a diameter
of about 0.75m. The sapwood is almost white in colour and the heartwood
varies from light brown to reddish-brown rather similar to European ash.
but a little lighter in weight, about 670 kg/m³ when dried.
Botanical Name(s) Fraxinus nigra, Fraxinus americana,
Fraxinus spp, Fraxinus pennsylvanica
Other Name(s) brown ash (Fraxinus nigra), red ash
(Fraxinus pennsylvanica), American Ash (America), black ash (Fraxinus nigra),
green ash (Fraxinus pennsylvanica), white ash, Canadian ash (Fraxinus
americana)
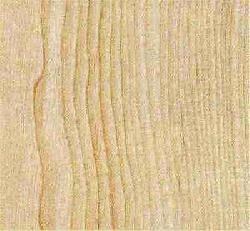 Ash,
European Wood type Hardwood
Ash,
European Wood type Hardwood
Introduction
European ash is typically straight grained, and this, combined with its toughness and flexibility, makes it one of the world's most valuable timbers for such uses as sports goods and striking tool handles. It is rather coarse textured, and varies somewhat in weight according to the growth conditions, from 528 kg/m³ to 816 kg/m³ when dried, but averaging 710 kg/m³. Found in Europe including the British Isles, north Africa and western Asia, growing best on loamy soils where both the soil and the atmosphere is moist and cool.
The Tree
A tall, graceful tree, reaching a height of 30m to 42m on good sites, with a clear bole averaging 9m in length, and occasionally more. The diameter varies from 0.5m to 1.5m. There is usually no distinction in colour between sapwood and heartwood, freshly cut wood being whitish to pale brown with a pink cast, turning to a slightly brownish-white after drying. In some logs, an irregular dark brown or black heartwood is found, but this is not necessarily a defect, as the timber is normally quite sound. Logs containing dark heart streaks are often enhanced in value because of the decorative nature of the wood which is known as olive ash.
It dries at a fairly rapid rate without excessive surface checking and splitting, but under the influence of severe temperatures, there is a tendency to distort and for end splitting to occur. Distorted stock responds well to reconditioning kiln treatment. Similar to oak in general strength properties, but tougher and more resistant to splitting. Good working qualities- Although tough, ash works and machines quite well, and finishes to a reasonably smooth finish. It can be glued, stained, and polished.
Botanical Name(s) Fraxinus excelsior