 The
tool tray is constructed from plywood and lumber, and is glued and screwed
together. It has hinges and latches to secure it. The tools
needed to build the tray are:
The
tool tray is constructed from plywood and lumber, and is glued and screwed
together. It has hinges and latches to secure it. The tools
needed to build the tray are:
 STORAGE COMPARTMENTS
When we restored Humpty in 2005, Kevin Vernon and Tudor Motors suggested we create some additional storage capacity. Considering how much mogging we do each year, any extra space is a blessing. Kevin had fashioned aluminum containers he had dropped into his Morgan's rear compartment lid (aka the parcel shelf). We decided to do the same with my car.
The size, spacing and number of these drop in containers depends on the year and suspension set up. Cars with the suspension hoop (eliptical bracket holding the shocks on the post 1991 cars) have less space. Cars with a Salisbury axle have more space than the later BTR axled cars as the BTR is larger. Each car should be measured to get the right depth and size. (REMEMBER the axle goes up and down. in relation to the lid.) The containers should be made to tightly slot in and I added rubber at the bottom of the container flanges to stop noise. The carpet covers them undetectably.
In both cars, we used aluminum. Light and easy to work with and less chance of cutting yourself as the edges are blunt. In both case, the flanges left on all sides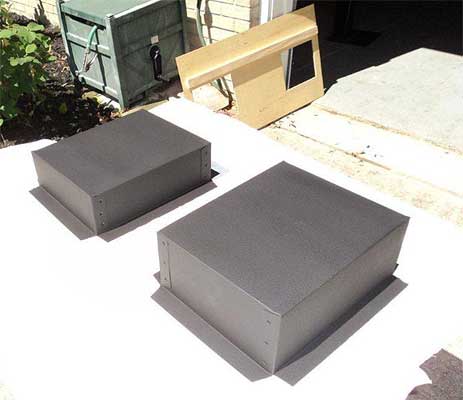 do the trick. I can take them out individually
(Kevin felt lined the containers and gave them straps for easy lifting),
or you can simply lift the whole deck up with them still in. (Lifting one
of them gives you access to your battery!)
do the trick. I can take them out individually
(Kevin felt lined the containers and gave them straps for easy lifting),
or you can simply lift the whole deck up with them still in. (Lifting one
of them gives you access to your battery!)
Kevin took advantage of every square inch with his four boxes..even shaping the left on to the differential. He also felt-lined the boxes. My work was less polished but as effective. No felt and only two identical boxes..though each is bigger than any of Kevin's 4.
Excuse the dimensions..I used a US tape measure that was handy
Flange = 1 inch on all sides (use some material on the flanges' undersides to cushion the contact between the flange and the deck)
Width = 10"
Depth = 8"
height to flange" 4"
Position:
4.5" from the rear of the rear bulkhead to the front flanges.
1 7/8 " from the wheel well to the outboard flanges.
We’ve all had to deal with the very limited storage space in our Morgans, and the fact that there is no way to secure things. We have wanted to take along tools, some spare parts, and other assorted bits, especially on longer trips. But when we have stopped for the night we don’t want to have to carry all that stuff into the hotel room. Nor do we want to leave it in the car and risk having it stolen. Well, here are a couple of solutions; a tool tray that mounts to the underside of the plywood package shelf behind the seats and a small storage box that mounts on the extended floor boards opposite the battery. They are inexpensive and easy to build and will allow you to carry along a fair amount of things. They don’t take up any of the precious space needed for your luggage, a couple of bottles of wine, etc. And, because nobody unfamiliar with Morgans would ever think to look there, they are reasonably secure.
The Tool Tray
The
tool tray is constructed from plywood and lumber, and is glued and screwed
together. It has hinges and latches to secure it. The tools
needed to build the tray are:
· A table saw or radial arm saw (making it with
hand tools would be much tougher)
· A drill and bits
· A tape measure
· A screwdriver
· A paint brush
· An x-acto knife or similar tool
The materials list is:
· A piece of ¼” marine plywood or Okoume
12” x 32”
· A piece of ash (or other hardwood) 1” x 7” x
36” (nominal measurements – actual thickness is more like ¾” and
actual width is at least 6 ½”)
· #8 x ¾” flat head stainless screws (I
used 42, you may use fewer)
· Six #8 x 1 ½” flat head stainless screws
· Six 6-32 x ½” flat head stainless machine
screws
· Six 6-32 stainless nuts
· Six 6-32 stainless flat washers
· Six 6-32 stainless lock washers
· Wood glue
· Wood preservative
· A piece of 1” thick foam rubber 24” x 36” (sold
by the yard in fabric stores)
· Adhesive backed foam weather-stripping
Your car should be able to take a tray this size, but make your own measurements and alter things as needed. To determine the possible depth, I made a small cardboard box 2 ½” deep and taped it to the underside of the package shelf directly over the highest point on the differential. My wife and I then bounced on the rear end of the car to attempt to bottom it. The box had been touched by the diff, but just a bit. I made another box 2 ¼” deep and repeated the experiment. This time there was no contact. Once you have verified the dimensions proceed as follows.
Rip a 2” wide piece from the hardwood and trim it to 32” long. Dado the ends to a depth and width half their thickness. Rip another 2” wide piece from the hardwood. Cut two pieces each 11 ¼” long. Dado the ends to a depth and width half their thickness. Rip a 1 ¼” wide piece from the hardwood and trim it to 32” long. Dado the ends as with the prior pieces. These for pieces should now fit together to form a frame 12” x 32”. Trim the scrap left over from the second 2” wide piece to a length of 10 ½”. This piece should fit into the center of the frame as a divider and strengthener. Rip a final ¾” wide piece from the hardwood and dado the ends as above. This piece will attach to the underside of the plywood package shelf in your car. You may have to adjust the length of the three short pieces based on the actual thickness of your piece of hardwood.
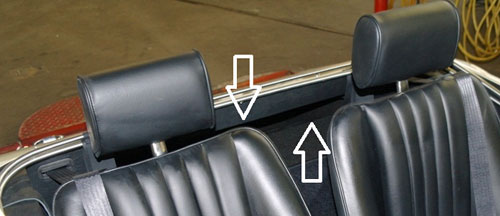
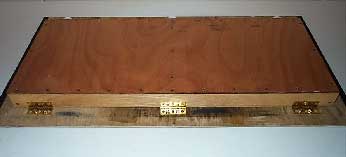
You will note that there is a piece of wood about 2” wide that runs most of the length of the plywood package shelf (see arrow) on the underside as a strengthener. This piece may NOT be square to the edges of the plywood – mine wasn’t quite. The tool tray will mount to the package shelf 2” from the rear edge. Mark the underside of the package shelf to show where the tray will mount. My shelf was 36 1/16” wide, so I measured in 2” from one end and 2 1/16” from the other end. Measure from the rear edge of the plywood shelf to the edge of the piece of wood attached to it at each spot just marked and in the center. Also measure the width of the piece of wood and its depth. You will use these measurements to cut notches in the end and center pieces of the tool tray frame so that the frame will fit snugly against the underside of the shelf. Cut the notches just a bit wide to allow them to clear when hinged.
As you are assembling the frame and tray bottom, note
where the hinges and latch pieces will be 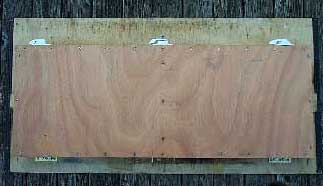 attached.
Ensure that the screws that secure the tray bottom to the frame are not
placed where screws that secure the hinges and latch pieces will be.
Scribe lines 3/8” in from each edge of the new piece of plywood that will
be the bottom of the tray. Drill and countersink holes for the screws
that will secure the bottom to the tray frame. Be sure to drill pilot
holes in the tray frame as you are doing this. Run a bead of glue
along the edge of the 2” x 32” piece of the frame and secure it to the
plywood with screws. Do the same with each of the end pieces, also
putting glue where they mate to the long piece. Be sure to have the
1 ¼” piece loosely in place to verify that the ends are properly
positioned. Now glue and screw the 1 ¼” piece to the plywood.
Mark the center of the long pieces and drill, countersink, glue and screw
the center strengthener to the plywood, making sure the notch lines up
with the notches in the ends. Secure the long pieces to the ends
and center piece with the longer screws, using one at each corner and one
at each end of the center piece. As you can see, I used a lot of
screws just to be on the safe side.
attached.
Ensure that the screws that secure the tray bottom to the frame are not
placed where screws that secure the hinges and latch pieces will be.
Scribe lines 3/8” in from each edge of the new piece of plywood that will
be the bottom of the tray. Drill and countersink holes for the screws
that will secure the bottom to the tray frame. Be sure to drill pilot
holes in the tray frame as you are doing this. Run a bead of glue
along the edge of the 2” x 32” piece of the frame and secure it to the
plywood with screws. Do the same with each of the end pieces, also
putting glue where they mate to the long piece. Be sure to have the
1 ¼” piece loosely in place to verify that the ends are properly
positioned. Now glue and screw the 1 ¼” piece to the plywood.
Mark the center of the long pieces and drill, countersink, glue and screw
the center strengthener to the plywood, making sure the notch lines up
with the notches in the ends. Secure the long pieces to the ends
and center piece with the longer screws, using one at each corner and one
at each end of the center piece. As you can see, I used a lot of
screws just to be on the safe side.
Turn the package shelf upside down and lay the tray on it. Mark the edge and end locations for the ¾” x 32” piece. Scribe a line 3/8” in from the edge line and drill holes 1 ¼” from each end. Turn the shelf right side up and scribe a line for the remaining screw holes. Drill and countersink the holes and glue and screw the ¾” wide piece to the shelf. Make sure you drill pilot holes in that piece of wood and ensure it is facing the right direction to mate with the tray frame.
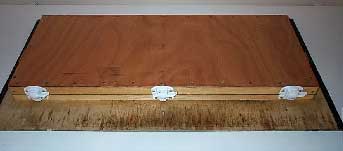
 Turn
the package shelf upside down and lay the tray on it. Place the hinges
along the back edge of the tray so that one is in the center and the others
are about 2” in from each end of the tray. Note the hinge locations
in the finished tray. Mark the locations for the holes in the package
shelf. Do not mark the locations for the screws in the tray frame
at this time as there will be weather-stripping on the upper edge of the
frame. Drill the holes in the shelf, turn it over and countersink
the holes. Put the machine screws through from the top and secure
the hinges with flat washers, lock washers and nuts. You should have
little or no machine screw extending beyond the nut if the screws were
properly countersunk.
Turn
the package shelf upside down and lay the tray on it. Place the hinges
along the back edge of the tray so that one is in the center and the others
are about 2” in from each end of the tray. Note the hinge locations
in the finished tray. Mark the locations for the holes in the package
shelf. Do not mark the locations for the screws in the tray frame
at this time as there will be weather-stripping on the upper edge of the
frame. Drill the holes in the shelf, turn it over and countersink
the holes. Put the machine screws through from the top and secure
the hinges with flat washers, lock washers and nuts. You should have
little or no machine screw extending beyond the nut if the screws were
properly countersunk.
Give the entire tray, inside and out, a thorough treatment with the wood preservative and allow it to dry. Once it is dry, attach weather-stripping to the top edges of the frame, including the notches in the end pieces.
 Turn
the package shelf upside down and lay the tray on it. Flip the hinges
up against the tray frame. Push down above each hinge to compress
the weather-stripping and mark the locations for the screws that will attach
the hinges to the frame. Drill pilot holes in the frame and screw
the hinges to the frame. Position the lower parts of the latches
against the 1 ¼” wide piece of the tray frame similar to the locations
of the hinges. Drill pilot holes in the frame and attach the latch
parts to the frame. With those latch parts in the closed position,
slide a top latch piece into place with the center latch. Push down
on the shelf to compress the weather-stripping while holding the top latch
piece up in tension against the bottom latch piece. Mark the holes
for the top latch piece and drill them and secure the top latch piece.
Latch the tray closed and repeat the process for the latches at each end
of the tray.
Turn
the package shelf upside down and lay the tray on it. Flip the hinges
up against the tray frame. Push down above each hinge to compress
the weather-stripping and mark the locations for the screws that will attach
the hinges to the frame. Drill pilot holes in the frame and screw
the hinges to the frame. Position the lower parts of the latches
against the 1 ¼” wide piece of the tray frame similar to the locations
of the hinges. Drill pilot holes in the frame and attach the latch
parts to the frame. With those latch parts in the closed position,
slide a top latch piece into place with the center latch. Push down
on the shelf to compress the weather-stripping while holding the top latch
piece up in tension against the bottom latch piece. Mark the holes
for the top latch piece and drill them and secure the top latch piece.
Latch the tray closed and repeat the process for the latches at each end
of the tray.
Open the tray and attach small pieces of weather-stripping to the outside of the frame at the edges of the notches in the end pieces and at the ends of those pieces where they mate with the piece attached to the shelf. These small pieces should overlap edges just a bit to help keep water out.
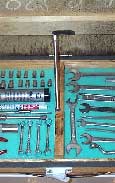 Cut
two pieces of the foam rubber to fit each compartment of the tray.
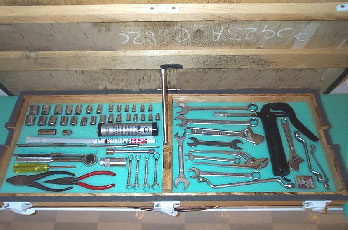
Place one piece in each compartment and lay out your tools as you want
them. Be careful to avoid putting anything really thick (like a grease
gun or cartridge) in the area that lines up with the notches in the end
and center pieces. Note from the picture that
Cut
two pieces of the foam rubber to fit each compartment of the tray.
Place one piece in each compartment and lay out your tools as you want
them. Be careful to avoid putting anything really thick (like a grease
gun or cartridge) in the area that lines up with the notches in the end
and center pieces. Note from the picture that 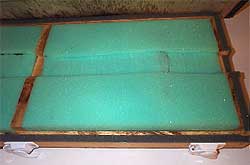 I
learned this the hard way. My tray still closes, but it is rather
tight. Mark around each tool with a pen and cut out a shallow piece
of foam so that the tool will sit in place. Cut a strip out of the top
pieces of foam where the board attached to the shelf will come down.
These strips should be about ½” deep at most. If you have
thick items as noted, cut a bit out of the underside of the top pieces
of foam so they fit better. You can find those spots by placing the
top piece of foam in place and cutting all the way through at the ends
of the thick items. Then turn the top piece over, locate the cuts
you made and remove a bit of foam.
I
learned this the hard way. My tray still closes, but it is rather
tight. Mark around each tool with a pen and cut out a shallow piece
of foam so that the tool will sit in place. Cut a strip out of the top
pieces of foam where the board attached to the shelf will come down.
These strips should be about ½” deep at most. If you have
thick items as noted, cut a bit out of the underside of the top pieces
of foam so they fit better. You can find those spots by placing the
top piece of foam in place and cutting all the way through at the ends
of the thick items. Then turn the top piece over, locate the cuts
you made and remove a bit of foam.
My entire tray weighs 21 pounds with the tools in it. The tools account for half of this weight, so the tray adds relatively little weight to the car. My tray holds:
· SAE sockets from 3/16” to ¾”
· Metric sockets from 4mm to 19mm
· Ratchet and two extensions, and 3/8” to ¼”
drive adapter
· Spark plug socket
· Pliers/wire cutters, needle nose pliers and
channel locks
· Two sizes of crescent wrench
· Assorted open end, box end and combination wrenches
· A slot and Phillips screwdriver
· A grease gun, spare cartridge and flexible hose
· A box of spare fuses
· A set of windshield wiper blades
 Like
the tool tray, the storage box is constructed from plywood and small pieces
of wood, and is glued and screwed together. The required tools and
materials will be similar. This project assumes your car has the
floor boards extended behind the passenger area. In our car
Like
the tool tray, the storage box is constructed from plywood and small pieces
of wood, and is glued and screwed together. The required tools and
materials will be similar. This project assumes your car has the
floor boards extended behind the passenger area. In our car 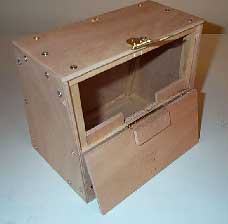 they
extend back about 6” and the battery is mounted on them. It was behind
the driver’s seat, but I moved it to the passenger’s side for better weight
distribution when driving alone. Because the brake line and the emergency
brake cable are on the passenger’s side in our car, the space available
was just enough for the battery. The storage box could have been
a bit bigger than I made it, but I used the Okoume left over from the tool
tray project.
they
extend back about 6” and the battery is mounted on them. It was behind
the driver’s seat, but I moved it to the passenger’s side for better weight
distribution when driving alone. Because the brake line and the emergency
brake cable are on the passenger’s side in our car, the space available
was just enough for the battery. The storage box could have been
a bit bigger than I made it, but I used the Okoume left over from the tool
tray project.
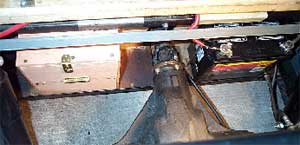
The part of the storage box that is against the plywood
panel behind the seats can be built at an angle to  match
that panel and provide
just a bit morespace. In our car, that panel is at a 15 degree angle
from the floor boards. There is a piece of wood that runs the width
of the car at the bottom of the plywood panel. That piece is 5/8”
thick in our car. Rather than notch the box, I cut another piece
of wood 5/8” thick by about 1 ¼” wide and the length of the box.
That piece sits on the floor boards right up against the angle iron.
The box then sits level on those two pieces of wood. There are 1
¼” screws that go through the bottom of the box and through the
new piece of wood and screw into the floor boards. There is a shorter
screw that goes through the ‘back’ of the box and into the plywood panel
behind the seats. Ignore the pieces of wood in the upper left of
the photo. They were a discarded idea.
match
that panel and provide
just a bit morespace. In our car, that panel is at a 15 degree angle
from the floor boards. There is a piece of wood that runs the width
of the car at the bottom of the plywood panel. That piece is 5/8”
thick in our car. Rather than notch the box, I cut another piece
of wood 5/8” thick by about 1 ¼” wide and the length of the box.
That piece sits on the floor boards right up against the angle iron.
The box then sits level on those two pieces of wood. There are 1
¼” screws that go through the bottom of the box and through the
new piece of wood and screw into the floor boards. There is a shorter
screw that goes through the ‘back’ of the box and into the plywood panel
behind the seats. Ignore the pieces of wood in the upper left of
the photo. They were a discarded idea.
The box was made using scrap pieces of wood about ½” square. This wood was cut to fit inside each place where two pieces of the box mated. The plywood was glued and screwed to these pieces of wood. The ‘front’ of the box was made in two pieces. The lower piece was glued and screwed in place. The upper piece was hinged to the lower piece and fits inside the edges of the sides and the top. The front piece is secured by a small hasp that is screwed to the top and laps over the upper edge of the front.
TOOLS SUPPLIED BY MORGAN IN 1982
by John Worrall
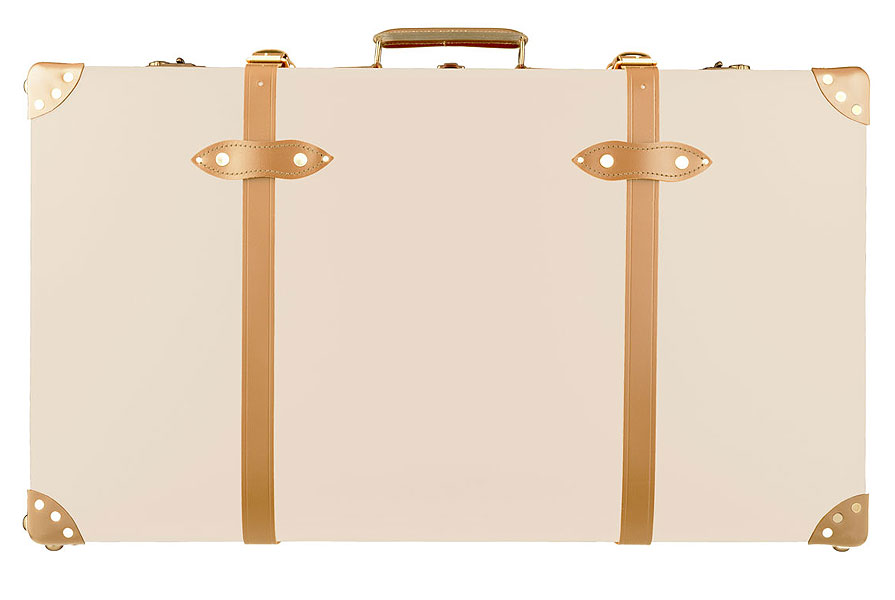
LUGGAGE (Packing your classic 2-seater)
by Lorne Goldman
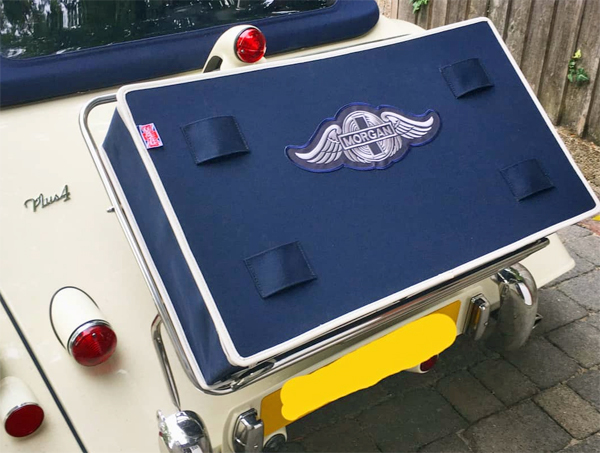
| Your rear luggage must meet the following conditions at a strict minimum: 1. The car must be balanced. Cantilevering weight behind
the axle multiplies its effect. We soon found that ruins all the
fun of driving a car you bought because it was fun to drive!!! It
is also dangerous. It can be mitigated by packing the heaviest
items in the axle compartment. Over the axle, weight even has a
beneficial effect. Gladstone bags match the angle of the axle
compartment rear and look great. I squeeze a laptop between them.
2. Whatever storage item one uses out back should NOT block
rear vision (aka the rear view mirror) That measurement is
18cm deep for us and we use 2 seater windscreens, not a 4 seater
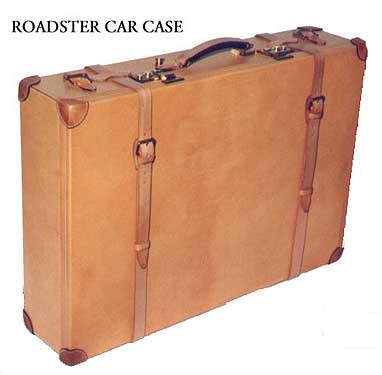
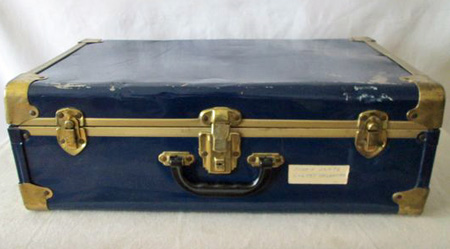
on a 2 seater car which became mandatory overseas. (year?) 3. It must be completely waterproof. NO fun arriving at a
hotel with your clothes soaking, or worse, their colours running
into each other. I find the otherwise lovely MMC luggage silly as
it requires the addition of a waterproof cover. That means your
Morgan luggage is more of a hassle than normal luggage! I have
found a hard-case, one that I can left easily when full, works.
|
 1. Packing Strategy
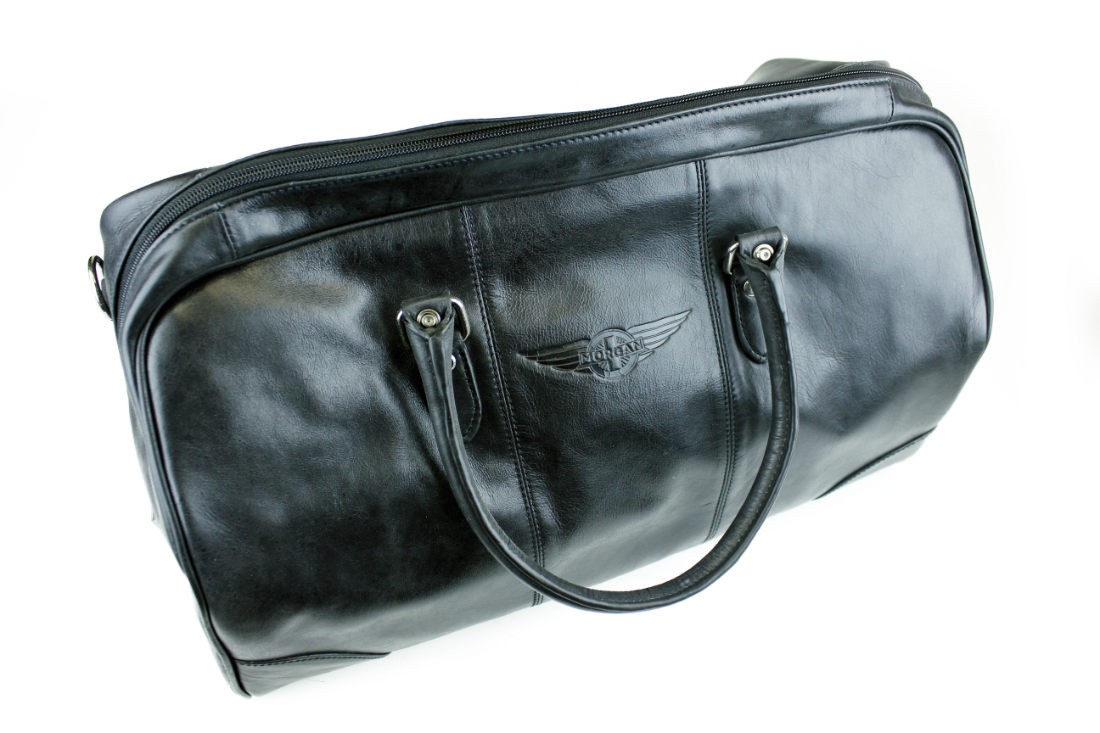
 end pockets. Important pharmaceuticals in front or side pockets.
Total length of two full bags must not exceed the length of the rear
compartment or obstruct your seat positioning. We
have access to leather makers, so we had two made in leather that
matches our Morgan interior. "You can find something suitable in a
complimentary colour "off the rack".
end pockets. Important pharmaceuticals in front or side pockets.
Total length of two full bags must not exceed the length of the rear
compartment or obstruct your seat positioning. We
have access to leather makers, so we had two made in leather that
matches our Morgan interior. "You can find something suitable in a
complimentary colour "off the rack". | WATCHPOINT: For those of you with the "easy up" hood system, do your best. These hoods and the longer side-screens for the Long Door cars, severely limit storage for the occupants' personal usage and make distance mogging less convenient or pretty. For the cogniescenti, the bunched up hood (when down) prejudices the iconic lines of the Morgan side view eveidence of after-thought design. These changes should have been better thought out but at the time, Charles was more interested in securing Steve Simmonds famous business and creating a longer door. Village thinking. Ergo enter the Deadly Morgan Domino Effect. The saddest fact is that by the time these changes appeared, the MMC had finally mastered a leakless traditional hood and leakwise, the new hoods retrogressed leaking 60 years and made the new cars look sloppily designed. Mine (2002) was the last traditional hood system made for many years but they are again an option. It is inexplicibly expensive, However, I recommend it as an option to insist upon. |
 for a Morgan to use high speed
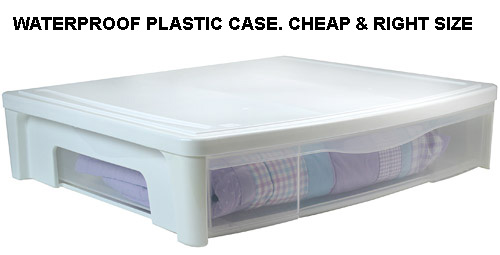 Motorways, Autoroutes, Interstates, is when it is raining. (They are not a preferred venue in any other weather for this Mogger. After all, what for?). If
the primary goal of luggage is to keep your clothes safe and unharmed,
why on earth would you spend one pence on something that is unfit for
the purpose you intend to make of it??!! This goes for any luggage that
requires a cover (safety condom) to keep it water-proof in the rain.
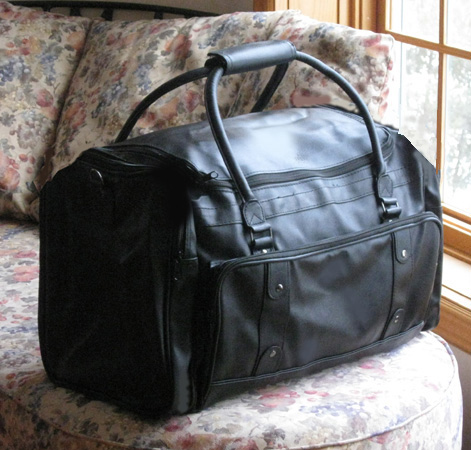
What silly nonsense! Also, we adore leather, but leather is heavy and is not waterproof. Once soaked it is even heavier and smells. We have
to be smarter than that. Happily there are now space age materials out
there that look like leather, are very light and completely waterproof.
Motorways, Autoroutes, Interstates, is when it is raining. (They are not a preferred venue in any other weather for this Mogger. After all, what for?). If
the primary goal of luggage is to keep your clothes safe and unharmed,
why on earth would you spend one pence on something that is unfit for
the purpose you intend to make of it??!! This goes for any luggage that
requires a cover (safety condom) to keep it water-proof in the rain.
What silly nonsense! Also, we adore leather, but leather is heavy and is not waterproof. Once soaked it is even heavier and smells. We have
to be smarter than that. Happily there are now space age materials out
there that look like leather, are very light and completely waterproof.

 leather straps to keep the luggage on the rack (I supplement this with a combination
 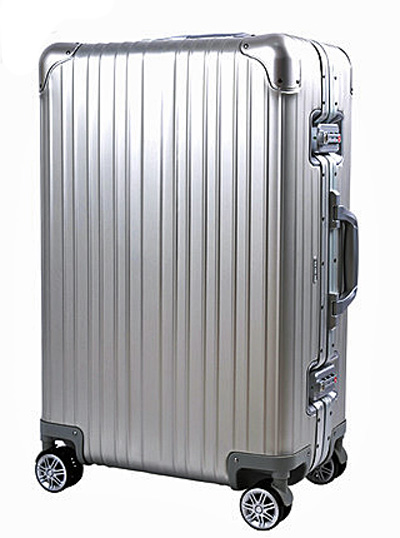 lock bicycle strap). The luggage is leakless and reparable.
 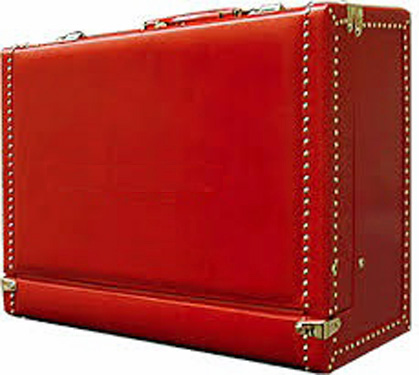 Of course, if mogging more than 2 nights doesn't happen in your life
and aesthetics are irrelevant then almost anything water-proof at speed
will do. However, try to avoid natural fabrics, as they smell
when wet, and that will quickly become a permanent condition unlikely to impress when checking into a hotel or flight.
Of course, if mogging more than 2 nights doesn't happen in your life
and aesthetics are irrelevant then almost anything water-proof at speed
will do. However, try to avoid natural fabrics, as they smell
when wet, and that will quickly become a permanent condition unlikely to impress when checking into a hotel or flight.