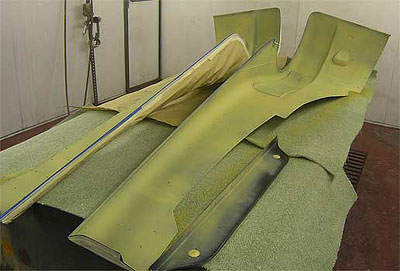
| READY FOR PAINT PREPARATION | 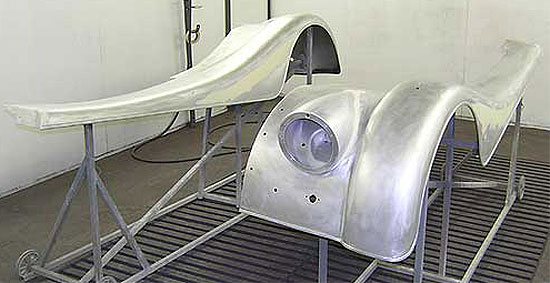 |
| ETCH PRIMERED | 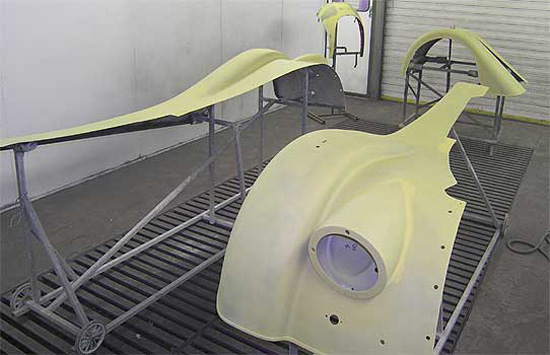 |
| BUILD PRIMERED | 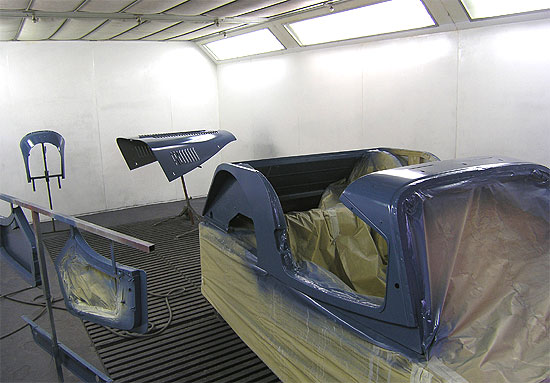 |
| TOP COATED! | 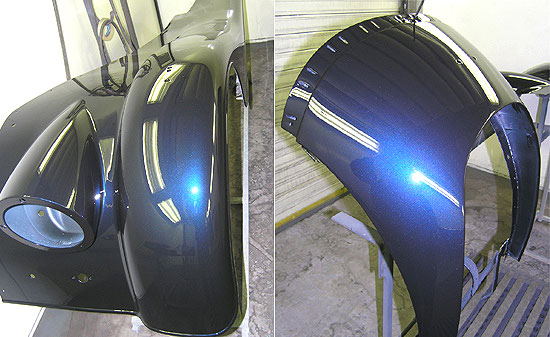 |
The paint process is involved...with many watchpoints. The surface must be perfectly smooth with all imperfections removed. This is a VERY tedious task involving much filling sanding and filling and with the older wings. With the Superform wings, the work is MUCH less as they arrive near perfect. A paint job with Superform wings is less costly than a paint job with pre-Superform wings.
N.B. There are a number of generations of Superform wings now, each attempting to tweak out earlier problems. There are different watchpoints with each. The wings here are early 2006s and come with a plastic protector under the impact point..(there is already another generation since and 4-5 before). We assume that the bubbling reaction between the edge molding's epoxy and the paint has been solved. It has been speculated that this could be dealt with using a lower paint baking temperature as the molding epoxy does not like heat. However, a lower temperature means that the paint must be baked longer to properly set. (If it isn't, one switches from a bubbling problem to a general issue the hardness of the whole job.)
Longer baking times are much harder to arrange in a Factory production line where bake room time is at a premium rather than an well-equipped private restorer who does not have production line pressures on his facilities.
After preparation, the aluminum
metal must be etched coated first. After that, a build primer is used that
makes surface super smooth for the paint. The build primer comes in a number
a base colors and the one used is that which is closest to the final color.
This cuts down on the paint necessary to achieve the color wanted. Too
much paint can be as bad as too little paint. The next step is a "wet flat"
with 1000 grade Wet or Dry paper and then it's top coat time. The actual
time to paint a Morgan from repaired and filled bare metal panels is about
50 hours (that's labor without drying times) at least 40 of those hours
are hard graft with a rubbing block (machines are not much use on panels
with such complex curvature). Finally, it is time for the top coats
and then a clear coat.
| READY FOR PAINT PREPARATION | |
| ETCH PRIMERED | |
| BUILD PRIMERED | |
| TOP COATED! | |
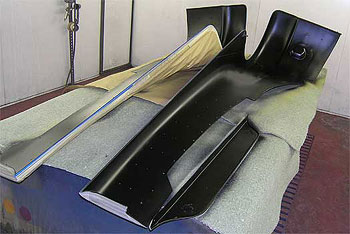
For most painters/restorers,
the job would now would move onto assembly. But not at Tudor Motor. There
is always the other side to deal with! After baking, the wings are retaped
to protect the painted surfaces and the wings are turned over and placed
on soft foam.
The first coat is again an etch primer, the second is an anti-chip coating for impact protection and the last coat is black gloss.
There will be no application of Pickersleigh goo.
 N.B.
Experience
with pre-Superform Morgan alloy wings suggests that precautions must be
taken to protect them against impact and consequent star fractures on the
paint surface. I have seen many attempted solutions, from the use of large
plastic underwings to rubberized floor tiles in the high impact areas.
The smartest solution I have seen for the older wings is the use of a professionally
sprayed on "truck liner" (the stuff you see now on the floor of the
carrying section of pickup trucks these days.
N.B.
Experience
with pre-Superform Morgan alloy wings suggests that precautions must be
taken to protect them against impact and consequent star fractures on the
paint surface. I have seen many attempted solutions, from the use of large
plastic underwings to rubberized floor tiles in the high impact areas.
The smartest solution I have seen for the older wings is the use of a professionally
sprayed on "truck liner" (the stuff you see now on the floor of the
carrying section of pickup trucks these days.
The Factory has been using an "optional" undercoating for the last 15 years. This consists of a non-hardening thick crawling black goo that is sprayed over everything, bolts, wings, wiring, etc.. making working on the car a filthy business and prejudicing access to electrical connections and hiding problems that could otherwise be seen and addressed. If you can at all avoid having this done to your car, do so. For some reason, the practice has continued even after all wings on all models sold changed to the much harder, impact-resistant Superforms.
 Much
of stock Morgan bright work and light plinths are plastic (painted or chromed
over) or alloy. This makes them very vulnerable to time, and this car's
collection was no different. Replacements are necessary throughout. Mirrors,
windscreen
Much
of stock Morgan bright work and light plinths are plastic (painted or chromed
over) or alloy. This makes them very vulnerable to time, and this car's
collection was no different. Replacements are necessary throughout. Mirrors,
windscreen 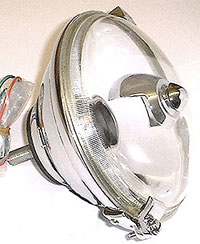 brackets,
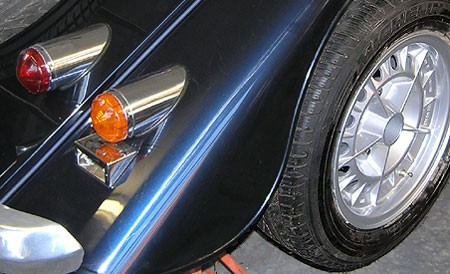
rear indicator plinths, rear brake light plinths, rear reflectors and front
indicator plinths.To bring out the dark Bentley Sapphire color, we opt
for something more long
brackets,
rear indicator plinths, rear brake light plinths, rear reflectors and front
indicator plinths.To bring out the dark Bentley Sapphire color, we opt
for something more long 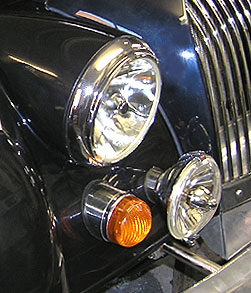 lasting
and brighter than Factory plastic. All items are replaced with bright
polished stainless items from Heart
of England Morgans. These will not only last forever, but look glorious
against the lustrous dark paint and the refurbished Morgan Plus 8 alloy
wheels.
lasting
and brighter than Factory plastic. All items are replaced with bright
polished stainless items from Heart
of England Morgans. These will not only last forever, but look glorious
against the lustrous dark paint and the refurbished Morgan Plus 8 alloy
wheels.
The old fog lamps (Lumax)
hanging on the bumpers supports are replaced with rear mounted Lucas SLR
spot lamps on a plinth match polished stainless Morgan spacer. The stock
headlamps are replaced with Jaguar XK120 tripod lamps with halogen lights...pretty
and also effective!