 1.
A
soldering gun. I recommend a gun that heats up 200+ waits A soldering
iron will work, but doesn't have the abilities of a real gun.
1.
A
soldering gun. I recommend a gun that heats up 200+ waits A soldering
iron will work, but doesn't have the abilities of a real gun.
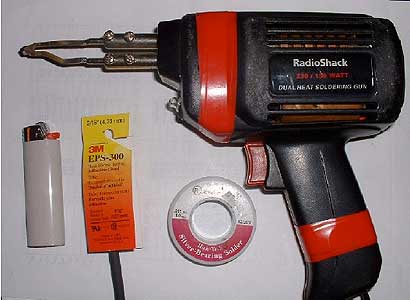
Now, to start, you need the right tools:
1.
A
soldering gun. I recommend a gun that heats up 200+ waits A soldering
iron will work, but doesn't have the abilities of a real gun.
2. A regular cigarette lighter. You can spend the big money on a heat gun, but it won 't go in all the tight areas wires can be found in a vehicle.
3. Solder, I recommend 0.015 diameter solder for its ease of use.
4, Flux. This is a greasy looking substance that is a must for good soldering. You can buy fluxed wire but I prefer a small can that I dip my soldering gun into before I heat the solder. The "hissing" flux also confirms that the gun is ready.
5. Heat Shrink Tubing. I recommend adhesive lined. You can buy cheaper tubing, electrical tape, etc, But if you use something other than what I recommend I can't be blamed!
6. Wire stripers Make sure they are sharp, you don't want to stretch the wire when you strip an end off You don't want strippers that cut half the wire with the insulation. I use many different types for different jobs. I like the strippers that overlap the wire for an ideal cut.
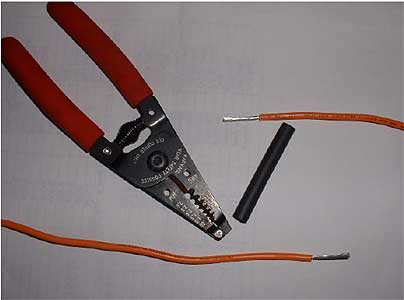
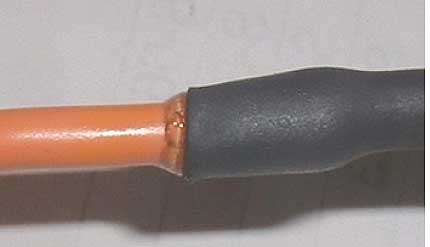
Cut a 2" piece of Heat Shrink Tubing and strip 3/4" of
the wiring back on both wires to be connected. Choose a diameter of heat
shrink that will seal the wire when shrank, do not pick a size that will
not shrink down enough. Most Heat Shrink will list a diameter before and
after heating.
 Slide
the Heat Shrink Tubing over the wire before you connect them! Put the heat
shrink over the wires before you solder them together, I cannot say this
enough. Once they are soldered it would take some voodoo magic to get the
heat shrink on without braking the solder. SLIDE IT ON!
Slide
the Heat Shrink Tubing over the wire before you connect them! Put the heat
shrink over the wires before you solder them together, I cannot say this
enough. Once they are soldered it would take some voodoo magic to get the
heat shrink on without braking the solder. SLIDE IT ON!
Now its time to get the wires together. Slide them together by pushing then into each other. Then twist the wires, this interlocks them for the LIFE! Just follow my simple pictures:
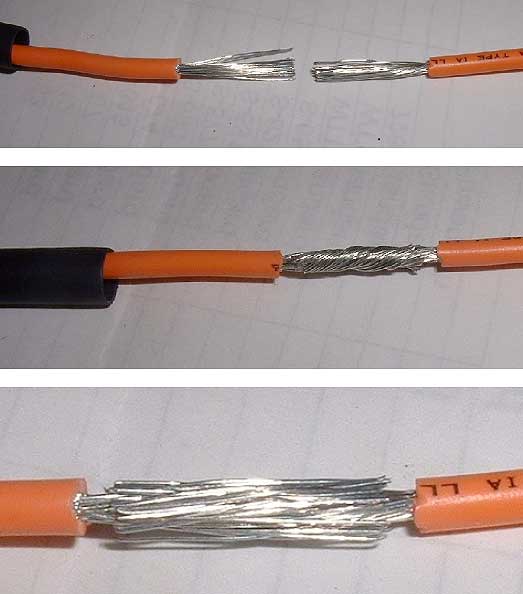
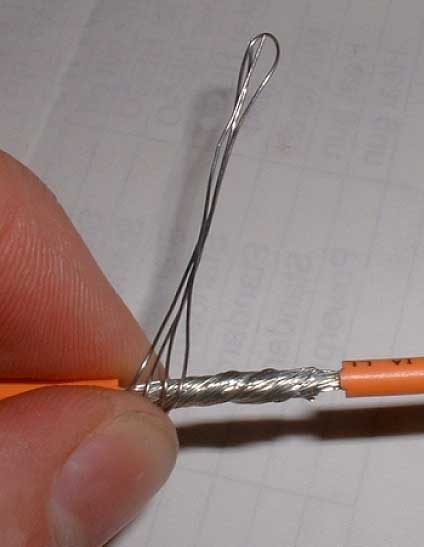
Brake off a good 8" piece of the thin solder. More or
less depending on the wire size you are connecting. The amount to use is
a judgment call. Now wrap the solder around the wire.
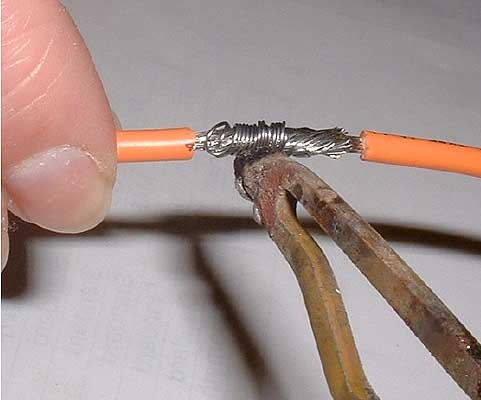
Now, dip the soldering gun into the flux and then to
the underside of the wire directly on the solder. Always us a flat spot
not the tip. The gun will melt the solder immediately touching the tip.
This first melted solder will act as a heat sink heating up the wires quickly
and melt the rest of the solder.
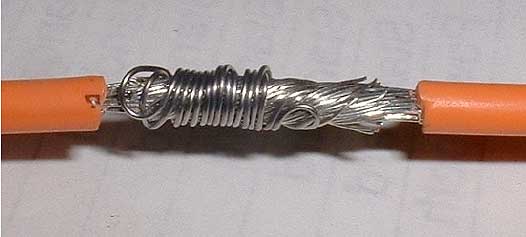
The solder will melt 100%, and the wires will become loose.
The time this will take depends on the wattage output of the gun you're
using. Remove the soldering gun from the wire as soon as all the solder
melts and they will cool. You just soldered!
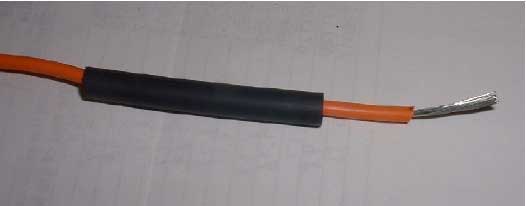
Good job, but you're not done, it's time for the Heat
Shrink Tubing. This is not the time to get cheap as I said on the first
page, electrical tape won't last 6 months!
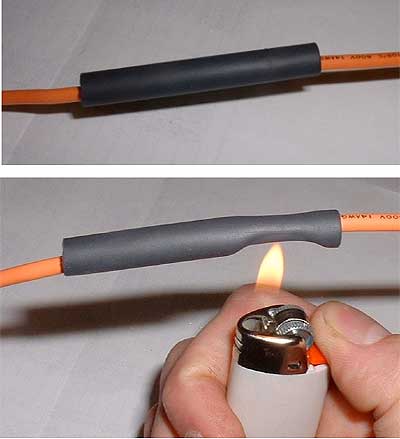
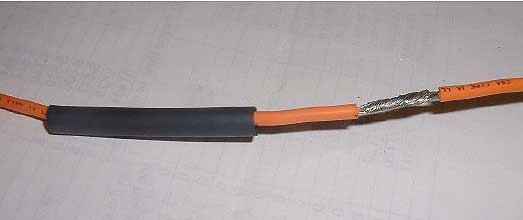
Cover the solder joint with the Heat shrink evenly.
Get out that lighter and shrink the tubing. This is where
cheap people will fail. Get the adhesive lined heat shrink tubing. It won't
melt and it has an adhesive Liner that glues and seals the solder joint
for life.
The adhesive glue should squirt out the ends a little. If you cheap out now it could melt away and you just lost the solder.
You're done!