 itself from the gearbox as well though I was able to move the propshaft out of the way enough.
 There are two general types of gearbox seals. The British, European and some of the Japanese use seals with a small classy looking flexible material (silicone or some such) edging them. The Americans are just metal edged and they jam thing in metal into metal.
For all this the American seals lasts much longer.
So you can buy the original part for $35 US and wait 'til it arrives, or, after you have removed the seal, you can take it to a gearbox place and the guy will find one that suits for $5 US..
This repair will take about 2.0 hours depending on your luck, how quick you are and whether you are working alone.
First drain some of the gearbox oil...not all is necessary because the seal is above the bottom of the gearbox. Next drain all the differential oil because (though the shaft is above the bottom) old and new differential oils don't mix. Remove at least one car seat and the prop shaft cover. BTW, on my car, the trick is to see whether you can now access the rear of the bolts holding the propshaft UJ flange to the gearbox flange..the gearbox cover might be in the way. If it is, your choice is to remove the gearbox cover as well, or cut a small appropriate access hole in the gearbox cover.
After marking the propshaft and gearboxes flanges for a reference, use spanners to remove the bolts. In removing the flange itself, first test the torque with a torque wrench, (start it low and adjust upward until you DON'T hear a click) and note the torque setting.
After you have removed the flange, the large center bolt becomes visible and the torque on this should be tested as well before it is removed. NOW, with the correct socket, a breaker bar and a pipe extension, try to remove the large bolt from the center of the rear gearbox flange. If you can't, get a impact wrench. Remove the flange and voila (!)...there is your rear seal. Pry it out and put it aside if you are on your way to the gearbox shop.
Depending on which type of replacement you chose, use gasket silicone or alternatively metal-on-metal-only silicone with the American style seal and align them carefully in the hole. Us techno-wizard types use a smooth ended 2x4 or make a board with a hole that touches the whole edge of the seal at once and then tap with another board until it is aligned properly and then then hammer the thing in solidly. The boards are made to allow a fit of the seals in evenly which is very very important.
Reassemble in the reverse order of disassembly and torque the bolts to the values and markings you noted and made.
CHANGING YOUR DIFFERENTIAL
REAR PINION SEAL (Salisbury)
by Lorne Goldman
Drain all the differential
oil. Angling and space will be an issue here and I suggest you remove at
least the prop shaft cover. You may have to remove the propshaft
itself from the gearbox as well though I was able to move the propshaft out of the way enough.
Detach the propellor shaft flange from the differential, first mark both flanges with a marker for reference. THE PROPELLOR SHAFT FLANGE AND THE DIFFERENTIAL FLANGE MUST BE BOLTED IN THE SAME POSITION THERE WERE IN WHEN YOU REMOVED THEM. (See drive shaft vibration). Then test the torque of the flange bolts with a torque wrench, start it low and adjust upward until you DON'T hear a click and then don't tighten. Note the torque settings. (It should be around 160 lbs/ft. or 217nm)
Move the prop shaft to the side and the large bolt holding the flange to the differential assembly is now visible. You must test its torque. (you will be surprised). This is the (no) fun part. The torque is so high that I had to rent and use an impact wrench. If you can get it off with a breaker bar with a pipe extension and a pipe wrench for bracing, more power to you but an impact wrench will make it an easy job in a tight place. Once again, test the torque of the fitting and note the figure. After that huge nut is out, remove the flange and there is your other seal. This one will probably be metal on metal.
Remove the old seal, examine it to see where the problem was. Then carefully align and position the new one with the appropriate silicone. On this side, (if memory serves) I used a pipe and wood buffer to tap the seal into place.
Re-assemble, (torquing to previously noted amounts) and aligning the marks on the propellor shaft. Then fill the differential., jack the back wheels, put on the prop shaft cover loosely to protect yourself and run the car to check for leaks. If none...complete the re-assembly and check against at 20 miles, again at 100 and then at 1000. Now! Was that tough? (evil grin!)
One other note, the cause
of the leaks are important. If you have the elliptical rear shock system
(the hoop) from the factory that may be the cause. See Rear
Suspension Kit for why.
| SALISBURY AXLE PINION
SEAL ISSUE II
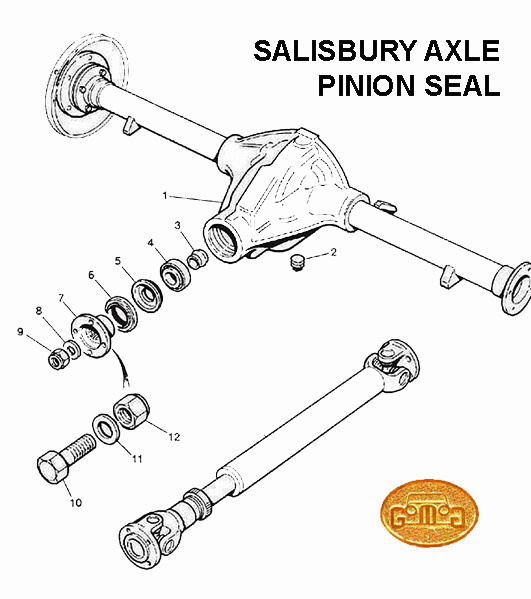
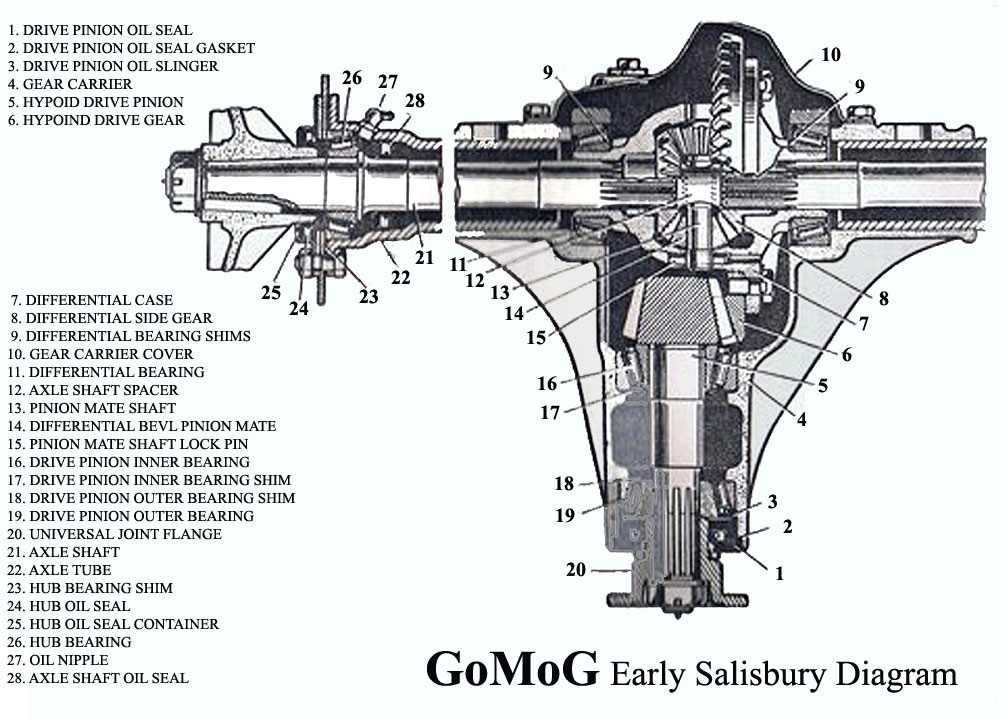
by Frederick Schuchard and Lorne Goldman On occasion, we receive emails complaining that the obvious leak at the pinion seal has not been cured by changing the seal, even a number of times and even when more modern seals (recommended) are used. The owners and their mechanics are mystified by this. Often, (refer to the Salisbury diagram) the cause turns out to be that the polished surface of the drive shaft flange has developed a groove worn into it from the abrasion of the original seal and the grit that works its way into that area and then held by the seal. It can be cured with good deal of polishing with different grits of emery cloth to get it smooth again. If the surface is too worn, it can be sleeved and a slightly oversized seal installed. Until this repair is carried out, the leak will persist. |
3HA Salisbury
oil seal is stamped as follows 2ha-019
The current seal is a TIMKEN 5778 (courtesy of Bill Beecher 2018!)
int. dia (metal) approx.43mm
int. dia (skin) approx.
36mm
7HA Salisbury oil
seal is stamped Autospin as 2871376-d3
int. dia (metal) approx
40mm
int. dia (skin) approx 31mm
The 7HA seal was introduced in 1961
7/8 UNF
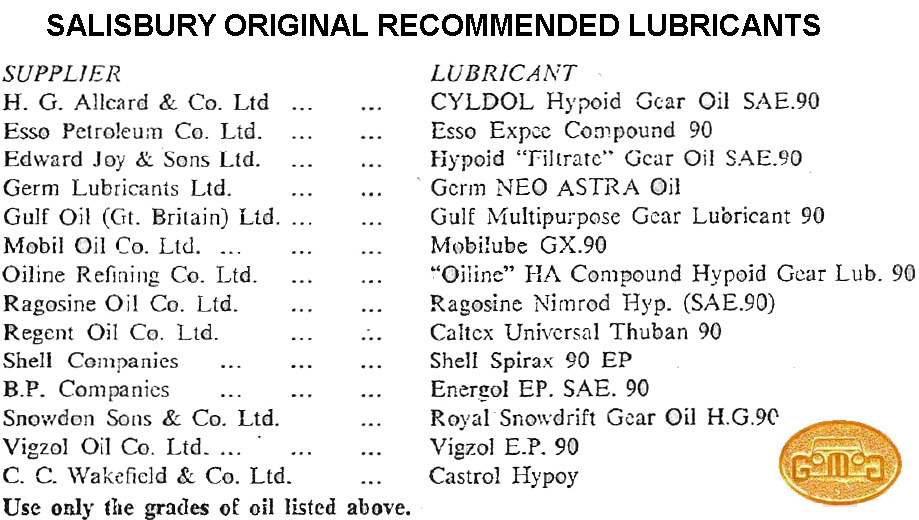
ORIGINAL SALISBURY RECOMMENDED LUBRICANTS
Because BTR changed the size of the crown wheel and pinion.
They went from an 8” diameter to 8.8” or similar, The
differential carrier in the middle of the axle is also physically
larger and heavier. Morgan did not want to invest in new CWP sets with
different ratios, though they were made available by Billy Bellinger for a short while.
BTR also no longer makes the axle or buy spares so they may dry up in a few
years as they did with the LT77 (Plus8 and Plus 4s)
PLUS 4 (1959) GEARBOX LEAK
by John Sheally II
After pulling the gearbox on my 59 +4 to investigate a massive leak, I found this fibre plug loose enough to spin in place and it seems that this was the cause. Is this plug used as an oil seal it is in front of the layshaft which seems to be drilled out for some sort of oil galley. Is it common for this fiber plug to cause such a huge leak?
That fiber plug can be the cause of a leak. It is designed to fit flush in the hole and be pressed tight when the two items are drawn together with bolting. It usually works because of the tight fit but I always put theplug in place then seal it with high grade RTV l and let it sit overnight to dry before I bolt thing up thus no leak occurs.
That will take care of that but while you are there also take a look to see if you are getting oil leaking from your rear main seal or the rear main itself. Usually on a Plus-4 that is where your biggest leak comes from. The reason for this is that the rear main is inserted with a 1/4 inch felt seal on each and the felt just conducts oil through it forming a "STANDARD "TR" LEAK" out the bottom hole in the bell house onto the ground forming a puddle of oil where ever you go. This was corrected, in my case, by packing the rear main cap with strips of a cotton "T" shirt soaked in Indian Head Shellac. To do this torque the cap into place and proceed to push the strips into the groves on each side of the cap with a blunt punch until you can't get anymore of the material in to the groves leave about a 1/4 inch unfilled with the material and add a good sealer in the 1/4 inch such as high grade RTV and let it sit overnight to dry.
Put RTV on the back side
of both halves of your rear main seal before you bolt it up also for a
good seal there also. The rear main seal should be in place before the
rear main cap is filled. Bolt your oil pan in place and enjoy a oil leak
less Plus-4.
LT77 GEARBOX OIL (Plus
8s (1977 to 2004) and Plus 4s (1987 to 2000)
by Lorne Goldman
The need to choose the right gearbox oil for is absolutely vital. Sadly, these days there is so much wrong information on the internet that disasters happen regularly. It even happened to me at the beginning of my Morgan life decades ago!
When the LT77 (so named as it came from from Leyland Transmissions with a 77 mm shaft spacing) was first fitted by LR/Rover (and others like Morgan) back in 1977, the recommendation was for the stock manual gearbox oil (MTF) of that era. Sadly, this snackered (aka broke) the boxes. The LT77 is unusual in that it has a tiny internal pump with a little plastic impeller. When the car is cold, the thicker MTF fluid causes the pumps grief, quickly destroying them. Lubrication is consequently prejudiced and the internals would eat each other within a few kilometers After a few attempts at better solutions, they "temporarily" went to the thinner ATF in hope the pump could handle that until they found something that was a proper match. That was not an ideal solution but it had the advantage of working and it was only going to be short-term. However, nothing was done and it was left as since..and now the box is obsolete, But ATF Dextron III was the recommendation for the LT77. This is dangerous as non-Morgan mechanics will automatically put in something that will cause you MUCH sadness. Sadly, Dextron ATFs have been discontinued. Many fluids are being tried and many boxes are quietly being destroyed, requiring full rebuilds.
The best in the business, continue to recommend an ATF compatible with Dextron 2/3.
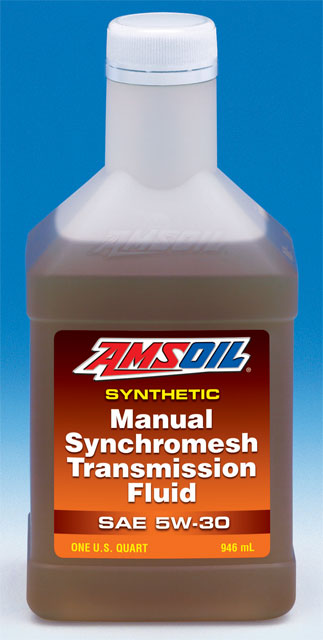
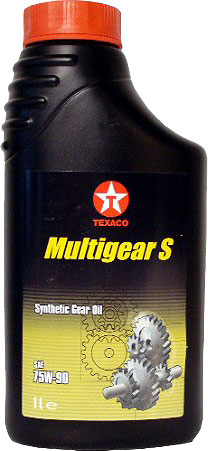
| Major WATCHPOINT: At the point in time (2024), here are three of the recommended LT77 lubricants you will be safe with along with Valvoline Dex/Merc in the blue bottle |
The 2wd LT77 capacity
is officially 2.6 liters..but I find it takes less.
CHANGING
THE GEARBOX OIL
by Lorne Goldman
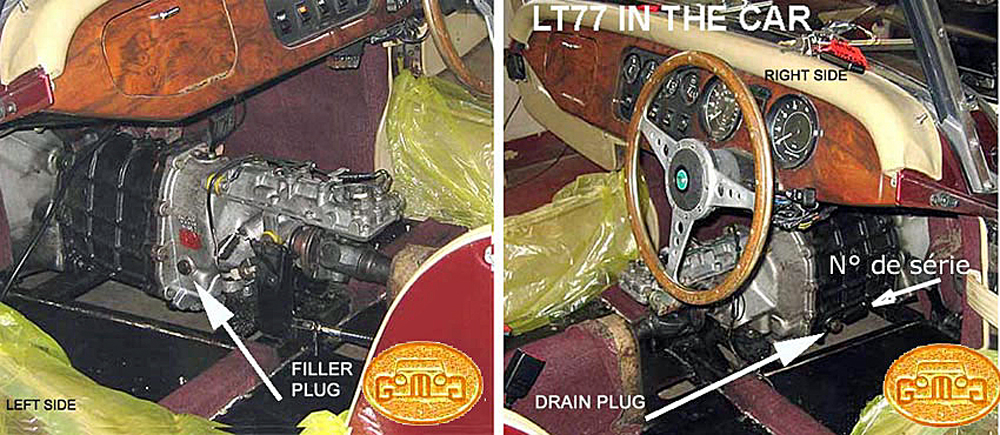
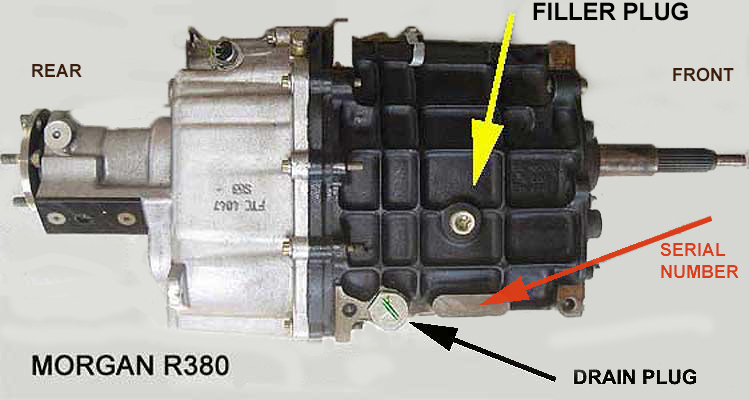
If you do not have a car lift, changing Morgan LT77 (R380 below) gearbox oil is done though the access panel in the gearbox cover. The placement on the panel will vary, depending on the model, gearbox and year of the Morgan. For example, the LT77 cars (Plus 8s from 1977 to 1995ish & Plus 4s from 1987 to 1995ish), the panel is on the left hand side. For R380s after (Plus 8s from 1995ish to 2004 and Plus 4s from 1996 to 2002) look further below.
 WATCHPOINT The
LT77 casing has had a number of different access holes for
filling and draining at different times and different sides of the WATCHPOINT The
LT77 casing has had a number of different access holes for
filling and draining at different times and different sides of the 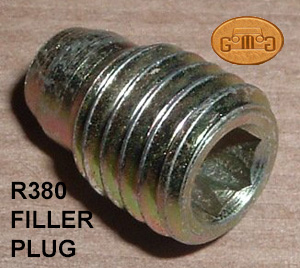 box..on both sides of the box. Most will be blocked
off and the placement of the ones you need FOR A TWO WHEEL DRIVE
VERSION OF THE GEARBOX can be whimsical. I normally find the
larger DRAIN plug shown on the right. Filler holes can be either on the
left. The originl LT77 filler plugs I have seen are original a
threaded plug with a squared off exterior looking like a cube on the
left. They
could be changed to the later R380 plug or the later R380 plug can be
changed for thye earlier LT77 plug, interchangeable The R380 plug is
the same
size and fit, made for an TORX 55 key and pictured on the the left and
found on the right of the box.
I have easily removed the R380 filler plug (I changed all three of my
earlier Plus 8s to R380s long ago) with an Allen key. Others concur,
one informing me (or 3/8" square drive depending on the variant) and
another stating that he used a large flathead screwdriver.These large
plugs should only be only mildly torqued 25 Nm (approx. 18 lb-ft) and
not with eye-poppinbg muscle. I wrap mine with petroleum safe PTFE
tape. The drain plug is torqued until 30 Nm (22 lb-ft) box..on both sides of the box. Most will be blocked
off and the placement of the ones you need FOR A TWO WHEEL DRIVE
VERSION OF THE GEARBOX can be whimsical. I normally find the
larger DRAIN plug shown on the right. Filler holes can be either on the
left. The originl LT77 filler plugs I have seen are original a
threaded plug with a squared off exterior looking like a cube on the
left. They
could be changed to the later R380 plug or the later R380 plug can be
changed for thye earlier LT77 plug, interchangeable The R380 plug is
the same
size and fit, made for an TORX 55 key and pictured on the the left and
found on the right of the box.
I have easily removed the R380 filler plug (I changed all three of my
earlier Plus 8s to R380s long ago) with an Allen key. Others concur,
one informing me (or 3/8" square drive depending on the variant) and
another stating that he used a large flathead screwdriver.These large
plugs should only be only mildly torqued 25 Nm (approx. 18 lb-ft) and
not with eye-poppinbg muscle. I wrap mine with petroleum safe PTFE
tape. The drain plug is torqued until 30 Nm (22 lb-ft)
|
Lift the shroud from the sides of the gearbox cover to find the gearbox cover access panel. (There are also panels to access the propshaft and U-joint grease nipples and often one to allow the replacement of the reverse light switch.) Remove it. On the later cars with the aluminum covers, you may have to move the inside insulation aside to see the gearbox and the filler plug. The drain plug is on the bottom...unless it is a model where there is no separate plug to empty the gearbox. Please ask me. After emptying the oil, open correct panel, remove the gearbox filler plug and fill to that level.
Dealers (who invariably have a lift) drain and fill the gearbox (and grease) from below with the car on the lift.LT77 DRAINING & FILLING POINTS
These
can be hard to pin down as they could change from LT77 year and
variants, RWD or 4WD. The drain is at the bottom of one side and the filling point is up one side or the other. LT77 gearbox fluid should be changed every 12000 to 16000 kilometers.
R380 FILLING/DRAINAGE POINTS & FLUIDS (revisited in March 2024)
 A. a large Allen key, to fit the filler
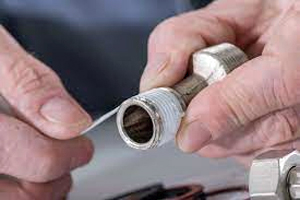 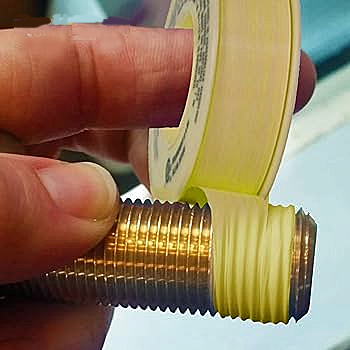 WATCHPOINT: PTFE
tape when white is called "plumber's tape" and can be used autotively
with coolant connections. When dealing with petroleum connections, one
should use petroleum-resistant yellow tape. They come in small rolls. WATCHPOINT: PTFE
tape when white is called "plumber's tape" and can be used autotively
with coolant connections. When dealing with petroleum connections, one
should use petroleum-resistant yellow tape. They come in small rolls. The only trick in using them, is that you should wrap them tightly in the correct direction so that the tape has no chance of unravelling when you thread what ever you wrapped with it. You do not want pieces of tape circulating in any system....VIDEO |
 |
The R380 (R for Rover and
380 for its minimum capacity for torque) was made to replace the LT77.
It is a radically altered version of the LT77. The dimensional match is
very good and with some fiddling, an R380 can replace a LT77. However,
you would be hard put to find a single identical internal between the LT77
and the R380. Originally, the first versions and their manuals for the R380 called for an ATF-F as well. However, over time the box was improved the recommendation changed to one of the more modern brews, a MTF 94. Many of the fluids recommended for the Morgan gearboxes or axles are not to be found in North America. The recommendation for R380s from experts in the United Kingdom was for Castrol SMX-S...(discontinued now and replaced by Castrol Syntrans at the right). Now the Syntrans It can safely be replaced by either of the two alternatives shown here. Three new alternatives (2024) are HERE The R380 capacity is 2.667 Litres absolutely dry and more like 2-2.1 L when I am refilling. I change my R380 fluid every 20-25,000 kilometers |
 |