WINDSCREENS
UNHEATED I (Fitting)
by John H. Sheally
II and Lorne Goldman
If you are lucky enough
not to have one of
the post-1997 heated windscreens, your windscreen is quite simple
to replace. This is a godsend as Morgan windscreens, being flat glass,
break often and pit constantly requiring replacement if you want a
clear view. (any glass with even a tiny bit of curvature is MUCH stronger and pit resistant. A regular glass place (a 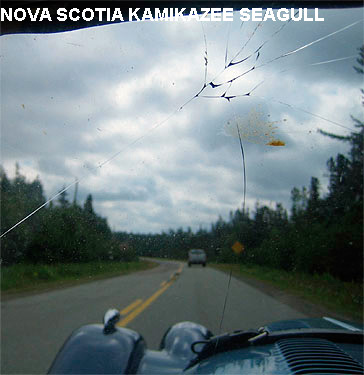 non-auto
glass place) is the best. They will always have shatter-proof
glass one hand of the same or near-same thickness. They use
it for
cabinet windows and coffee-tables. They also have considerably more
experience in cutting flat glass to size than any autoglass place
fitting pre-made stuff.
non-auto
glass place) is the best. They will always have shatter-proof
glass one hand of the same or near-same thickness. They use
it for
cabinet windows and coffee-tables. They also have considerably more
experience in cutting flat glass to size than any autoglass place
fitting pre-made stuff.
Go to the glass shop and
tell them you would like a new windscreen cut from a piece of "school bus"
glass. School bus glass is a standard stock item for glass cutters. You can also have a choice
of tinted glass or tinted with shading towards the top//a MUCH better
alternative (as well as aesthetically pleasing) than ugly sun visors.
| WATCHPOINT:
Here's a head's up. They will charge you for a standard sized
sheet of the relevant glass. However, the windscreen needs only 1/2 of
that stock piece and they will keep the rest. If
you are near home rather than mogging far away, after they give you a
quote, ask how much extra it will be to cut a second windscreen from
the same piece. This quite often catches them unaware and though they
will charge you a small additional fee to cut the second piece, you
still
come out ahead with a spare windscreen for the next time. |
Costs are
normally very
inexpensive (I paid the equivalent of 75 US for the last one in the
USA) or 100£ in the UK at a Morgan dealer. Many UK dealers will
keep exchange windscreens on hand for
pre-1997 Morgan classics. Takes only a few minutes to swap as they are
already fit into a frame. On the other hand, if the glass must be
cut and fit into the cleaned windscreen frame, expect a 60-90 minute
wait. However, some Morgan dealers carry pre-fitted windscreens,
frame and all. Brands Hatch -for example is one of these. Merely
minutes for a swap.
| WATCHPOINT 2: Many
of these screens are fit with the installation of a small rubber or
cloth "gasket" that goes around the glass as it slots into the frame.
All glass cutters will be able to manage this and have something that
will suffice on hand. However, silicone (RTV) will always be necessary
and can do the trick with or without that gasket. |
I change
my windscreens as needed (when mogging) or every 2-3 years as a regular maintenance thing as all flat glass screens
become pitted over time. My record between two Morgans was 5 windscreens in a 12-month period!
| WATCHPOINT 3: The Morgan
windscreens are held by 3 screws on each side. The lengths are different
and must get the right length in the right hole or the longer ones will
go through the windscreen frame touch and cause the windscreen to crack. |
WINDSCREENS UNHEATED
II (Fitting)
by Fred Sisson from
the eMOG archives
For some reason the grit
in Georgia eats glass surface and so I have replaced a few windscreen glasses
too. Even have used tinted glass. It is a cheap, easy job.
I like the silicone replacement
method but buy the proper tools to remove glued-in glass from the frame
next time. I use a combination of home-bent knife blades and old banjo
strings to remove the glass. Even then it is not that easy, BUT... easier
than removing some of the original glasses. Be careful about bending the
frame when removing the glass I find it easiest to do a simple one-finger
cleanup while the silicone is wet.. then I do the final cleanup after
it is dry, using razor blades to trim the excess and clean the glass.
MOST IMPORTANT... Just about
anyone who has replaced a few windscreens had broken one at sometime
because of the screws holding the screen to the frame or the screws holding
the little angle brackets (that hold the frame together).. contacting
the glass. Sometimes they crack a few days later...
MAKE SURE the screws are
short enough that they don't contact the edge of the glass!
I also like to shape my own
glass for the Brooklands Aeroscreens. I have four different shapes sitting
on the shelf at the moment.. Since I am not worried about them being watertight...
I only use three inch long squirts of silicone to hold the glass ('cuz
I know I am going to get bored with them in a year or so...).
WINDSCREENS UNHEATED
III (Fitting)
by Phil Macwhirter
from the eMOG archives
It might only be a morgan
windscreen but it can be pretty difficult to get the screen back into the
frame, particularly if your rubber or glass is a bit thicker than it should
be. So, what I do with the rubber (which holds the screen into the frame)
is throw it away.
The best bet there is to
use NEUTRAL cure silicone. Don't use acetic cure as it will eat the lamination
in the glass, assuming it is laminated & not toughened. (As a
building contractor I see the results of the wrong silicone all the time,
it eats the back off mirrors & taints special metallic coatings as
well ). The use of silicone ensures that there is little pressure or stress
on the glass/frame assembly.
After removing screen frame
from car, pull it all apart, very easy, connections at points where bottom
rail joins side / top. & clean all components. Then 50% fill the rebate
of the metal frame with silicone.
Fit the glass, & assemble,
putting the screws back in to the frame. Then start to wipe off the excess
silicone which will ooze out, using turpentine as a solvent. A real messy
job, use doctors latex gloves & have plenty of newspaper &
rags on hand. Eventually you will get the whole lot clean and if required
can use a razor blade when silicone is dry for final trim up.
BTW, I've heard of many broken
windscreens trying to use the rubber sections. The silicone method uses
no force or strain on anything ( except you as you get the silicone off
everything.) I've done a few screens like this & would not do it any
other way.
If you need some more info
on this, drop me a line in Melbourne, Australia at pmlm@bigpond.com
WINDSCREEN RUBBERS (the front molding)
by Lorne Goldman at
the eMOG PUB
There are two types of Morgan
windscreen rubber and they go different ways. The earlier rubber is made
to fold back under and, indeed, was made to accommodate folding windscreens.
It is flat and longer. The later rubber has been used from late 1969
on all cars (but the 4/4s) and from 1977 with the 4/4s as well, until today.
ALL Plus 8s, saving the proto-type, had the newer rubber. It is the shorter
and mildly arched and to turn it under is not advisable. If you attempt
it, it will take much effort to fold the rubber under and require more
than one person (3?) to refit the screen and force it into position. ;)
Of course, if folding windscreens
are retro-fitted, the cars switch to the earlier version.
Both types of rubber are
available, you must ask for the right one, innie or outie. (smile)
WINDSCREENS HEATED (Sourcing Replacements)
January,
2011 (updated April 2014)
In 1997, Morgan decided
to recess the dashand lengthen the doors, hoping to create more tummy room for newer owners.
This eliminated the space for the air vents that were used to demist the
windscreen and necessitated made-for-Morgan heated
windscreens (while simultaneously decreasing the precious footwell
space with a easier to make gearbox cover, another Steve Morris
innovation).
Though these do a quick and often superior job in demisting the
windscreen,
they can only be sourced from the MMC. The price will be approximately
1700£ installed..depending on what country you live. They will
provide only the entire windscreen package or glass and frame. The
screens
are ususally back-ordered..and waits can be months. If you crack one
while
traveling, you must make do as best you can or replace it with a
non-heated
screen (see above) and buy an inexpensive fan demister or RAINEX
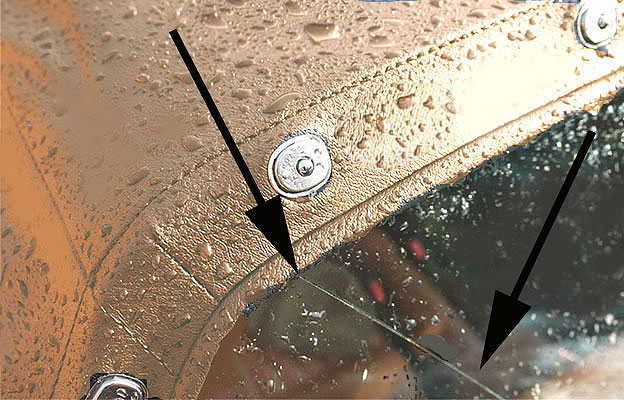
There have been complaints
that the inside of the unheated windscreen can "speckle up" with drops
when driving with the top down in the rain. Carry a shammy with you.
 WATCHPOINT: CRACKING
WINDSCREENS WATCHPOINT: CRACKING
WINDSCREENS
There has been a rash of
unexplained cracking windscreens since late 2009 AND the CX cars (2019 - on). Owners would open their
garages in the morning to find their windscreens cracked! Though some of
these claims were originally settled by the company under warranty when
they first began, the Factory very quickly transferred these decisions
to another and dealers were subsequently instructed to refuse the owner
claims and refer them to their car insurer. But irregardless of who pays,
a backlog for heated windscreens quickly grew to three months and more.
Happily, the cause has recently been determined and a cure has been found
(from the assurances of the MMC to its dealers).
The 4/4 Sport use different windscreen pillars from other
classics as it has the older 9 stud hood. The pillars curve slightly to
accommodate the width and type of screen. Sadly, the newer version of this
part for these cars was made with the curvature section too thin (unlike
the older versions) allowing unfortunate flexing and acting as pressure
springs on the screen when they are installed. It was this that is reported
to inevitably cause the cracking.
(However, considering the many
warranty refusals, it is not expected that this will be officially acknowledged
at this point.)
THE PROBLEMS OF A HEATED WINDSCREEN
The newer MMC hoods dubious copies of the Steve Simmonds hood, have NOT stood the test of time.
1. They do not fold up and fit into the rear compartment as these hoods did for 50+ years
2. They prejudice the sublime (design-patented) lines of the car by added an unsightly "hump" at the top rear of the car.
3. The newer side screens cannot be fit into the car, requiring them to be attached over the spare wheel.
4. They leak, something the MMC had designed out with skill and experience by the time the newer hoods were adopted.
5. The newer hoods take LONGER to put up in a pinch than the older hoods...something that becomes key if one mogs enough.
6. They stretch, like all hoods.
7. They
put an added stain on the windscreen which, along with the cheaper
windscreen supports adopted and the weakened corners of the wooden
structure accommodating the over-wide long doors, causes the flat glass
to crack. (These are not my comments but those of experts, MMC and aftermarket.)
8. They are absurdly expensive and VERY hard to source in sharp contrast to the earlier screen which can be fashion ANYWHERE.
Supposedly, replacement pillars, stronger
and thicker at the curve, have now been made and this has (hopefully) resolved
the problem (though the aesthetics have not improved). Replacement screens
should now delivered with these new pillars. Make sure they are included
with your replacement when your screen cracks or it will happen again!
Those who have already had to replace their screen (s) and did not
have the pillars changed be warned. These issues also vary with the other factors and we can expect them to re-appear with model changes.
|
|
| CAR WARRANTY
There are three types of
car warranties.
A. MANUFACTURER'S WARRANTY
The first is established
by Law called and called the Manufacturer's Warranty. It requires the manufacturer
to warrant the construction and components of their vehicles for a minimum
period. Claims may be made against the manufacturer directly or through
any of its agents/dealers. This warranty also covers "latent defects" or
defects that were not be apparent at the time of purchase. The terms of
this warranty are set by the Legislature and/or international agreements.
For the UK see HERE.
| Manufacturers' Warranty
is not simply established by specific National and International legislation,
it is also the part of the civil and case law in every country. The specific
law does NOT limit the extent and duration of buyer protection under these
latter provisions. After the time indicated by Law, there remains a liability
that can still be established if sufficient proof of the defect can be
made and it violates norms and common usage. |
B. DEALER'S WARRANTY
This second type warranty
is negotiated and established by contract with the Dealer. It covers certain
specified items and areas for a designated period agreed to in the signed
contract. It will vary from contract to contract and is exigible against
the signing dealer only. It can also extend the protection of the Manufacturer's
Warranty for an agreed to period. However, in this case only the signatory
and not the Manufacturer is liable during that period.
C. THIRD PARTY WARRANTY
This warranty is purchased
on the open market. It is normally, but not exclusively, engaged as an
anciliary to a second hand purchase. It bears all the limitations and risks
one has with a Dealer's Warranty, save the fact that it is not with a specific
dealer.
| There is a codicil to the
above imposed by your own auto insurer. This is a strict engagement on
your part to provide all materiel facts to them when applying for coverage
and when making a claim. Failure to do so is a violation of the policy
AND the law of the land. If it is discovered that a claim has been made
for a loss caused by another's fault, and this was not revealed on making
the claim then the consequences can be extremely serious, not simply in
the disposition of the claim, but for the insured's ability to obtain any
insurance. For details, consult your insurance agent or the national organization
that assists insurance consumers. |
|
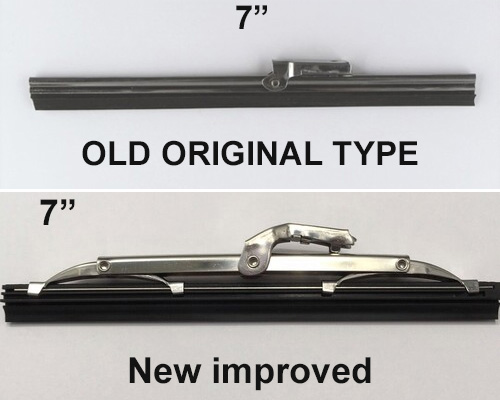
WIPER BLADE
REPLACEMENT
For those of us with a difficult
access to a Morgan Agent, you will find the the early Volkswagon Beetle
wiper blades work fine with a Morgan or the earlier Land Rover blade rubbers
can be used as well.. By the way, for the purists, there are three sizes
of Morgan wiper blades (regulars are 6 Inches and four-seater have a 7" length windscreen.
You
can also simply replace
the rubber only. Use silicone to glue-in new rubber for the wiper
blades.
Two dollars gets you new refills for modern wipers - long enough to do
three-four
Mog blades. The new blades let the rubber do the flopping rather than
the whole blade.. and they work a LOT better than original. (keep
the new glass
clean..). If your wiper slows down, bend the arm to lessen the force it
is p[ushing the blade onto the screen
BACK