 them from one side or
the other. Then there is the inside lining. Many come without lining and
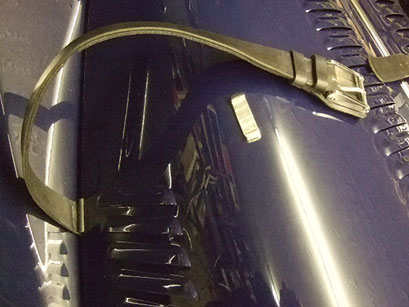
they will quickly rub the paint off your bonnet. However, Andrew Moore
has come up with a stylish answer for that. SEE BELOW
them from one side or
the other. Then there is the inside lining. Many come without lining and
they will quickly rub the paint off your bonnet. However, Andrew Moore
has come up with a stylish answer for that. SEE BELOW
The belt goes under the center bonnet bumper bracket that is mounted to the inner wing valance regardless of model of Morgan.
On the Plus-8 you will find the bonnet bumper bracket under the fifth bolt and nut 23 3/4 inches measured from the back of the cowl lined up with the wing to the bolt that holds the bonnet bumper bracket. That is on the right side wing when sitting in the car looking forward. The bumper bracket measurement from back of cowl to bonnet bumper bracket on the left side measures 24". This will vary slightly from car to car. Another measurement is from the front of the brass insert of the bonnet hinge at the cowl measure 19 & 1/2 inches back to the front edge of your bonnet belt.
As you probably are aware the belt was Morgans answer to the secondary tie down of the bonnet required in racing. Most Marques use latches, hood pins etc. but Morgan chose a leather belt and it became a trademark. I tell people if it doesn't have a bonnet belt it's a MG if it does it's a Morgan.
FITTING A MORGAN BONNET BELT
by Lorne Goldman, Andrew Moore.
GENERALLY
There are all sorts and sizes of Morgan bonnet belts.
Leather of course, but in different colors, widths, buckles and even a
choice of one or two buckles (allowing you to open them from one side or
the other. Then there is the inside lining. Many come without lining and
they will quickly rub the paint off your bonnet. However, Andrew Moore
has come up with a stylish answer for that. SEE BELOW
Then there are those which are felt lined in different colors and then there are sheepskin lined belts, in off-white (common) or black wool (rarer). These offer more protection and give a more authentic look but the off-white will get dirty over the years and they both can hold road debris if not washed and inspected. If a lined belt is glued only (especially the sheep ones), the lining will eventually have a tendency to come unglued.
This author (Lorne) has a wife who loves these belts.
She has a number of horses and likes the familiar look down the hood. I
have no problem either way, but in their favor, they attract a crowd faster
than anything else on the car AND they do serve as a backup when you forget
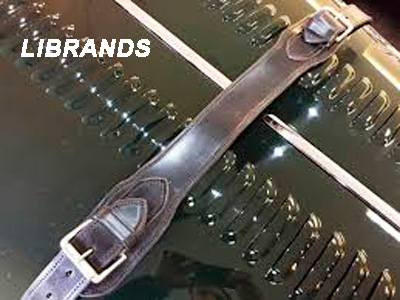
to properly latch the bonnet. She came up with a bonnet belt I like (after
so many tried). Heavy enough to be substantial, but flexible enough to
lay properly. It is 2 inches wide. It has a great lining, black Persian
lamb, the poor woman's fur 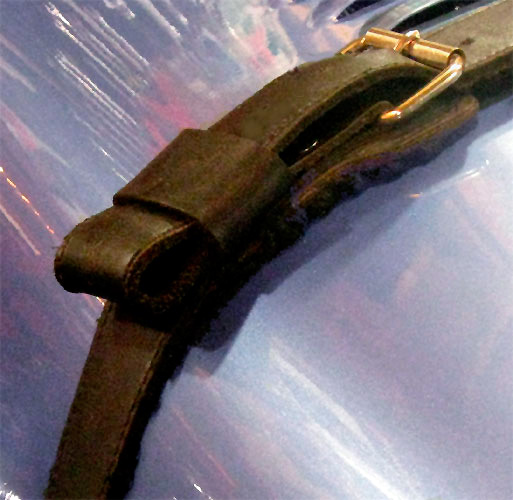 coat
of the Roaring Twenties. Google it. It is not hard to find on ebay or garage
sales. It lies flat and polite rather than raggedly overflowing the sides
and is softer than lamb or felt. She had it both glued AND sewn on.
coat
of the Roaring Twenties. Google it. It is not hard to find on ebay or garage
sales. It lies flat and polite rather than raggedly overflowing the sides
and is softer than lamb or felt. She had it both glued AND sewn on.
FITTING
The trick with fitting a bonnet belt is to get the length
right and the buckle (s) where you want them. The belts purposely come
too long..with the expectation that you will measure and cut them to fit.
To a degree, that is impossible to do perfectly, as it is hard to perfectly
gauge the tightness of the belt when you measure, or the stretch when 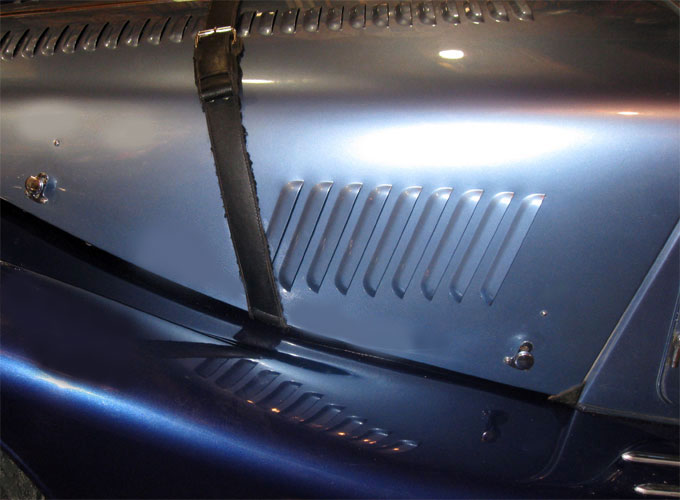 wet.
You will likely have to add a hole or two...and over time, (or in the rain!)
the belt will stretch.
wet.
You will likely have to add a hole or two...and over time, (or in the rain!)
the belt will stretch.
The problems are made more complicated with a two buckle belt as you want the buckles to match on each side, rather than going for the lopsided look. (smile). However, as long as the short lengths on each side (there are two short lengths with a two-buckled belt) are the same length, that should be accomplished.
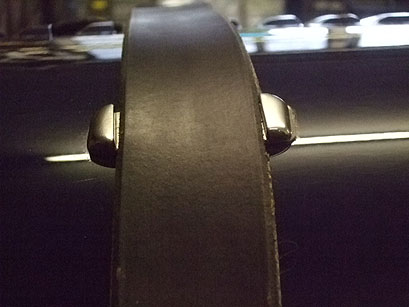
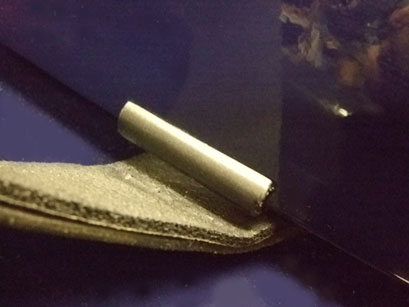
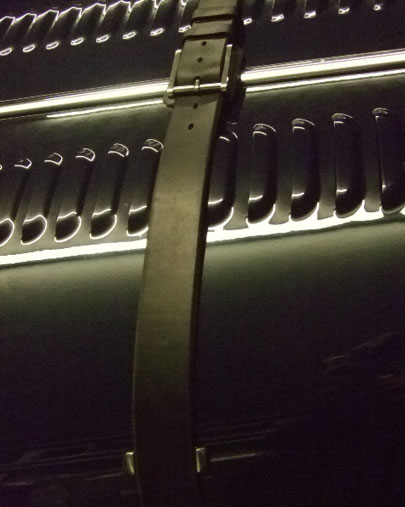
Your anchoring points are the bonnet bumpers. The belt will not go straight across..but angle slightly forward and should be cut accordingly. With all this in mind, open the packaging, buckle the belt in the hole you wish to use (with a two buckle belt use the same hole on both of sides. With a thinner belt, many people curl the end of the belt back and underneath itself at the loop. It is neater and the end will not flap in the wind. If you are going to do this, leave enough belt past the buckle.
Here are two images showing you what I mean about the angle forward and the optional curl. If another helps you do the fitting, it will be easier, but I have often done it alone.
1. Place the bonnet belt on the car and slip the excess ends under the closed bonnet at the bonnet bumper just to the rear and touching the bonnet bumpers.
 2.
Position it and hold it stretched tight, with the buckle (s) where you
want it/them, Mark one side of the belt at the lip of the bonnet with chalk.
2.
Position it and hold it stretched tight, with the buckle (s) where you
want it/them, Mark one side of the belt at the lip of the bonnet with chalk.
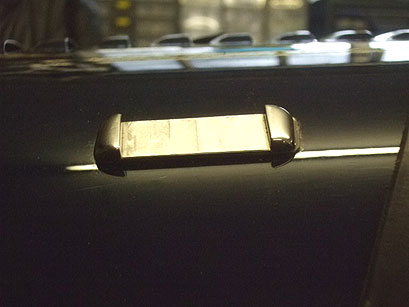
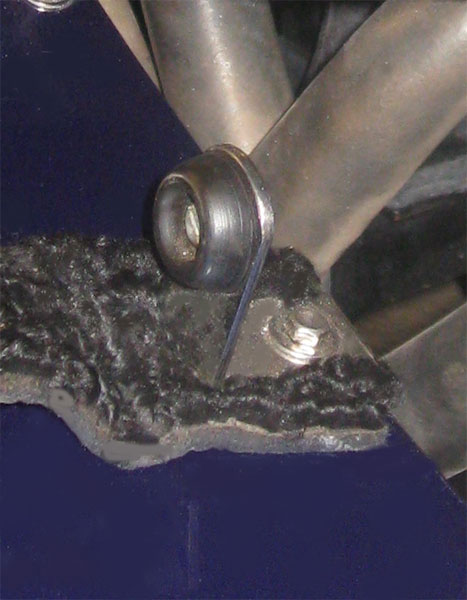
3. Now remove the bonnet bumpers. I find this easiest to do using a small needle-nose vice-grips below.
4. The belt is held by going under the bumper with the wool side facing up..as shown in the attached image. You must calculate the extra belt length this will take to get to where the bonnet bumper bends downward and also any extra length necessary to go out and around the edge of the bonnet.
5. Now cut the excess off as explained. Remember it will need a slight angle to produce the slight path forward.
6. Now mark on the belt where a hole must be made for the bonnet bumper screw to go through. (you may need a longer screw if the belt and lining is very thick).
7. Now punch (with your leather punch) the screw hole from the leather side.
8. Now, you just put the screw back into the bonnet bumper and then work it through the lamb's wool and the leather. Once that is done (it will be a fiddle) place the bumper and its screw in its fitting hole on the wing and refit it.
9. At this point, I would stop, rebuckle on the rest of the belt and see where everything is going to end up on that side. If you are content with that, fit the long side in the same method. (If you have a double buckle belt, you must copy the exact length of what you have already done, and use the same place for the hole for the bonnet bumper screw hole on the other end section of the belt.)
10. After you have fit both sides, fit the belt entirely
and, with fingers crossed, look at what you have done. Angle the belt as
I show on my car. Now see if you need to punch extra belt buckle holes
to tighten it. (If you are using a double buckle belt, you must make holes
on both sides or the buckles will be mismatched in their placement on the
bonnet.
 |  |
 |
Good luck and do not hesitate to contact
me for
further advice.