 Morgans
are partially made
with wood. This is how ALL were once made. It is an excellent material
to mate withthe famous classic Morgan flexing chassis that is so much
part of the personalityof the ca. Wood also has some properties that
make it ideal
for a car. However, this is not
an article to explain the merits of the use of wood in
automobiles,
it is to address one of the most common problems encountered in the use
of
this product.
Morgans
are partially made
with wood. This is how ALL were once made. It is an excellent material
to mate withthe famous classic Morgan flexing chassis that is so much
part of the personalityof the ca. Wood also has some properties that
make it ideal
for a car. However, this is not
an article to explain the merits of the use of wood in
automobiles,
it is to address one of the most common problems encountered in the use
of
this product. 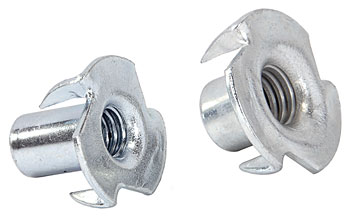 other materials, so why combine materials with different characteristics
if it is at all unnecessary?
And I am loathe to use a larger screw if
I can avoid it. I favor quick and easy non-invasive repair methods that
can be performed even when mogging about. I classify these
fixes in two types; those where the fittings are NOT subject to
lots of stress and those points that are going to be subject to a
greater force.
other materials, so why combine materials with different characteristics
if it is at all unnecessary?
And I am loathe to use a larger screw if
I can avoid it. I favor quick and easy non-invasive repair methods that
can be performed even when mogging about. I classify these
fixes in two types; those where the fittings are NOT subject to
lots of stress and those points that are going to be subject to a
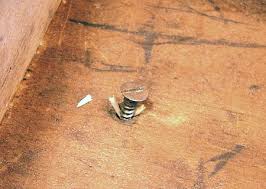
greater force.| WATCHPOINT: BEWARE!!!!The
reason I am adding this article is that I was very concerned to see a
current forum participant recommend to his audience that they burn
around a sheared engine bay bulkhead screw with an acetelyne torch to
create a charred space sufficeent to allow the owner to hold the end of
the sheared screw with a needle nose pliars!!!!! Basic common sense
should show that this very dangerous for in a
fossil fuel driven vehicle but it also leaves permanent and very
obvious
irreparable damage. The evidence of that is sufficient to preclude
Concours successful competition and to negate or lower the sale value
of the Morgan in question. Trust me. I was a Concours Chairman for many years. |
B. Try
Pliers. If part of the screw head is exposed above the wood, try a pair
of needle-nose or a small vice grip clamping pliers. Grip the head of
the screw tightly with the pliers. While keeping a tight grip, rotate
the screw counterclockwise to remove it. If needle-nose pliers
slip off the screw head, you’ll need to try again with needle nose vice
grips.
C. Try a bigger or different screw driver. For example, you can try a different
screwdriver if the screw you’re trying to remove is a Phillips screw. In
this case, you’ll want the flathead screwdriver that matches the size
of the drive.
1. Insert the flathead screw into the remaining indentation in your stripped screw.
2. Push down as hard as you can.
3. Try to turn the screw.
If this doesn’t work, you can try combining this method with the rubber band trick as well.
D. Try Hammering. You wouldn’t think a hammer could come into play when you’re trying to
figure out how to remove a stripped screw, but sometimes, a hammer can
help. However, to be clear, a hammer isn’t to be used for pounding in
frustration on your poor project. :0
If your screw was soft enough to strip, sometimes you can hammer a
screwdriver into the screw enough that it will grip the screw. (Note:
Only try this method if the piece you’re working on isn’t terribly
fragile.)
1. Place your screwdriver’s tip into the screw head.
2. Tap the screwdriver into the screw.
3. When you feel it grip a bit,
put down the hammer, and use the screwdriver to remove the screw.
E. Try Drilling a Hole. If you have a drill and a drill bit that’s slightly smaller than the stripped hole in the screw head, try these steps:
1. Drill a small hole in the middle of the screw head. Don’t drill too
deep. It’s doesn’t take much depth for this method to work.
2. Place your screwdriver in the hole. When it gets a grip, remove the screw.
F. Try a Rotary Tool If you have a rotary tool with a sharp knife attachment, try this:
1. Cut a notch in the screw head with the rotary tool. Use a diamond-head bit to do this.
2. Use a flathead screwdriver to remove the screw.
G. Use a Screw Extractor The last but by no means least effective way of removing a screw is by
using a screw extractor. I’ve listed this method last because most
people don’t have a screw extractor, and if you don’t, you might as well
try the above methods before you go out and buy one. Screw extractors
generally work in two ways. One of the least expensive extractors seats a
collar over the stripped screw then uses an extractor bit to pull the
screw out.
How to Remove a Broken Screw Without a Head
The two methods below will only work if the broken part of the screw is
sticking up above the surface of your wood. If your screw is
broken off flush with the surface of the wood, you will have to do one
of two things.
1. Drill a trough around the screw. Be aware that this is a bit of a
messy process, and it’s harder to do than it looks. Don’t use this
method on a screw if it’s in a part of your project that will be
prominently seen.
2. Or use a rotary tool with a diamond-head bit to cut a trough around
the screw. This is much easier than the drill bit method in the last
step.
Obviously, creating the trough will enlarge the hole the screw is in.
You’ll need a way to invisibly patch the hole after you get the screw out. Wood
filler will work for that. Just be aware that wood filler doesn’t absorb
wood stain the same way wood does. Another method, 1st class, is to use a plug maker to plug the hole. See below.
Now, whether you initially had enough screw sticking up or you’ve
created enough by making a trough, you can remove it with either of
these methods:
Method 1: Try Locking Pliers AKA Mole Grips (Mole Wrench) or Vise-Grips
Unless a broken screw is totally stuck, this method should work.
1. Grip the exposed bit of screw with the vise-grips.
2. With a firm grip on the screw, rotate the screw to remove it.
Method 2: Try a Drill Without a Drill Bit
Your drill can come to the rescue in a broken screw situation.
1. Remove any bit you have in your drill.
2. Place the drill chuck directly on the screw and tighten up the chuck.
3. Reverse the drill and unscrew the screw.
| A dowel is a cylindrical rod, in the case made of wood usually made of wood.
Dowels are commonly used as structural reinforcements in cabinet making
and in numerous other applications, including: Furniture shelf
supports. They are sold at any hardware store or can be made at home. |
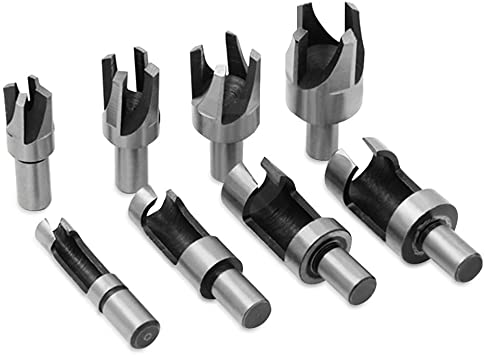
You
will need a plug cutter. They are also available at any hardware store.
(See the image to the right) To prepare the wood for a plug, you’ll
first need a hole sized to the hole you created in removing the screw.
Use the plug cutter carefully to keep the wood from splintering. Then
fill the hole by gluing and inserting a dowel cut about a 1/2 inch
shorter than the hole. Tap it beneath the surface by turning a nail
upside down and hammering the point to drive the dowel as far down as
it'll go.
You can also create a dowel by drilling them from a piece of scrap wood
with matching color and grain of the surface you’re fixing. You can
place a flathead screwdriver into the plug hole and pop the plug loose
at its base.
Insert the smooth plug end into the hole with the grain of the plug
parallel with the grain of the wood and tap the plug in place with a
hammer. You can sand the remaining plug smooth with an electric sander,
or save time by using a sharp chisel to shave the plug nearly flat and
sand it smooth. I use wood glue (3000 lbs) as well.