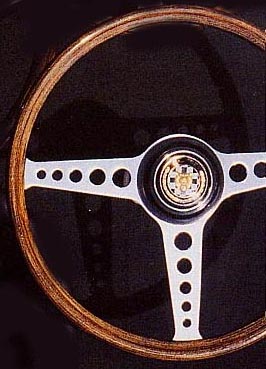
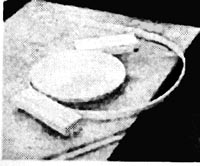
The average DIY'er can try this project with basic workshop tools for a cost of about $30.00.. Four pieces of 1 1/16th X 5/6" clear pine are soaked in water, formed into circles and glued to the steel wheel frame. This size of wood strip is used because it is a standard size available at any wood supply store or lumber yard. The circumference of the steering wheel is approximately four feet, but the pine strips should be at least six feet long, so that a good radius can be formed into each piece. A seven inch piece of 1.5 inch A.B.S. drain pipe, capped at one end and filled with water can be used to soak the wood strips. With only one drying form, the project should take about seven to ten days.
The old covering of the steering wheel is cut away using a sharp knife. The wheel rim should be wire brushed and sanded to remove any rust and to provide a brushed surface to which the glue can adhere. Keep a piece of the the old covering rubber because it will help provide a profile pattern when you shape the woodgrain wheel.
 Using
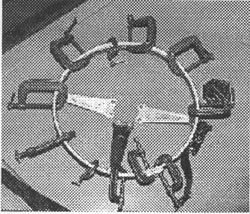
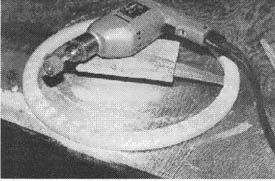
2 pieces of 3/4 inch plywood, cut two circular pieces approximately 14"
in diameter (for a 14 inch wheel, or make it larger or smaller to match
the original diameter). These two pieces are screwed together with a 1/2
inch spacer between them and fastened to a sturdy base. These pieces will
provide the drying pattern for the wood strips. Two pieces of scrap 2"
x 4" lumber can be used to hold the ends of the wood strip in place while
it is drying. The picture shows a wood strip being wrapped around the drying
form. The wood strip had been left in the water tube for about three days.
and should be left on the drying form for another three days.
Using
2 pieces of 3/4 inch plywood, cut two circular pieces approximately 14"
in diameter (for a 14 inch wheel, or make it larger or smaller to match
the original diameter). These two pieces are screwed together with a 1/2
inch spacer between them and fastened to a sturdy base. These pieces will
provide the drying pattern for the wood strips. Two pieces of scrap 2"
x 4" lumber can be used to hold the ends of the wood strip in place while
it is drying. The picture shows a wood strip being wrapped around the drying
form. The wood strip had been left in the water tube for about three days.
and should be left on the drying form for another three days.
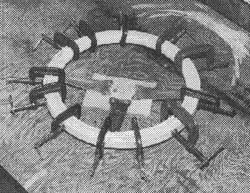
The picture shows the wood strip
after it has dried on the form. The picture also shows why it is important
to use a strip that is longer than required. It is next to impossible to
form a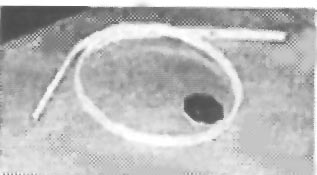
good radius at the ends of the
strip. A lot of fitting is required as the wood strip is cut to the proper
length. Start by cutting the piece too long and carefully trim it to the
proper length. Three-hour epoxy is the best glue to use. Nonetheless, leave
the clamps in place for at least twelve hours. Borrow as many clamps as
you can from your friends and neighbors.
As the remaining pieces come off the drying form, they can be added to the wheel. A good grade of wood glue can be used to hold them in place. Wood glue is best because it can be sanded and stained without detracting from the finished appearance of the wheel. Use small wooden blocks with the clamps to protect the outside wood strips from clamp marks.
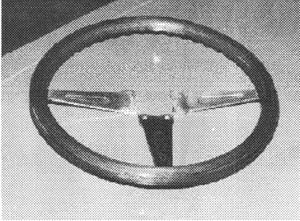
This photograph shows all four pieces glued to the frame. Now the real work starts. Using a rasp, shape the wood to a profile that is similar to the cover that was originally on the wheel. Alternatrively, shape the wqoiod to the grip you prefer for you hand but from a point of view of aethestics, extra bulk should be shaped into the depth rather than the width of the rim. After the wheel is shaped, finish the wheel with sandpaper. Start with a 100 grit paper and finally work up to a 400 grit paper.
 Once
the sanding is complete, coat the wood with 50-50 mixture of boiled linseed
oil and turpentine. Two or three coats should be applied. After each
coat, rub the oil mixture into the wood with a dry clean cloth.. This step
required so that any subsequent application of stain can be controlled.
Apply the stain to the wheel until the desired finish is obtained. Let
this finish dry for a day or two before finishing with two or three coats
of clear gloss lacquer. The only thing left to do is to install the wheel
on your car and wait for the compliments.
Once
the sanding is complete, coat the wood with 50-50 mixture of boiled linseed
oil and turpentine. Two or three coats should be applied. After each
coat, rub the oil mixture into the wood with a dry clean cloth.. This step
required so that any subsequent application of stain can be controlled.
Apply the stain to the wheel until the desired finish is obtained. Let
this finish dry for a day or two before finishing with two or three coats
of clear gloss lacquer. The only thing left to do is to install the wheel
on your car and wait for the compliments.
This job could be done easily with any tattered steering wheel with an appropriate frame you find at an autojumble or junk yard. You can even have a frame cut out of stainless steel at a metalwork shop. The advantage of this is that you will be able to drive your car with your old steering wheel or temporarily exchange it with the spare wheel so you can keep on driving during the process.

 Steering
Wheel and Boss Removal
Steering
Wheel and Boss Removal
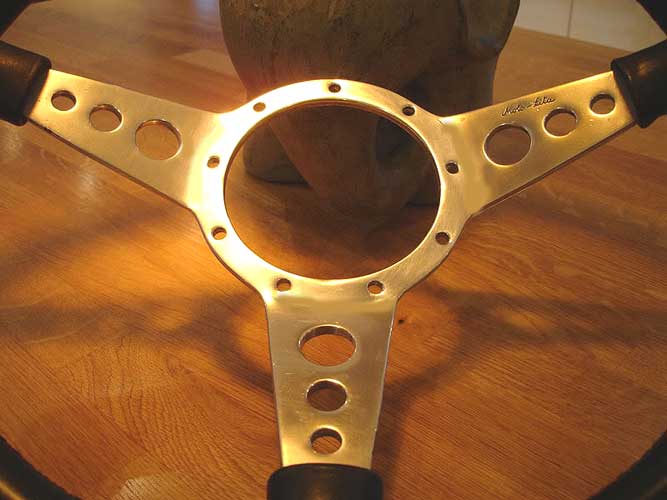
There are many styles of steering wheels that one can fit to a Morgan, from standard Morgan Factory fare all the way up to a made-to-order bespoke affair for incredible prices and look. Most Morgan steering wheels (and the popular aftermarket ones like Moto Lita) are attached with screws and nuts to a steering wheel boss which in turn attaches to the splined end section of the steering wheel column.
Morgan bosses also come in a wide variety of styles and
options. The factory types are normally workaday affairs hidden by an inexpensive
plastic shroud made in a faux crackle or a steering column plastic cover,
sometimes covered in upholstery. (France).
| WATCHPOINT: Make sure you use the correct nut with the correct thread. A Morgan steering column is not something you want to damage or ruin entirely. The three pre-1994 steering columns are no longer available. |
Lastly, there is a large nut that holds the steering wheel on the splines as a second securing method for safety. It is covered by centre plaques or covers that are either secured by by the screws that hold the wheel to the boss OR simply squeezed (aka plugged) into the large hole.
|
|
The steering wheel can be removed in one of two ways,
depending on the which assembly you have. You can unscrew all the fittings 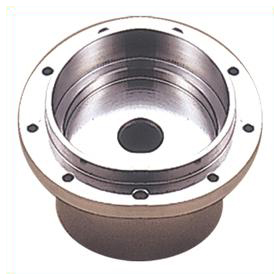
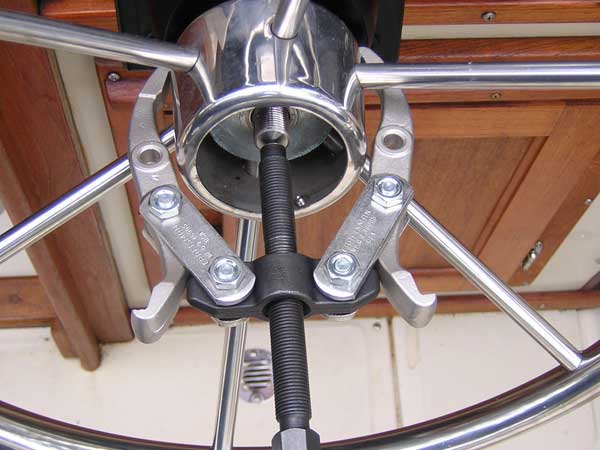 or
upgrades, there is no choice but to separate the wheel and the boss as
that is only way to access the steering column and its securing nut. Once
you have access to the nut, remove it. I use a quick slap to the racthet
arm to break it free.
or
upgrades, there is no choice but to separate the wheel and the boss as
that is only way to access the steering column and its securing nut. Once
you have access to the nut, remove it. I use a quick slap to the racthet
arm to break it free.
At this point is unlikely that the wheel will come off. If it does, chances are that the splines were damaged at one point when someone improperly removed the assembly. In an ideal world, the splines on the boss and the column are tight enough to make removal by hand difficult. This appens when a person has once removed the boss/steering wheel by rocking it and damaging the splines. The correct method to detach the assembly from the column is with a puller. This is an inexpensive device made for this purpose. You will see an indent at the end of the column that is made to fit a puller's point. Fit the 2-3 arms of the puller to the underside of the boss and its point in that indent at the end of the colum. Turn the puller and the assembly will pop off. The puller will not damage the column or the boss as it pulls straight along the splines' direction rather than twisting them from side to side. Try to mark or note the alignment of the steering wheel you remove it. Do not move the front wheels with the steering wheel or off or, if you have to, mark the position of the wheels. It is frustrating to drive with a steering wheel even a little off in its alignment with the direction of the car.
Re-installation is the opposite of removal. Align the boss spines and the column splines to get the steering wheel back to the postion it had. Tightening the column nut will mate the splines again. Torque for a 9/16 in. is 27 to 29 lbsft. and a 11/16 in. nut is 41 to 43.
DETACHABLE STEERING WHEELS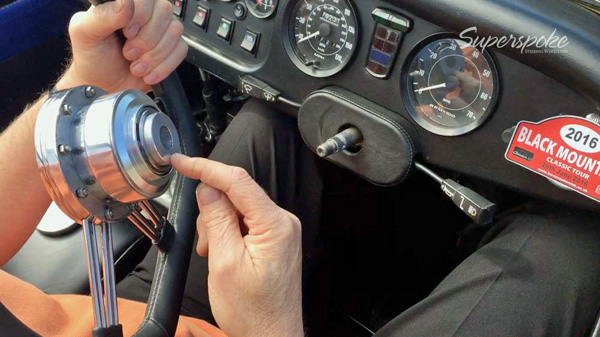 Detachable
steering wheels (aka "Quick Release Steering Wheels") are an item
made for the racing community. Required racing modifications, for
example a roll cage, or a special racing seat, often make entry and
exit a very tight fit where a steeriing wheel can be an
obstruction. A removeable steering wheel avoids this problem. The
wheels is removed, the driver enters the car and straps in, and the
wheel is refit. The procedure is reversed order to exit.
Detachable
steering wheels (aka "Quick Release Steering Wheels") are an item
made for the racing community. Required racing modifications, for
example a roll cage, or a special racing seat, often make entry and
exit a very tight fit where a steeriing wheel can be an
obstruction. A removeable steering wheel avoids this problem. The
wheels is removed, the driver enters the car and straps in, and the
wheel is refit. The procedure is reversed order to exit.