 ALTERNATE ALTERNATORS
Installing a
GM Alternator
by Lorne Goldman April 4, 2003
I am not a great fan of Land Rover V8 alternators. They
are problematic, they are very expensive, they have a weak output and they
are hard to find.
The
ideal choice for a replacement must vary from
venue to venue as the decision must be based on what is the easiest to
find where
you Mog about. Everything fails eventually (especially the exotic
"upgraded" stuff). Why ruin a weekend or much more waiting for
something you cannot find
on a Sunday at any garage near where the alternator fails?
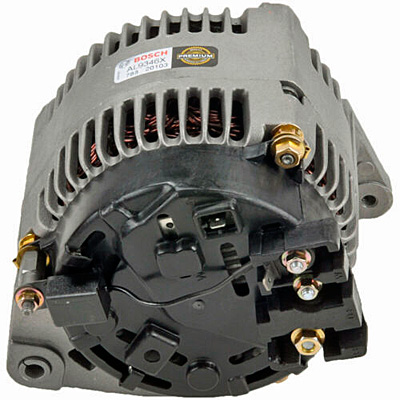
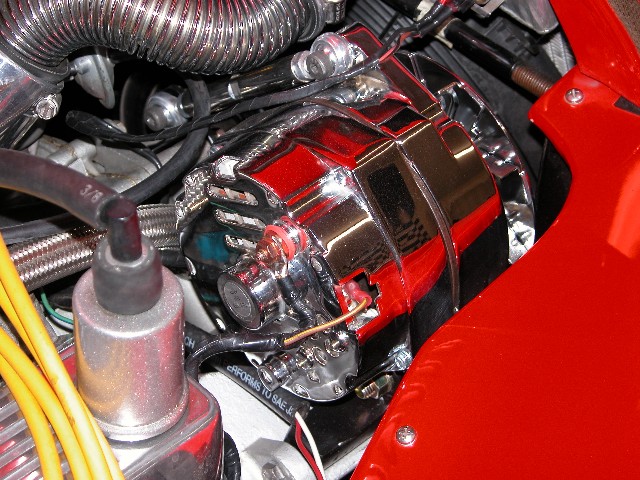
In North America, the best choice would be a GM (DELCO) configuration..available
everywhere in many aftermarket brands...even in chrome.
They are metal
rather than plastic cased and yet are lighter and smaller than the
Lucas originals. A chrome GM costs $75 for 100 amps on ebay and a new one can
be found anywhere in NA and replaced in minutes. An LR replacement cost
$500 and is very hard to find.
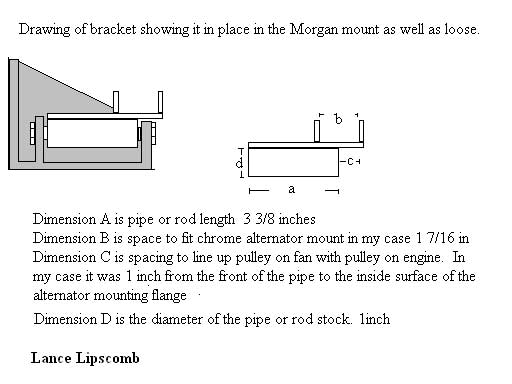
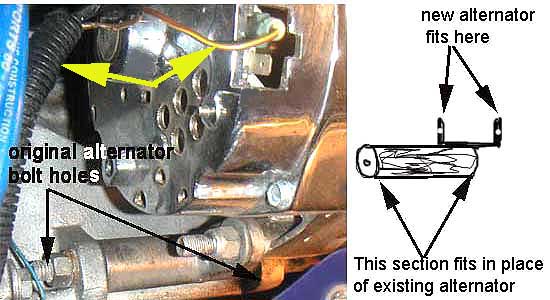
To install you must fashion a small bracket to attach
to the Morgan bracket. That allows you to swtch back whenever you wish.
The images below should be self-explanatory. The WATCHPOINT is to make
sure you shim or place the bracket so that the fan belt is perfectly aligned.
I left a little space and shimmed with washers to suit.
In Europe, I have found that Bosch is the best choice to replace
the LR/Rover.
 Installing Bosch Alternator
by Eric Dzubehor
In this case, installing a Volkswagen Bosch 120 Amp alternator into a 1990 Range Rover Classic 3.9 with V-Belts. Others will fit.
Introduction
Genuine
Range Rover alternators have always been on the expensive side -- I
remember buying a new one for over $700. They are also substandard. The
situation has improved significantly in recent years. For example, the
alternator swap is common, but requires making custom brackets. This
article covers the installation of a low cost generic Bosch alternator,
as used on a wide range of Volkswagen vehicles. For this conversion the
existing mounting brackets are used, making the job much easier. Total
time to do this swap is about 1 1/2 hours. The procedure works on
all pre-serpentine belt models (see "Model Year Applicability" below).
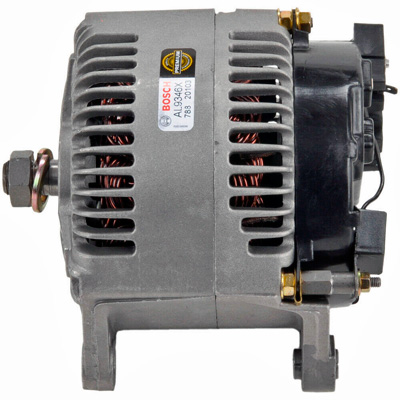
VW Alternator Parts Information:
Bosch alternator.
VW Part # 021 903 025 G, more common part #s are 028 903 018 B or 028 903 018 C
Bosch Part # Bosch 0-123-510-007, -053 (refers to 021 903 025 G)
Bosch Remanufactured Part # AL0184X
If you want to try this out, ask for 120 A alternator for the following VW vehicles.
92-95 VR6 Corrado
94-99 Jetta GLX VR6, 95-99 Golf GTI VR6 (These are Mk3 bodies).
92-97 Passat GLX VR6
93-2004 Eurovan VR6 or Winnebago / Rialta RV camper.
Some auto parts stores may not carry the 120 A Bosch alternator, they may have a 90 A Bosch or Valeo brand.
With
the redesign of VWs models from '99+ there are newer versions of this
alternator. The main difference is that the electrical plug is now
proprietary and oval shaped. The other difference is the rear black
plastic cover, depending on which model it was fitted to, may have an
air intake. Many newer Bosch alternators have this due to the cramped
engine bays, some are even water cooled.
This
Bosch 120 A alternator sells on average for $220 (rebuilt), with a core
charge extra. New, they run $450-675. The less potent versions (90amp)
cost less.
Procedure for Modifying the VW/Bosch Alternator
You will need to drill the Lucas pulley to 17mm ID so it will fit the Bosch alternator shaft. The
orientation of the Lucas pulley is the same as if it were going on a
Lucas alternator. No need to flip it around, it works as is. The
pulley alignment is so close that it doesn't require any shims, but
check with a long ruler.. I put the Lucas pulley on without the
original fan or other Lucas hardware. All you need is the Bosch lock washer and nut. The Lucas fan is not used, the Bosch alternator has an internal fan of its own.
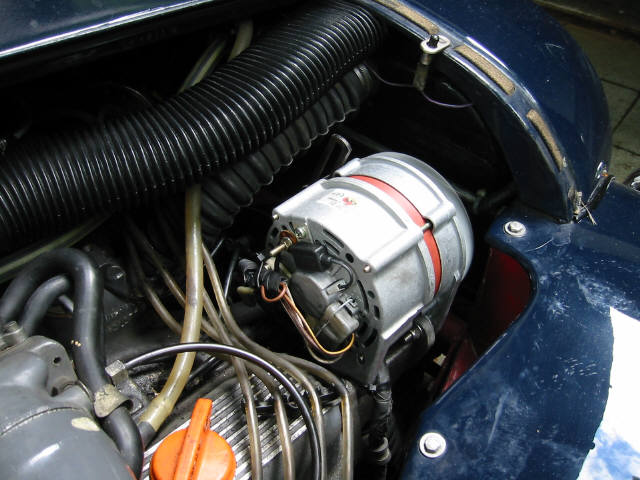
Mounting the Alternator
To
secure the Bosch alternator to the Range Rover lower bracket, mount the
front alternator ear on the outside of the RRC bracket. You will
need to use suitable nuts and bolts for the lower mounts and for the
upper mount. The
rear requires some shims or a spacer of about 25mm long. This length
can vary a bit. due to the alternators sliding rear nut.
Use
the best recommend among the GoMoG MANUAL belt specified for use with
your Morgan Plus 8s or take your belt to an automobile supply (factor)
store (Autozone, NAPA, or Halfords) and match it to what they have.
This is NOT rocket science! Check OD and length. Do NOT over-tension as
you will wear the alternator bearings faster. PLEASE SEND THE MANUFACTURER AND PART# TO ME and I will add it to the list for posterity.
There was no need to modify the upper Range Rover bracket at all.
Connecting the Wiring
The wiring is so simple, once you know what the function of the wire is.
YOUR colors may vary, but my vehicle had the following colors:
Thick
brown wire (battery lead), goes to alternator battery stud (Bat). I
replaced it with a 4 ga. red wire to the firewall terminal.
Brown with yellow stripe goes to D+ on Bosch alternator (dash light).
White with slate stripe goes to W on Bosch alternator (tach lead).
No need for the Rover condenser, there is no noise heard over the radio or CD (after
market sound system, 800w Sony 4 ch. amp). This Bosch alternator has a
condensor built into the rectifier assembly. The Bosch condensor is not
a serviceable part, it must be replaced with a new rectifier assembly.
I
revised these measurements after driving the truck, a more realistic
test as the alternator is hot. Original measurements were done with a
cold alternator, just after the swap. I originally had lower wattage
55/60W H4 headlamp bulbs, now they are 90/100W.
Voltage
with accessories off was 14.04V, measured at the alternator while the
truck was parked idling. Voltage with 90/100W H4 E-code Hella
headlamps, and 55W H3 Hella 550 driving lamps on was 13.96V at the
alternator.