Removing the Gas Tank
©By: John T. Blair (WA4OHZ)
 1133 Chatmoss Dr., Va. Beach, Va. 23464; (757) 495-8229
Originally Written: Circa 1998
Last update: September 2, 2009 - Reformatted page & Corrected email address, added pictures.
In the past, I've had several people ask me about removing the gas tank. Unfortunately, when I restored my 4/4 it was about the last thing removed, so I really didn't know if or how to do it without completely disassembling the car.
Fortunately, we'd had a discussion about pulling the gas tank on the Morgan mailing list, and I got most of the of the answers I needed about removing the gas tank, and it is doable without removing the rear deck or pulling the body. It has to come out from under the car!
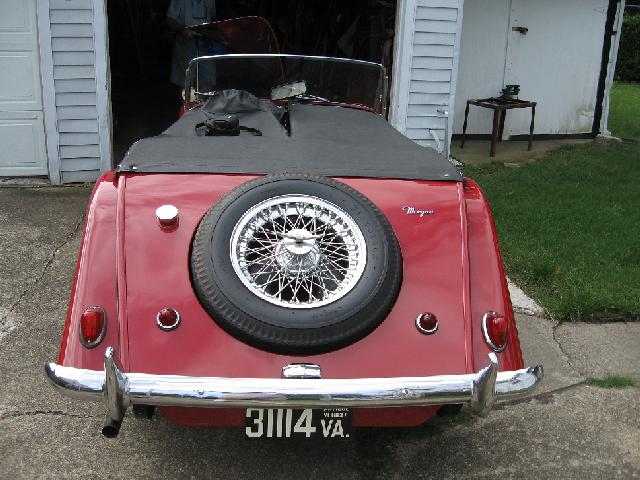
Rear of My Morgan
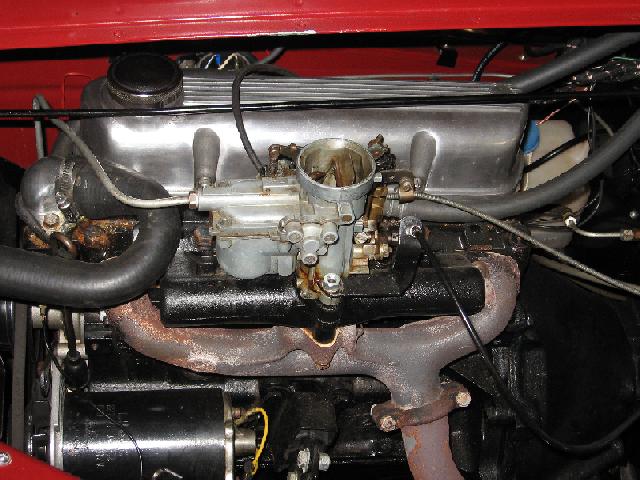
Zenith 32VN Carb on my '65 4/4 Series V
The first problem to over come is that the car had been sitting for quite some time and the fuel in the float bowl had evaporated. Trying to use starting either and cranking the engine, until the engine gets fuel usually kills the battery. So I used a trick I discovered a while back.
How do you get fuel to a carburated engine easily?
So now I can back her out of the garage to drain the old gas and drop the gas tank. And still be able to drive her back into the garage.
The following is the procedure to do pull the gas tank. It took me about 2 hours from start to finish, including about 30 minutes to drain the gas tank.
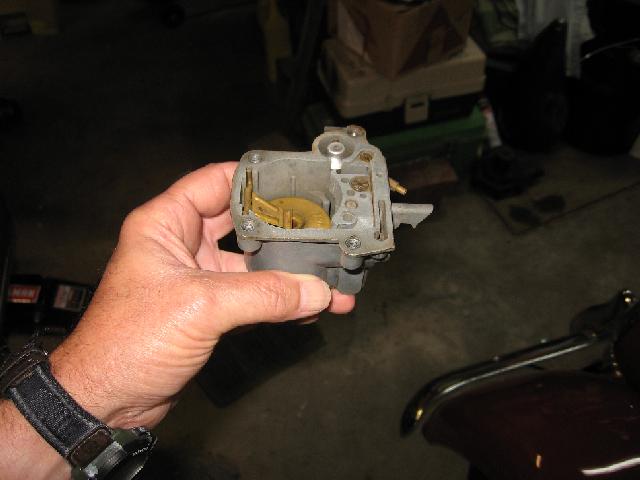
Empty Float Bowl
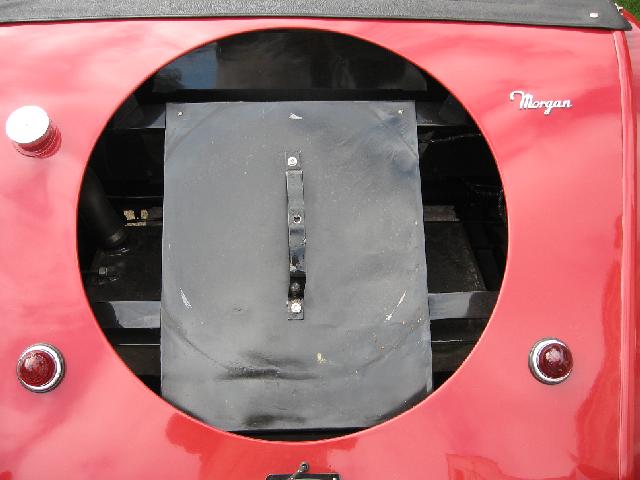
Spare Tire Removed
- Jack up the rear on the car and put ramps under the rear wheels. You don't
want to use jack stands here, as they will block the forward movement of the
gas tank's deck - the board that it sits on. But, you do want the weight of
the car on the wheels and not the chassis so it will raise the
differential up. It is important that you use something strong - do
not use cinder blocks! We have had several people killed locally,
working on their cars while on cinder blocks.
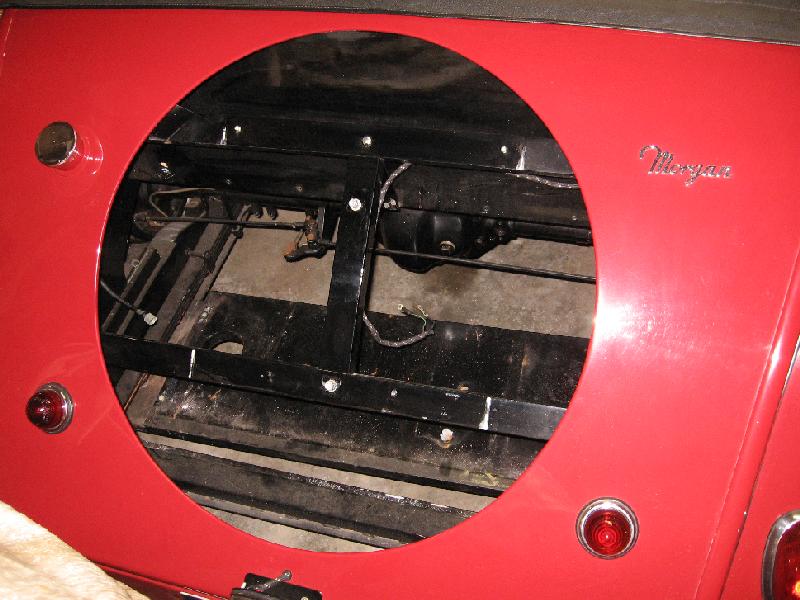
- Remove the spare tire and the metal plate the covers the wood supports
for the spare tire.
- There are 4 nuts and bolts that hold the tank to the wooden deck.
Remove them.
- Disconnect the fuel line. Drain the gas tank - mine has a drain plug
in the left rear corner of the tank. The plug requires a 3/16 Whitworth
wrench.
- There are 4 carriage bolts that attach the gas tank's deck to the
chassis, remove them. Only the 2 bolts, furthest from the rear bumper, hold
the curved braces for the rear bumper.
These carriage bolts can be a real pain - especially if the wood base has rotted. If the carriage bolts turn in the wood, you will have to cut the nuts and bolts off with a die grinder or a hack saw. Then you can use a drift to push the bolts up through the wood. The rear bolts are the hardest to deal with as they sit right under the back of the rear leaf springs. So getting them out can be a real challenge.
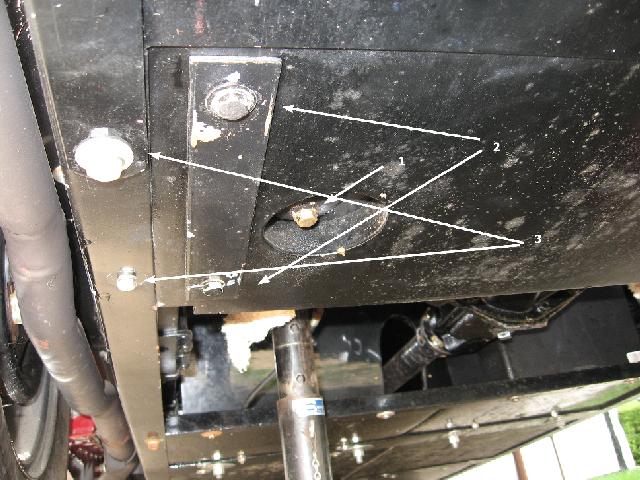
Gas Tank_Drain plug and mounting bolts
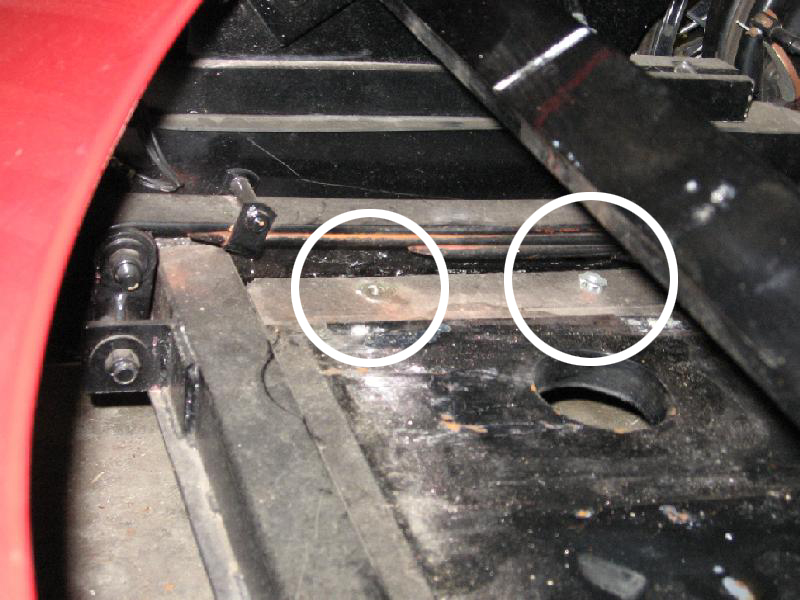
T nuts in Tank Bed
- You should now be able to slide the tank and the deck forward on the
chassis. I slid the deck as far forward as I could and the tank then
came straight down off the back of the deck. If you don't get the bolts
out of the gas tank deck, they will hang on various items - like the
rear springs. So move the deck around until you can get the bolts out.
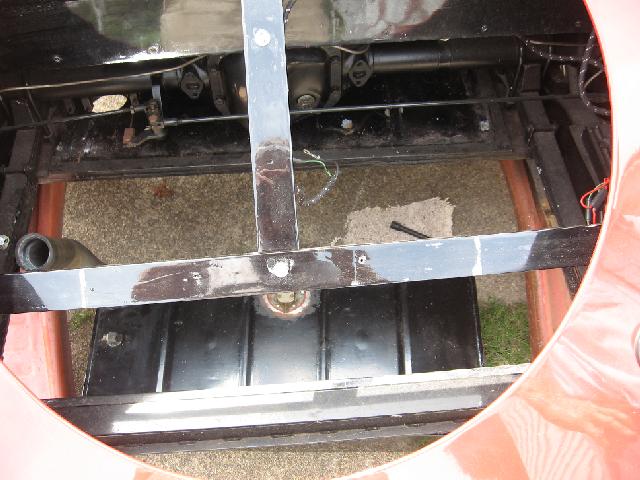
Tip #2 - When I moved the tank deck forward, it just hit the differential. So I got my dad to sit in the car. The moved the differential up just enough to slide the tank deck under the differential.
The tank is relatively light, so when I got it off it's mounting deck, I set it on my chest. Then I moved around and set it on a piece of cardboard to slide it out from under the car.
Gas Tank on the Ground
Tank Bed slid forward
Tank Bed Slid Back with Tank Removed
- The deck is a little too wide to come out easliy with out disconnecting the rear spring. You don't really need to remove the deck unless you think it is rotten. But if you have/want to, the easiest way to get it out then is to take a saber saw and cut it, from rear to front down, the center line of the car (after you have removed the gas tank). Now you can inspect the wood, or make a new one(you'll have to cut the new one in half to get it in). To put it back in, simply slide the 2 pieces in place and simply take a piece of steel and lay it across the cut and bolt it in place. Again I suggest using T nuts on the top of the deck so you can insert the bolts from the bottom. Or you can counter sink the wood so either the head of the bolt or the nut is below the top surface of the wooden deck. You might also want to put a piece of rubber sheet or tarpaper over the bolts so they don't work a hole in the tank.
One final note, I noticed that my gas gauge had quit working when I ran out of gas with the gauge showing about 1/2 a tank. So when I pulled the tank (Sept 2009) to have it relined I had to pull the sending unit out. I found the problem. The float was stuck, not moving. I removed the top (4 small screws) and squirted some WD40 into the sending unit and on the outside where the shaft goes into to the unit. After working it for a few minutes, it freed up. So if you gas gauge isn't working, you might want to check this. You don't have to drop the tank to get to the sending unit, just remove the spare tire and the metal plate under it. It might be a quick fix.
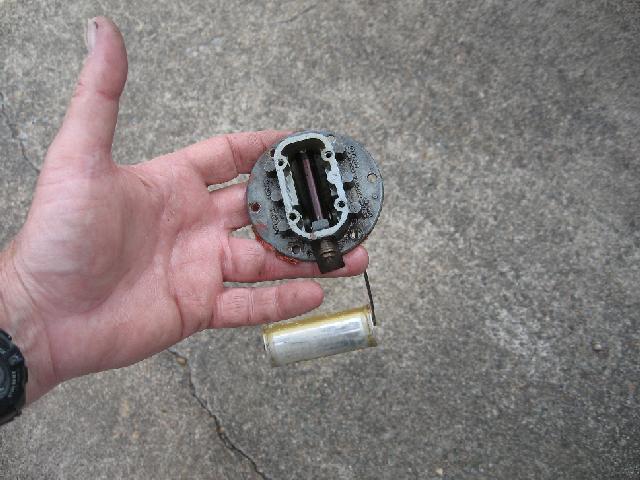
Fuel Sending Unit
John
P.S.
A couple of comments about leaking gas tanks.
Phil Roettjer, owns a 1967 +4 and has had problems with his gas tank:
I have the gas tank out of my +4 since it was also leaking. What I discovered is there are stress points at the bottom where the sides of the tank are soldered on. There are two bolt holes on the flanges on each side and the side-to-side motion of the car plus vibrations puts tremendous stress on these solder joints. So any padding that would allow the stress to be transferred away from these joints should be beneficial. The leaking problem in my car is not due to corrosion, but due to breaking the solder joints at these stress points. So I do plan to have some sort of rubber or padding at the bolting points to help relieve the stress. I would also recommend sealing the inside of the tank with a compound such as the POR15 tank sealer.
Greg Solow of the "Engine Room" writes:
I have had my car since 1965 when I purchased it new. The only problem I have had with my gas tank , and I have seen the same problem in many other cars, was that the two baffles which run fore and aft dividing the tank roughly in thirds, came unsoldered from the inside of the tank and fell to the bottom where they would slide around and sometimes interfere with the correct functioning of the fuel gauge. To repair this, I ultimately drilled 8 holes through the sides of the tank so that the baffles could be pop riveted into place securely. Then the steel pop rivets were silver soldered over to plug the holes . There have been no problems since. I believe that the original mounting, solidly on good wood boards is an excellent solution. The leaks are caused by either the boards coming adrift from the chassis, or the tank itself coming loose from the beards and moving around then stressing the soldered joints. The two wooden boards are fastened together by two metal straps that are screwed into the wood. Then the boards are fastened to the fuel tank by four bolts that pass through the mounting brackets that are soldered to the ends of the tank. Then this whole rigid assembly is attached to the frame by three screws only. There is a good reason for that. Three points determine a plane. With the board platform attached in this manner, the boards and the tank form one unit that is insulated form any flexing of the frame, i.e.. the frame can move around but the tank will not be "bent" or twisted.
My recommendation is to do a good solder job on the tank. Secure the baffles if they have come loose. (You can see them with a mirror and a light through the sending unit hole). If the tank is not rusty inside DON'T seal it. I believe that "sealing" is to stop or prevent rust, not stop leaks. Make sure that the support boards are in good shape, especially at the forward corners where the two front bolts that go through the chassis are located. Tighten everything up and keep it tight and you should have no problems.
We have found that most of the engineering that went into Morgans was and is quite good. Most things do not need to be reengineered! The areas where things can really be improved are in the fit and finish and sometimes in the materials used. Morgans were "Built to a price" during the sixties, remember a new +4 cost more that an MG-B, but less than an Austin Healey 3000. The way Morgan kept the price down was by using the least expensive materials that would do the job, and I don't necessarily think that there was any thought of the cars being on the road 30 years later. After all, by 1964, when I first visited the factory, the 3 wheeler was really an orphan, as far as Morgan was concerned, and the last one produced was only 11 years old then.
Regards,
Greg Solow
Bob Nogueira also writes:
I know of what you speak (Leaking gas tanks). The Duchess tank leaked at the same joint. It took me forever to discover the leak as it was so small that fuel never dripped to the ground but collected between the tank and wood boards. After repairing the tank, to keep from stressing the seams again I used two metal straps with rubber under them. They start and end at the rear cross member, going over the tank down to the boards and under the boards back to the rear cross member. On top of the tank I have two adjustment screws to tighten up the straps. With this arrangement I don't have to use side flange. I also feel much more secure knowing my gas tank is not being held in place by two soldered flanges.
Bob Nogueira
Return to theIndex of Tech. articles
To email me with comments or questions.